How to Make Whipped Cream in a Stand Mixer?
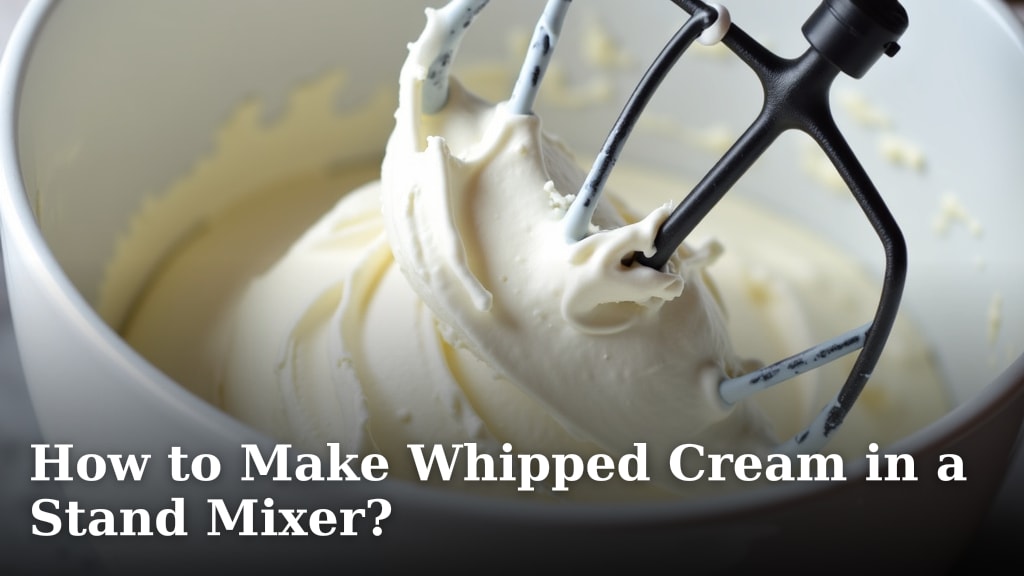
The easiest way to make whipped cream in a stand mixer is by using a chilled bowl and whisk attachment, along with cold heavy cream, sugar, and vanilla. You’ll whip these ingredients on medium-high speed until soft peaks form, typically within 2-4 minutes. This method ensures a consistently light and fluffy texture every time.
You want perfect whipped cream, right? Using a stand mixer takes the guesswork and arm strain out of the process, giving you effortlessly fluffy results. We’ve found that the mixer’s power and continuous motion are key to achieving that ideal airy consistency without over-whipping.
- Chill your bowl and whisk for best results.
- Use cold heavy cream, sugar, and vanilla.
- Whip on medium-high speed.
- Stop when soft peaks form.
- Enjoy perfectly fluffy whipped cream!
Below, we break down exactly how to make whipped cream in a stand mixer, covering everything from ingredient selection to storage tips. Let’s walk through the steps together.
Getting Started: Your Stand Mixer Whipped Cream Journey
Making whipped cream with a stand mixer is simple and efficient. You’ll need a few common ingredients and a little preparation to get the best results.
Gathering Your Essentials: Ingredients and Equipment
Success starts with having the right tools and ingredients. Let’s make sure you’re all set before you begin.
Choosing Your Heavy Cream
The foundation of great whipped cream is good heavy cream. You’ll want to select heavy cream, often labeled as “heavy whipping cream” at the grocery store. This cream has a higher fat content, usually around 36% or more, which is essential for stable, fluffy peaks (USDA).
Avoid “light cream” or “half-and-half” as these won’t whip properly. We found that the colder your cream is, the better it whips. So, keep it in the fridge until you’re ready to use it.
Sweeteners and Flavorings
For sweetness, granulated sugar is standard. However, you can also use powdered sugar, which contains a bit of cornstarch to help stabilize the whipped cream. Many bakers prefer powdered sugar for this reason, as it can help prevent weeping.
Vanilla extract is a classic flavoring. A good quality pure vanilla extract makes a big difference. But don’t be afraid to experiment! Almond extract, a touch of liquor, or even citrus zest can add wonderful dimensions.
Your Stand Mixer Setup
Of course, you’ll need your trusty stand mixer. Make sure it’s stable on a flat surface. The critical attachment here is the whisk attachment. This wires all those glorious air bubbles into your cream.
We’ve found that a standard kitchen aid mixer works beautifully for this. You don’t need a professional-grade machine to achieve excellent results.
The Chilling Secret: Why It Matters
This step is often overlooked but it’s genuinely a game-changer. Chilling your equipment is key to stable, high-volume whipped cream.
Chilling Your Mixer Bowl and Whisk
Placing your stand mixer bowl and whisk attachment in the freezer for 10-15 minutes before you start makes a world of difference. Why do we do this?
Cold helps the fat molecules in the cream stiffen more quickly and efficiently when aerated. A cold environment prevents the cream from warming up too fast, which can lead to a soupy mess or butter rather than fluffy cream. Think of it like keeping ice cream from melting too quickly; cold just helps things hold their form.
Whipping Up Perfection: Step-by-Step Guide
Once your ingredients are ready and your equipment is chilled, you’re just minutes away from perfect whipped cream. Let’s walk through it together.
Combining Your Ingredients
Take your chilled bowl and whisk from the freezer. Pour your cold heavy cream into the bowl. Add your sugar and vanilla extract now. No need to mix it beforehand; the mixer will take care of it.
A good starting ratio is about 1 to 2 tablespoons of sugar per cup of heavy cream, but you can adjust this to your taste. For vanilla, about 1 teaspoon per cup of cream is a good starting point.
The Whipping Process
Attach the bowl to your stand mixer and secure the whisk attachment. Start the mixer on low speed for about 30 seconds. This prevents splashing and helps the sugar dissolve a bit. Then, gradually increase the speed to medium-high (usually setting 6-8 on a KitchenAid mixer).
As the cream whips, you’ll notice it transform. It will go from liquid to frothy, then to thickened, and finally, peaks will start to form. Keep a close eye on it, as the transition can happen quickly!
- Start on low speed for 30 seconds.
- Increase to medium-high speed.
- Watch for changes in consistency.
- Stop when soft or medium peaks form.
Recognizing Soft, Medium, and Stiff Peaks
Knowing when to stop is the trickiest part, but it’s easy once you know what to look for. Lift the whisk attachment periodically to check the consistency.
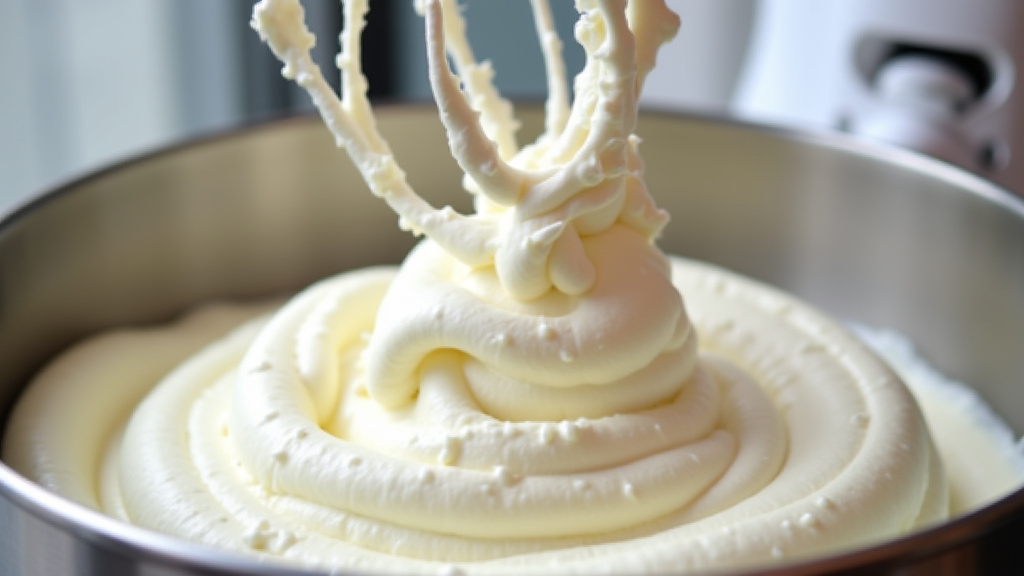
Soft peaks: When you lift the whisk, the cream will hold its shape but the tip will gently fold over. This is perfect for dolloping onto desserts where you want a delicate texture.
Medium peaks: The cream will hold its shape more firmly, and the tip will stand up straight but still have a slight curl or slouch. This is often the ideal texture for most uses, offering good structure without being too dense.
Stiff peaks: The cream will stand straight up with no curl when you lift the whisk. Be careful here! If you continue whipping past stiff peaks, you risk over-whipping and turning your cream into butter.
We found that for most dessert toppings, medium peaks are the sweet spot. It provides enough structure to hold its shape but remains light and airy.
Here’s a quick visual guide to help you decide when to stop whipping:
| Peak Type | Description | Best Uses |
|---|---|---|
| Soft Peaks | Holds shape loosely; tip gently folds over. Delicate and airy. | Pancakes, coffee, fresh fruit, warm pies. |
| Medium Peaks | Holds shape well; tip stands mostly upright with slight curl. Classic texture. | Cakes, tarts, parfaits, filling for cream puffs. |
| Stiff Peaks | Holds shape firmly; tip stands straight up. Very firm. | Piping decorations, very stable fillings. |
Troubleshooting Common Whipped Cream Issues
Sometimes things don’t go exactly as planned. Don’t worry, we’re here to help you fix it.
My Whipped Cream Won’t Thicken!
If your cream isn’t thickening, the most common culprits are typically the cream itself not being cold enough or using the wrong type of cream (e.g., light cream instead of heavy cream). Ensure your heavy cream is ice cold directly from the fridge, and that your bowl and whisk were chilled.
Another reason could be overfilling the bowl. If there’s too much cream, the whisk struggles to aerate it efficiently. Try using less cream or a larger bowl.
Oops, I Over-Whipped It!
Did your beautiful whipped cream suddenly look grainy or start to separate? You’ve likely over-whipped it. This means you’re on your way to making butter.
If it’s just slightly over-whipped and looks a bit chunky, you might be able to save it. Add a tablespoon or two of un-whipped cold heavy cream and gently whisk by hand. This can sometimes smooth it out. If it’s fully separated into solids and liquid, it’s too late for whipped cream, but congratulations, you’ve made the beginnings of butter!
Storage and Shelf Life Tips
Freshly made whipped cream is best enjoyed right away, but you can store it for a short period.
Store leftover whipped cream in an airtight container in the refrigerator. It will typically last for 2-3 days. You might notice it softens or “weeps” a bit as time goes on, especially if you didn’t use powdered sugar as a stabilizer. A quick, gentle whisk by hand can sometimes revive it.
Beyond Basic Whipped Cream: Flavor Variations
Once you’ve mastered the basic technique, you can get creative with flavors!
Consider adding different extracts like mint, almond, or lemon for a distinct taste. You can also mix in powdered cocoa for chocolate whipped cream or a dash of instant espresso powder for a coffee-flavored treat. Even a little zest from an orange or lime can brighten up your whipped cream for summer desserts.
Have fun experimenting, but remember to add any liquid flavorings in small amounts to avoid thinning your cream too much. We found that a small amount of liquor, like Grand Marnier or Bailey’s Irish Cream, can also work wonders.
Your Checklist for Perfect Stand Mixer Whipped Cream:
- Use very cold heavy cream.
- Chill your mixer bowl and whisk.
- Add sugar and vanilla to the cream.
- Start mixer on low, then increase to medium-high.
- Watch carefully and stop at soft or medium peaks.
- Enjoy immediately or store properly.
Conclusion
You now have all the tools and knowledge to create perfect whipped cream with your stand mixer. Remember, the secret lies in starting with cold ingredients and equipment. Mastering the art of knowing when to stop whipping will prevent grainy cream and ensure a light, airy texture every time. We’ve found that a little practice makes a big difference in achieving your ideal consistency.
So go ahead, put your stand mixer to good use! Experiment with flavors and enjoy the superior taste and texture of homemade whipped cream. It truly elevates any dessert.
Frequently Asked Questions
Can I make whipped cream ahead of time?
You can make whipped cream a few hours in advance, especially if you use powdered sugar for stabilization. Store it in an airtight container in the refrigerator. We’ve noticed it holds up best for about 24 hours.
What if I don’t have a stand mixer? Can I use a hand mixer?
Absolutely! A hand mixer works very well for whipped cream. You’ll follow the same steps, using a chilled bowl and cold ingredients. It might take a little longer than a stand mixer, but the results are just as good.
Why did my whipped cream turn out yellow?
If your whipped cream has a yellowish tint, it’s typically because your heavy cream has a high butterfat content. This is a natural characteristic of richer creams and doesn’t affect the quality or taste. It often means you’ve got some really good cream!
Can I make sugar-free whipped cream?
Yes, you can easily make sugar-free whipped cream. Simply substitute the granulated or powdered sugar with your preferred sugar substitute. We’ve found that erythritol-based sweeteners work quite well for this.
My whipped cream tastes bland. How can I boost the flavor?
To enhance the flavor, ensure you’re using a good quality vanilla extract, or try adding a touch more. You can also experiment with other extracts like almond or peppermint. A pinch of salt can surprisingly make the sweetness pop even more.