Can You Make Whipped Cream in a Stand Mixer?
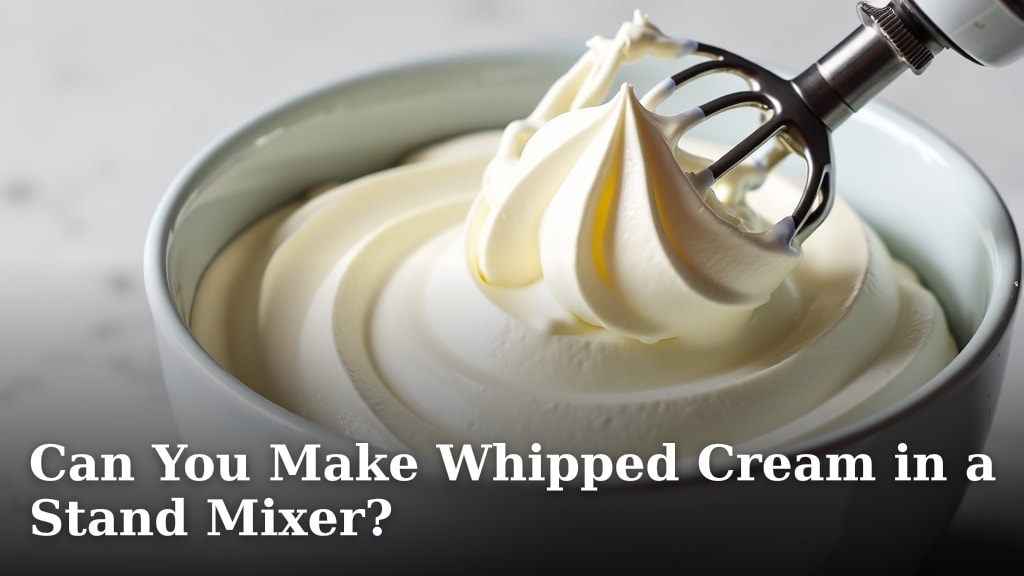
Yes, you can absolutely make whipped cream in a stand mixer, and it’s often the easiest and most efficient method. We found that a stand mixer provides consistent power, making light and fluffy whipped cream a breeze. You’ll get perfect results almost every time.
Using a stand mixer frees up your hands. This lets you prep other things while the mixer does the hard work. Many home bakers find it allows for the best texture and volume. We’ve seen it produce wonderfully stable whipped cream.
- Stand mixers are ideal for whipped cream.
- They offer consistent power and hands-free operation.
- Achieve light, fluffy, and stable results.
- It’s easier and often quicker than hand whisking.
Ready to ditch the arm workout? Let’s walk through everything you need to know about making perfect whipped cream in your stand mixer, step by step.
Mastering Whipped Cream with Your Stand Mixer
Making whipped cream with a stand mixer offers convenience and consistent quality. It truly simplifies the process. Let’s delve into why this method is so popular and how you can get the best results.
Why Choose a Stand Mixer for Whipped Cream?
You might wonder, why a stand mixer specifically? We found several compelling reasons. It’s about power, consistency, and convenience.
Unmatched Consistency and Power
A stand mixer delivers continuous, even power. This is crucial for creating stable whipped cream. Unlike hand mixers, it maintains a steady speed without wavering. This consistency helps to incorporate air uniformly into the cream. Many baking experts highlight this as a key advantage.
Hands-Free Operation
Here’s a big one: your hands are free! While the mixer does its work, you can prepare other elements of your dessert. This multitasking ability saves you time and effort in the kitchen. It makes baking a more relaxed experience.
Achieve Superior Volume and Texture
We’ve observed that stand mixers often produce whipped cream with better volume and a lighter texture. The powerful whisking action creates tiny air bubbles efficiently. This results in that cloud-like texture we all love. It’s a noticeable difference compared to less powerful methods.
Essential Ingredients and Equipment
Before you begin, gathering your tools and ingredients is important. A little preparation goes a long way. What do you really need for perfect whipped cream?
Heavy Cream: The Star Ingredient
You absolutely need cold heavy cream for the best results. Look for cream with a high-fat content, usually 36-40%. This fat is essential for creating stable foam. Lower fat creams will struggle to whip properly (USDA FoodData Central).
Sweetener of Choice
Powdered sugar is the most common sweetener for whipped cream. It dissolves quickly and helps stabilize the cream. Granulated sugar can be used, but it might leave a slightly gritty texture if not fully dissolved. Vanilla extract is also a popular addition for flavor.
The Right Stand Mixer Attachments
You’ll need your stand mixer equipped with the whisk attachment. This wire whisk is designed to incorporate maximum air. The bowl should be clean and, ideally, chilled. A cold bowl helps the cream whip faster and stay stable longer.
Here’s a quick checklist of what you’ll need:
- Cold heavy whipping cream (at least 36% fat)
- Powdered sugar (confectioners’ sugar)
- Vanilla extract (optional, but recommended)
- Stand mixer with whisk attachment
- Chilled mixing bowl
- Spatula for scraping
Step-by-Step Guide to Whipping Cream in Your Mixer
Now, let’s get to the good part: the actual whipping process. It’s surprisingly simple. Follow these steps for perfect results every time.
Step 1: Chill Everything Down
This is a small but mighty step. We found that chilling your bowl and whisk attachment for 15-20 minutes in the freezer makes a big difference. Cold ingredients whip faster and achieve better volume. Remember, cold cream is happy cream!
Step 2: Combine Ingredients in the Bowl
Pour your cold heavy cream into the chilled stand mixer bowl. Add your powdered sugar and vanilla extract now. Start with about 1-2 tablespoons of powdered sugar and 1 teaspoon of vanilla per cup of cream. You can always adjust sweetness later.
Step 3: Start Whipping – Low Speed First
Attach the bowl and whisk to your stand mixer. Begin mixing on a low speed (setting 2-3). This helps to prevent splashing and incorporates the sugar evenly. It’s like a gentle warm-up for your cream.
Step 4: Gradually Increase Speed
After about 30 seconds to a minute, once everything is combined, gradually increase the mixer speed to medium-high (setting 6-8). Keep an eye on it. The cream will begin to thicken and froth.
Step 5: Watch for Soft, Medium, or Stiff Peaks
This is where the magic happens. You’ll see the cream transform. The consistency will change from liquid to thick. How do you know when it’s done?
- Soft Peaks: The cream will hold a shape, but the tips will flop over. This is great for a light topping.
- Medium Peaks: The cream will hold its shape, and the tips will curl slightly. This is a versatile stage for many desserts.
- Stiff Peaks: The cream will stand straight up and hold its shape perfectly. Be careful not to over-whip!
Many home bakers find it helpful to stop the mixer and check the cream’s consistency every 30 seconds or so. This prevents over-whipping, which can lead to grainy, curdled cream.
Common Pitfalls and How to Avoid Them
Even with a stand mixer, sometimes things go awry. We’ve all been there! Knowing what can go wrong helps you avoid it. What are the most common hiccups?
Over-Whipping: The Grainy Cream Dilemma
The most common mistake is over-whipping. If you whip too long, the cream will separate and become grainy, almost like butter. It loses its light, airy texture. This is why watching it closely and stopping at the right peak stage is vital. There’s no coming back from over-whipped cream, so err on the side of caution.
Under-Whipping: The Runny Mess
If your cream isn’t thickening, it might be under-whipped. This usually means you haven’t whipped it long enough. Just keep going! Ensure your cream was cold enough to begin with. Warm cream struggles to whip properly.
Warm Ingredients: The Enemy of Volume
We can’t stress this enough: warm ingredients are your enemy. If your cream or bowl is warm, the fat globules won’t emulsify correctly. This leads to flat, runny whipped cream that won’t hold its shape. Always chill your cream, bowl, and whisk for optimum results (Cleveland Clinic).
Comparing Stand Mixer vs. Hand Mixer vs. Hand Whisk
While we champion the stand mixer, it’s good to understand your options. Each method has its pros and cons. How do they stack up against each other?
| Method | Pros | Cons | Effort Level |
|---|---|---|---|
| Stand Mixer | Hands-free, consistent, great volume, stable results. | Requires dedicated appliance, cleanup of large bowl. | Minimal |
| Hand Mixer | Faster than hand whisking, more portable, easier storage. | Less powerful than stand mixer, still requires holding. | Moderate |
| Hand Whisk | No electricity needed, good arm workout, simple. | Very labor-intensive, difficult to get consistent peaks, time-consuming. | High |
As you can see, for consistent, high-quality whipped cream with minimal effort, the stand mixer often wins. Many cooks find it a worthwhile investment for baking tasks like this.
Conclusion
You’ve seen that making whipped cream in a stand mixer is truly the superior method. It offers unmatched power, consistency, and the coveted hands-free operation. We’ve covered everything from chilling your ingredients to recognizing the perfect peak. By following these straightforward steps, you can avoid common pitfalls like over-whipping and achieve wonderfully light and stable whipped cream every time.
So, go ahead and use your stand mixer for your next dessert. It will simplify your baking and elevate your finished dishes. Your stand mixer is ready to deliver that perfect, fluffy topping you’ve been dreaming of.
Frequently Asked Questions
How long does whipped cream last after being made in a stand mixer?
Freshly made whipped cream is best enjoyed immediately. It will typically hold its texture for 2-3 days when stored in an airtight container in the refrigerator. After that, it tends to deflate and lose its airy consistency.
Can I use dairy-free cream alternatives in my stand mixer?
Yes, many dairy-free cream alternatives can be whipped in a stand mixer. Look for products specifically labeled for whipping, such as full-fat coconut cream (chilled overnight) or certain plant-based whipping creams. The process is similar to dairy cream.
What if my whipped cream won’t stiffen?
If your whipped cream isn’t stiffening, the most common culprits are warm cream or an under-chilled bowl and whisk. Ensure all your ingredients and equipment are very cold. Also, make sure you are using heavy cream with at least 36% fat.
Can I re-whip deflated whipped cream?
Unfortunately, once whipped cream deflates, it’s very difficult to get it back to its original fluffy texture. Re-whipping often results in a grainy or separated product. It’s best to use it as a sauce or topping for other dishes.
Is there a trick to cleaning the stand mixer whisk after making whipped cream?
To easily clean your whisk, rinse it immediately after use to prevent cream from drying on. For a thorough clean, some whisks are dishwasher safe. Otherwise, a small brush can help dislodge any cream from the wires.