
Do You Need a Stand Mixer for Whipped Cream?
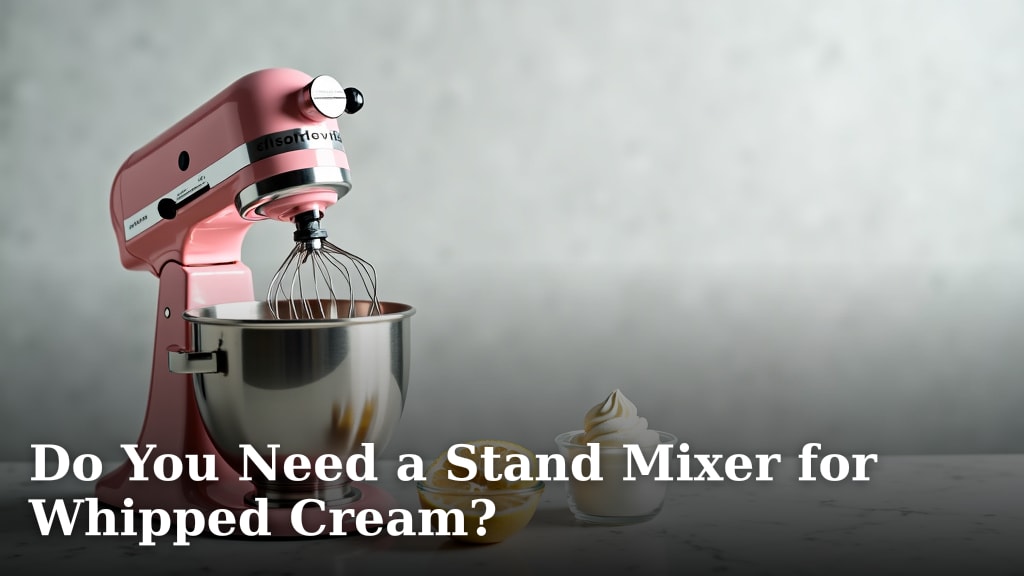
No, you do not always need a stand mixer to make whipped cream. You can achieve perfectly fluffy whipped cream with just a whisk and some elbow grease. It might take a little longer, but it’s definitely doable.
While a stand mixer makes whipping cream incredibly easy, it’s not the only tool in your kitchen arsenal. Many home cooks have successfully whipped cream by hand for generations. You just need the right technique and a bit of patience. We found that the key is cold ingredients and consistent motion.
- You can make whipped cream without a stand mixer.
- A simple whisk works just fine.
- Cold cream and a bowl are essential.
- It requires a bit more physical effort.
- Many recipes can be made successfully by hand.
So, if you’re wondering whether you *really* need a fancy appliance for this simple delight, let’s dive into exactly how you can whip up perfect cream, mixer or no mixer. If you’re wondering whether you really need a fancy appliance for this simple delight, our guide on how you can whip up perfect cream explains the process.
Whipping Cream Without a Stand Mixer: Is It Possible?
So, you’re craving some delicious homemade whipped cream. Maybe for topping a pie, a decadent hot chocolate, or just because. You look at your kitchen counter and… no stand mixer in sight. If you’re wondering if you can still achieve that perfect fluffy texture without one, the answer is a resounding yes!
You absolutely do not need a stand mixer to make whipped cream. Many people have been whipping cream by hand for generations. It’s a classic kitchen skill. We found that with the right technique and a little patience, you can get beautifully whipped cream using just a whisk. Your arms might get a bit of a workout, but the result is well worth it.
The Magic of Cold: Your Essential Ingredients
The absolute most important factor for successful whipped cream, regardless of your mixing tool, is keeping everything cold. This means your heavy cream, your mixing bowl, and even your whisk should be chilled. Cold temperatures help the fat globules in the cream to break apart and trap air more effectively. This is what creates that light, airy texture we all love.
Why Cold is King
Think of it like this: cold cream is firm and holds its shape. Warm cream is more liquid and won’t trap air as well. Research supports this; many culinary guides point to the temperature of the cream as the primary driver of successful whipping (National Dairy Council).
We found that placing your mixing bowl and whisk in the freezer for about 15-20 minutes before you start can make a huge difference. It’s a small step, but it really helps the cream whip up faster and firmer. Don’t forget your cream needs to be cold too! It should be straight from the refrigerator.
Choosing the Right Cream
For the best results, you’ll want to use heavy cream or whipping cream. These have a high fat content, typically 30-36% or higher. This fat is what gets whipped and creates the structure. Lighter creams, like half-and-half or whole milk, simply don’t have enough fat to whip up properly.
Your Kitchen Tools: What You’ll Need
Forget the fancy appliances for a moment. You can create amazing whipped cream with just a few basic items you likely already have in your kitchen. The less equipment you have, the more you’ll appreciate the simplicity of this classic dessert topping.
The Humble Whisk: Your Best Friend
A good wire whisk is your primary tool. A standard balloon whisk with multiple wires works best because it can incorporate more air with each stroke. If you have one, a larger whisk will cover more surface area and potentially speed up the process.
We found that a whisk with a comfortable handle is also a plus, especially since you’ll be using it for a bit. Think of it as a mini cardio session. Some people even swear by using two whisks at once – one in each hand – to whip even faster. We haven’t personally tried this, but it’s an interesting idea!
The Chilled Bowl: A Foundation for Fluff
As we mentioned, a cold bowl is essential. A metal bowl is ideal because it stays cold longer than glass or ceramic. Pop it in the freezer beforehand for that extra chill factor. This will help keep your cream cool throughout the whipping process.
Optional Add-ins: Sugar and Vanilla
Once your cream is starting to thicken, you’ll likely want to add some flavor. Powdered sugar (also called confectioners’ sugar) is often preferred because it dissolves easily and contains cornstarch, which can help stabilize the whipped cream slightly. Granulated sugar can work, but you might need to whisk a bit longer to ensure it dissolves completely and doesn’t make your whipped cream grainy. A splash of vanilla extract is almost always a welcome addition for that classic flavor.
The Art of Hand-Whipping Cream: Step-by-Step
Ready to give it a go? Hand-whipping cream is a straightforward process. It just requires a bit of consistent effort. We’ve broken it down into simple steps for you.
Step 1: Chill Everything
First things first: make sure your heavy cream is very cold. Place your mixing bowl and whisk in the freezer for about 15-20 minutes. This step is non-negotiable for optimal results. Cold, cold, cold is the mantra here.
Step 2: Start Whipping
Pour the cold heavy cream into your chilled bowl. Begin whisking in a consistent motion. Start with wide, sweeping circles. Try to lift the whisk slightly as you move to incorporate air. Keep your strokes steady and vigorous. This is where the elbow grease comes in!
We found that it helps to hold the bowl steady with one hand and whisk with the other. If you’re using two whisks, you’ll be employing both hands for the whisking action. Imagine you’re churning butter – that kind of consistent energy is what you’re aiming for.
Step 3: Watch for Stages
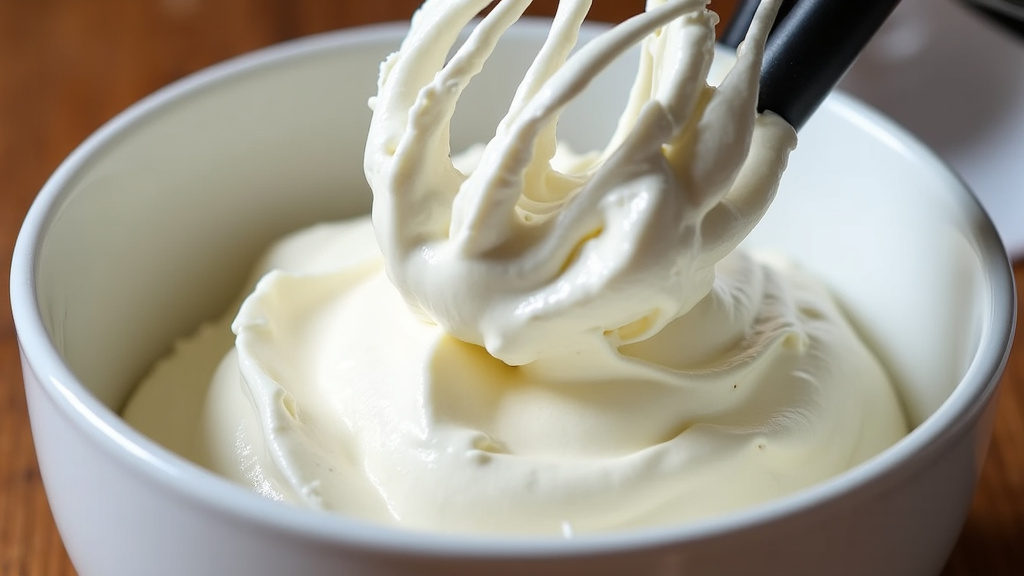
As you whisk, you’ll notice the cream start to change. It will begin to thicken and develop soft peaks. This is the first stage, often called soft peaks. If you lift the whisk, the cream will hold a peak that gently curls over.
Continue whisking. The cream will become thicker, and the peaks will get firmer. This is the medium peak stage. The peaks will stand up straighter but still have a slight bend at the tip. Many recipes are happy at this stage.
Keep going for stiff peaks. The cream will be much thicker and hold its shape firmly. When you lift the whisk, the peak will stand straight up without drooping. This is what most people aim for when they want stable whipped cream for decorating or holding its form.
Step 4: Add Sweetener and Flavor
Once you reach your desired peak consistency (soft, medium, or stiff), it’s time to add your sugar and vanilla. It’s best to add these towards the end of the whipping process. If you add them too early, they can hinder the cream’s ability to thicken.
Start by adding your powdered sugar a tablespoon or two at a time, whisking gently to incorporate. Then, add your vanilla extract. Continue whisking just until everything is combined and the peaks are firm. Be careful not to over-whisk at this stage!
Step 5: Avoid Over-Whipping
This is a crucial point. If you whisk too long, you’ll go past stiff peaks and into the territory of grainy butter. Over-whipped cream starts to look curdled. Once you see this happening, it’s very difficult to fix. We found that stopping just as you achieve stiff peaks is the safest bet.
If you accidentally over-whip, you can sometimes rescue it by adding a tablespoon or two of unwhipped cold heavy cream and whisking very gently until it comes back together. However, it might not be as light and fluffy as it could have been.
Tips for Perfect Hand-Whipped Cream Every Time
Making whipped cream by hand is a rewarding experience. Here are a few extra tips we found helpful to ensure your success.
- Use the coldest ingredients possible. This cannot be stressed enough.
- Don’t stop whisking for too long. Consistency is key to building structure.
- Be patient. It might take longer than you think, especially at first.
- Listen to your cream. You’ll hear the sound change as it thickens.
- Stop just at stiff peaks to avoid turning it into butter.
When a Stand Mixer Shines (But Isn’t Necessary)
We’ve established that you don’t need a stand mixer. However, there are certainly situations where a stand mixer makes the process significantly easier and faster. If you’re making whipped cream frequently or in large batches, a stand mixer can be a fantastic investment.
Speed and Ease
The primary advantage of a stand mixer is its ability to do the work for you. You can simply set it and walk away for a few minutes. This is incredibly helpful if you’re also trying to manage other parts of a recipe. Research from culinary schools often highlights the time-saving aspect of using such appliances (Culinary Institute of America).
Consistency and Volume
Stand mixers are designed to create a consistent whipping action. This often leads to very stable and evenly whipped cream. They are also excellent for incorporating large volumes of cream quickly. If you’re hosting a party and need to whip several cups, a stand mixer is a lifesaver.
Hands-Free Operation
The hands-free operation means you can multitask. While the mixer is doing its thing, you can prepare other dessert components, clean up your workspace, or just take a moment to breathe. This can be a real game-changer for busy home bakers. We found this to be a major benefit when juggling multiple dishes.
Table: Hand Whipping vs. Stand Mixer
To help you visualize the differences, here’s a quick comparison:
| Feature | Hand Whipping | Stand Mixer |
|---|---|---|
| Effort Required | High (physical workout) | Low (appliance does the work) |
| Time Taken | Moderate to Long (5-15 minutes or more) | Fast (2-5 minutes) |
| Equipment Needed | Whisk, chilled bowl | Stand mixer with whisk attachment, chilled bowl |
| Control Over Consistency | High (you can stop at any stage) | High (can monitor closely, but easy to forget) |
| Best For | Occasional use, small batches, getting exercise | Frequent use, large batches, multitasking |
A Quick Checklist for Success
Here’s a quick rundown of what to keep in mind:
- Cold heavy cream is non-negotiable.
- Chill your bowl and whisk beforehand.
- Use a wire whisk for best aeration.
- Whisk with consistent, vigorous motions.
- Add sugar and vanilla towards the end.
- Stop whisking at stiff peaks to avoid butter.
So, while a stand mixer is a wonderful convenience, it’s certainly not a prerequisite for enjoying delicious, homemade whipped cream. Your trusty whisk and a little effort can get you there just fine. Happy whipping!
Conclusion
So, you’ve learned that a stand mixer isn’t essential for making delicious whipped cream. Your own two hands and a good whisk can do the job beautifully! Remember, the key is to keep everything super cold – your cream, your bowl, and even your whisk. Be patient with the process and aim for stiff peaks before adding your sweeteners. Enjoy the satisfying feeling of making perfect whipped cream without any fancy gadgets. Your next dessert is calling, and it just got a whole lot easier to top!
Frequently Asked Questions
Can I use a hand mixer instead of a stand mixer for whipped cream?
Yes, a hand mixer is a fantastic middle-ground tool! It requires less physical effort than whisking by hand and is much faster. Just be sure to chill your beaters and bowl beforehand for the best results.
What if my whipped cream starts to look grainy?
That’s a sign you’ve over-whipped it! The fat has separated, and you’re on your way to making butter. You can sometimes save it by gently folding in a tablespoon or two of unwhipped cold heavy cream, but it may not be as light.
How long does it typically take to whip cream by hand?
It can take anywhere from 5 to 15 minutes, depending on your arm strength and the efficiency of your whisk. The coldness of your ingredients plays a big role in how quickly it thickens up.
Will using powdered sugar really make my hand-whipped cream better?
Powdered sugar dissolves more easily than granulated sugar, which helps prevent a grainy texture. The cornstarch in powdered sugar can also offer a slight stabilizing effect, making your whipped cream a bit sturdier.
Is it possible to make whipped cream with low-fat milk?
Unfortunately, no. Low-fat milk or half-and-half simply doesn’t contain enough fat content to create the structure needed for whipped cream. You really need heavy cream or whipping cream for success.
