
How to Cut Fresh Pasta with a Stand Mixer Attachment?

Yes, you can absolutely cut fresh pasta with a stand mixer attachment, and it’s surprisingly easy and fast. These attachments roll and cut your dough into uniform sheets and strands, saving you loads of time and effort compared to hand-cutting. It’s a fantastic way to achieve professional-looking pasta at home.
We found that using a stand mixer attachment can really transform your pasta-making game. It takes the most tedious part of the process and makes it almost effortless. Beyond just saving time, these tools help ensure your pasta cooks evenly for a better dining experience. Think perfectly cut fettuccine every single time!
- Stand mixer pasta attachments are great for home cooks.
- They save time and effort in cutting.
- You get uniform, professional-looking pasta shapes.
- It’s an easy way to make delicious meals.
Ready to see how simple it is? Below, we’ll guide you through the steps of cutting your fresh pasta dough using your stand mixer attachment, from preparing the dough to getting those perfect noodles.
So, you’ve made some beautiful pasta dough, and now it’s time for the fun part: shaping it! You might be wondering if that stand mixer attachment you got is actually useful for more than just mixing. The good news is, yes, it is! Cutting your pasta with a stand mixer attachment is a total game-changer for any home cook. It takes the most tedious part of the process and turns it into a smooth, efficient experience. Let’s dive into how you can get those perfect noodles with minimal fuss. If you’re new to this, our guide on making pasta dough with a stand mixer attachment can help.
Getting Your Pasta Ready for the Machine
Before you even think about running your dough through the rollers, you need to make sure it’s prepped correctly. This is a super important step that many people overlook. Proper dough preparation is key to getting clean cuts and preventing any sticky messes.
Consistency is Key: The Dough’s Texture
Your fresh pasta dough should be firm, not sticky. If it feels too wet, it’s going to be a mess in the machine. We found that adding a little extra flour, about a tablespoon at a time, is usually enough to fix a dough that’s a bit too soft. You want it to feel like firm playdough. It should spring back slightly when you press it with your finger. Many bakers recommend a hydration level between 45-50% for most pasta doughs (King Arthur Baking). Too much moisture can cause the dough to tear or stick. Too little, and it might become brittle.
Resting Your Dough: Patience Pays Off
This step is non-negotiable! After you’ve kneaded your dough, it needs to rest. Wrap it tightly in plastic wrap or a damp cloth. Let it sit at room temperature for at least 30 minutes. We found that a longer rest, up to an hour, can make the dough even easier to work with. This resting period allows the gluten to relax. This relaxation is vital for a smooth rolling process. Without it, the dough can resist the rollers and might even tear. Think of it like letting a tense muscle relax before a stretch.
Dividing Your Dough for Easier Handling
A big ball of dough can be tough to manage. Divide your pasta dough into smaller, more manageable portions. We suggest cutting it into 3-4 pieces, depending on the size of your batch. Roll each piece into a rough disc. Keeping the unused portions covered while you work with one piece will prevent them from drying out. This simple step makes the entire process much less intimidating.
Using Your Stand Mixer Pasta Attachment: The Basics
Now for the star of the show! Most stand mixer pasta attachments come with a set of rollers for flattening the dough and separate cutters for different pasta shapes. They usually attach to the same port where you’d put a whisk or dough hook. It’s designed to be simple. Let’s walk through the process.
Attaching the Roller and Cutter
First, make sure your stand mixer is unplugged. It’s a safety precaution we can’t stress enough! Locate the attachment hub on your mixer. This is usually at the front, often covered by a small cap. Remove the cap. Align the pasta attachment’s drive shaft with the hub. Push it in firmly until it clicks into place. You might need to twist it slightly to secure it. Refer to your stand mixer’s manual and the attachment’s instructions for specific details, as each model can vary slightly.
Setting Up the Stand Mixer
Once the attachment is securely in place, you can plug in your stand mixer. The pasta attachment will have settings for roller thickness. Start with the widest setting. This is usually marked as ‘1’ or the thickest position. You’ll be passing the dough through this setting multiple times. This gradual thinning is crucial for achieving the right texture.
The Rolling and Cutting Process: Step-by-Step
This is where the magic happens! We’ve found that a systematic approach yields the best results. Don’t rush this part; enjoy the process of watching your dough transform.
Flattening the Dough (The First Pass)
Take one of your divided dough portions. Flatten it slightly with your hands or a rolling pin to give it a rough rectangular shape. This makes it easier for the rollers to catch. Feed the dough into the widest setting of the pasta roller. Let the mixer do the work. As the dough comes out the other side, catch it with your hands. Fold the dough in half or in thirds, like a letter. Feed it through the widest setting again. Repeat this folding and rolling process 2-3 more times on the widest setting. This helps to further develop the gluten and create a smooth, even sheet. We found this makes the dough much more pliable for subsequent passes.
Gradually Thinning the Dough
After the initial flattening, it’s time to make the dough thinner. Move the roller setting to the next notch (e.g., from ‘1’ to ‘2’). Pass the dough sheet through this setting. Don’t fold the dough this time. Just feed it through as is. Continue to move the setting down, one notch at a time, passing the dough sheet through each setting. Your dough will get longer and longer. Keep track of the settings. For most pasta shapes, you’ll want to go down to a thickness of ‘5’ or ‘6’ on a standard 0-9 scale. Thicker pasta, like for lasagna, might need a thicker setting. Delicate noodles like angel hair might require a thinner sheet. Many cooks suggest a thickness around 0.8mm for most dried pasta applications (National Pasta Association).
Switching to the Cutter Attachment
Once your dough is rolled to the desired thickness, remove the roller attachment. Attach the cutter head of your pasta maker. These come in various widths, such as fettuccine, spaghetti, or linguine. Secure it in the same way you attached the roller. Again, make sure the mixer is unplugged before making the switch.
Cutting Your Pasta Strands
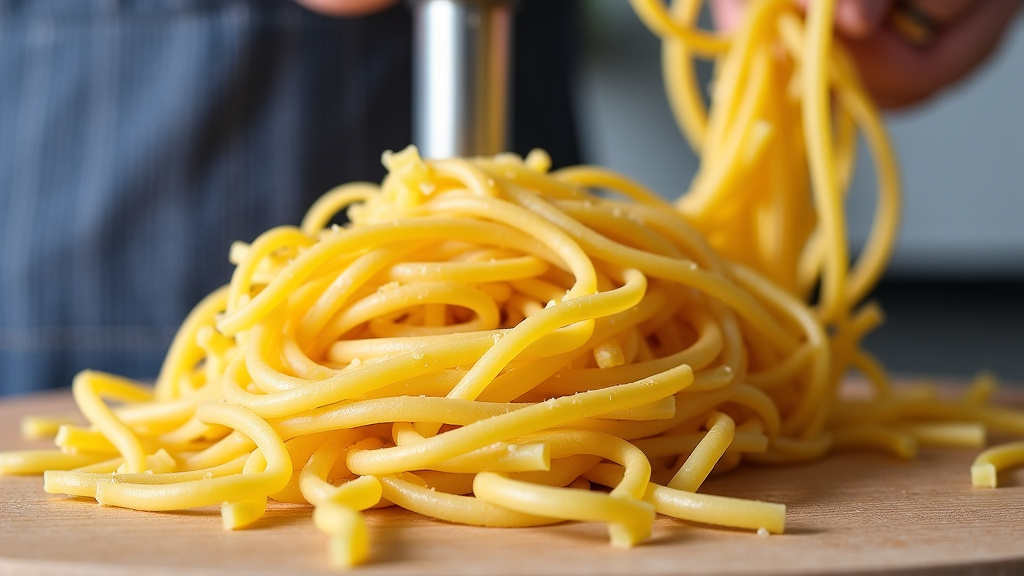
Now, you’ll feed the flattened pasta sheet through the cutter attachment. You can feed the sheet through as is, or for easier handling, you can cut the long sheets into shorter, more manageable lengths before feeding them into the cutter. Lightly flour the pasta sheet if it feels a little sticky. Hold the end of the sheet as it emerges from the cutter. Let the mixer pull the dough through. The attachment will cut the dough into uniform strands. Catch the cut pasta gently with your hands. It’s helpful to have a lightly floured baking sheet or pasta drying rack ready.
Tips for Clean Cuts and Preventing Sticking
Sometimes, pasta can stick together or not cut cleanly. We’ve found a few tricks that help. A light dusting of semolina flour or all-purpose flour on the pasta sheet before cutting can prevent sticking. Ensure your dough wasn’t too wet to begin with. If the strands are clumping, a gentle shake or a bit of extra flour can help separate them. If the cutter seems to be dragging, check that the dough isn’t too sticky or too thick for the setting you’re using.
Drying Your Freshly Cut Pasta
Once your pasta is cut, you need to handle it quickly. Fresh pasta can dry out and become brittle very fast. You have a few options for drying. You can arrange the pasta strands on a lightly floured baking sheet. Or, you can use a pasta drying rack, which is ideal for longer strands like spaghetti. For immediate cooking, you can place it directly into boiling water. If you plan to cook it later, you’ll want to dry it further. Many sources suggest drying it for at least 15-30 minutes before cooking. For longer storage, you can dry it completely until it’s brittle. This can take 12-24 hours depending on humidity (The Kitchn).
Here’s a quick checklist to keep you on track:
- Ensure your dough is firm, not sticky.
- Rest your dough for at least 30 minutes.
- Divide dough into manageable portions.
- Start rolling on the widest setting, folding several times.
- Gradually decrease roller thickness, one setting at a time.
- Lightly flour sheets to prevent sticking before cutting.
Troubleshooting Common Issues
Even with the best intentions, sometimes things don’t go perfectly. Don’t get discouraged! We’ve encountered a few common hiccups ourselves and found solutions.
Dough Tearing or Breaking
If your dough is tearing, it’s usually a sign that it’s too dry or it hasn’t rested enough. Try adding a teaspoon of water to your dough and kneading it briefly. Or, let the dough rest longer. We found that ensuring the dough is consistently hydrated is key. Over-processing on the thinner settings can also cause tearing if the dough isn’t strong enough.
Pasta Sticking Together
This is a very common issue. Often, it means the dough is a bit too sticky, or you didn’t use enough flour when cutting. Try lightly dusting the pasta sheet with semolina flour or all-purpose flour before it goes into the cutter. Also, ensure you’re not overcrowding the pasta onto the baking sheet or rack. Separate strands as much as possible.
Machine Jamming
If the machine seems to be jamming, stop it immediately! Unplug the mixer. Check if a large lump of dough got stuck. You might need to clean out the rollers or cutters. Sometimes, this happens if the dough is too thick or too soft. Going back to the drawing board with your dough consistency can help. We found that a bit of semolina flour mixed into the dough can add strength and prevent sticking.
Maintaining Your Pasta Attachment
Just like any kitchen tool, proper cleaning and care will make your pasta attachment last. These attachments are typically made of metal and require specific cleaning methods.
Cleaning After Each Use
Never put your pasta attachment in the dishwasher. The metal can rust, and any coating can be damaged. Instead, use a pastry brush or a dry cloth to wipe away any flour and dough residue. For stubborn bits, you can use a damp cloth, but make sure to dry it thoroughly immediately afterward. Many sources advise against using soap on metal pasta attachments to prevent rust (Food52). Ensure all parts are completely dry before storing.
Storage Recommendations
Store your pasta attachment in a clean, dry place. Many attachments come with their own storage box, which is ideal. If not, wrap them in a cloth or store them in a way that prevents dust from accumulating. Keeping them clean and dry will ensure they’re ready for your next pasta-making adventure.
Conclusion
You’ve seen how straightforward it is to cut fresh pasta using your stand mixer attachment. It transforms a labor-intensive task into an enjoyable experience. By prepping your dough correctly, following the rolling and cutting steps, and performing basic maintenance, you’ll consistently achieve beautiful, uniform pasta. Don’t hesitate to try it for your next pasta night! Your homemade creations are just a few steps away from a delicious meal.
Frequently Asked Questions
How do I know if my pasta dough is the right consistency for the attachment?
Your pasta dough should feel firm, like playdough, and not sticky. If it’s too wet, it will tear or get stuck in the machine. Adding a tablespoon of flour at a time can help firm up a dough that’s too soft. It should spring back slightly when you press it.
Can I use pre-made pasta dough with the attachment?
While you can use store-bought pasta dough, it might not have the same texture as homemade. Some pre-made doughs can be softer or contain ingredients that affect how they roll and cut. You might need to adjust flouring or handling slightly if you use it.
What’s the best way to store fresh pasta after cutting?
For immediate cooking, place cut pasta on a lightly floured baking sheet or a drying rack. If you want to store it for a few hours, let it dry for about 15-30 minutes. For longer storage, dry it completely until brittle, which can take 12-24 hours.
My pasta strands are sticking together after cutting. What can I do?
This often happens if the dough is a bit sticky or not floured enough before cutting. Try lightly dusting the pasta sheet with semolina or all-purpose flour before feeding it through the cutter. Gently separating the strands as they come out also helps.
How often should I clean my pasta attachment?
You should clean your pasta attachment after every use. Use a dry brush or cloth to remove flour and dough bits. Avoid using water or soap, as this can cause rust. Ensure the attachment is completely dry before storing it away.
