
How to Make Whipped Butter in a Stand Mixer?
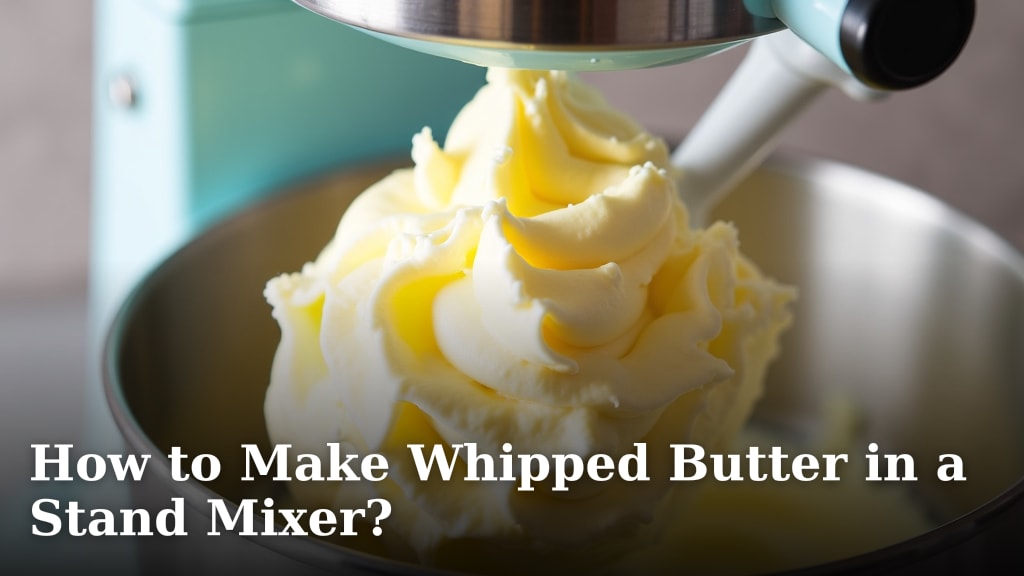
Making whipped butter in a stand mixer is surprisingly easy. You can create incredibly fluffy and airy butter in just minutes with minimal effort. This method is perfect for spreading on toast, baking, or even serving as a delicious topping.
You might be wondering if it’s really worth the effort. We found that using a stand mixer significantly reduces the time and physical strain compared to whisking by hand. It also yields a much more consistent and lighter texture, making your butter go further.
- Use softened butter.
- A stand mixer makes it easy.
- Whip until light and fluffy.
- Perfect for toast or baking.
Ready to transform your butter? Let’s walk through exactly how to whip butter to perfection using your stand mixer, step by step.
Whipping Up Fluffy Butter in Your Stand Mixer
Making whipped butter at home is a delightful culinary trick. Your stand mixer is the perfect tool for this job. It whips air into the butter, creating an incredibly light and spreadable texture. This process takes just minutes. You’ll be amazed at how easy it is.
Gathering Your Ingredients and Tools
You don’t need much to make fantastic whipped butter. The main ingredient is, of course, butter. You’ll also need a few other simple items. Having everything ready makes the process smooth.
What You’ll Need
Start with good quality butter. Unsalted butter is often preferred, as it gives you control over the saltiness. You can always add salt later. For every pound of butter, you’ll typically want about 1/4 cup of liquid. This liquid helps achieve the perfect consistency.
- 1 pound (2 sticks) unsalted butter, softened
- 1/4 cup milk or heavy cream
- Pinch of salt (optional, to taste)
- Stand mixer with whisk attachment
Preparing the Butter for Whipping
The most critical step is ensuring your butter is properly softened. This isn’t the same as melted butter. Softened butter should be pliable and slightly yielding, but not greasy. If it’s too cold, your mixer will struggle. If it’s too warm, it won’t whip up properly.
Achieving the Right Softness
The best way to soften butter is to let it sit at room temperature. This usually takes about 1 to 2 hours, depending on your kitchen’s temperature. You can test it by gently pressing a finger into the butter. It should leave an indentation without being mushy. We found that cutting the butter into smaller cubes can speed up this softening process.
Avoid microwaving your butter to soften it. This often leads to uneven melting and can make the butter greasy. If you’re in a real hurry, you can cut the butter into small cubes and let them sit in a bowl for about 20-30 minutes. Many bakers agree that patient softening yields the best results (King Arthur Baking).
The Whipping Process: Step-by-Step
Now for the fun part! Your stand mixer will do most of the work. The goal is to incorporate air into the butter, making it fluffy and light. Follow these steps carefully for the best outcome.
Step 1: Initial Mixing
Place your softened butter into the bowl of your stand mixer. Attach the whisk attachment. Start the mixer on a low speed. You want to break down the butter and get it moving. Let it mix for about 30 seconds to a minute. This loosens up the butter. If you’re looking for a powerful machine, our guide to the best stand mixer for heavy dough highlights models capable of handling tough tasks.
Step 2: Adding the Liquid and Salt
With the mixer still on low, slowly drizzle in your milk or cream. If you’re adding salt, add it now as well. This is your chance to customize the flavor. A small pinch is usually enough to start. You can always add more later.
Step 3: Increasing the Speed and Whipping Time
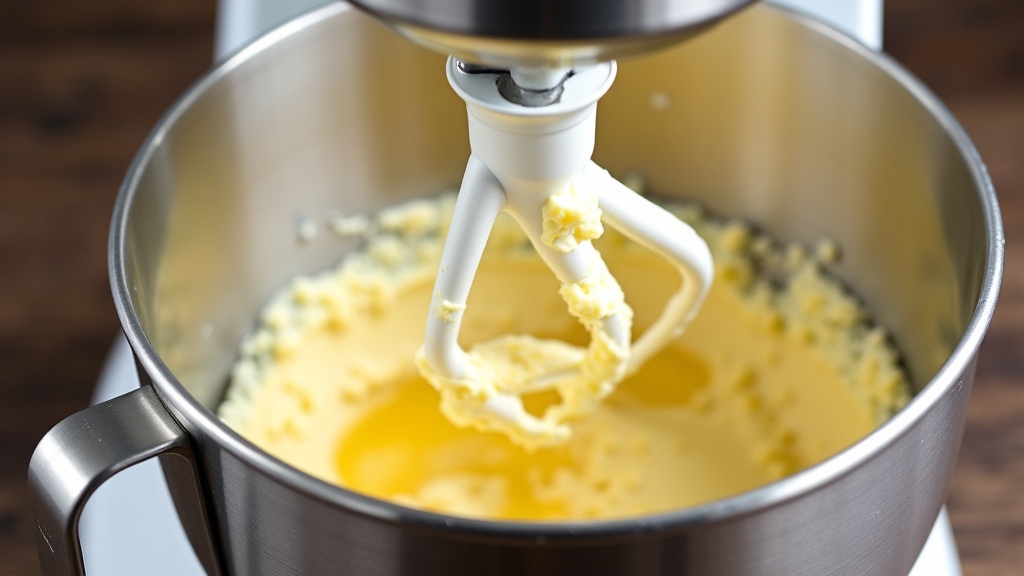
Once the liquid is incorporated, increase the mixer speed to medium-high. Let the mixer run for 3 to 5 minutes. You’ll notice the butter changing color. It will become lighter and much fluffier. Watch it closely. You want it to be airy, not runny.
The exact time can vary depending on your mixer and the butter’s temperature. Keep an eye on the texture. It should look like soft clouds. Many find that the transformation is quite dramatic. It goes from dense blocks to a beautiful, airy spread.
Step 4: Scraping Down the Bowl
Periodically, you might need to stop the mixer. Use a spatula to scrape down the sides of the bowl. This ensures all the butter gets evenly whipped. Butter can stick to the sides. Getting it back into the center helps with consistent texture. We found this step is essential for uniform fluffiness. If you encounter issues, our guide on why your stand mixer might not be mixing evenly can help troubleshoot common problems.
Understanding the Consistency of Whipped Butter
Whipped butter should be noticeably lighter and airier than regular butter. It will have a soft peak consistency. It’s easy to spread directly from the refrigerator, which is a game-changer. The key is not to over-whip it.
Over-whipping can cause the butter to break down. It might become greasy or separate. If you see tiny beads of liquid forming, you’ve likely whipped it enough. Many recipes suggest stopping once you achieve a pale, fluffy appearance. The butter should hold its shape loosely.
Troubleshooting Common Whipping Issues
Sometimes, things don’t go exactly as planned. Don’t worry! Most common issues with whipped butter are easily fixed. Here are a few common problems and how to solve them.
Butter is Too Soft or Greasy
If your butter seems too soft or oily, it was likely too warm. The best fix is to chill it. Put the bowl with the whipped butter in the refrigerator for about 15-30 minutes. This will firm it up. Then, give it a quick whip on low speed to re-aerate.
Butter Isn’t Getting Fluffy
If your butter isn’t whipping up, it’s probably too cold. Try letting it soften a bit longer at room temperature. Alternatively, you can try warming the bowl slightly. Place the bowl over a pan of warm (not hot) water for a minute or two. Be very careful not to melt the butter. You want it just soft enough to whip.
Liquid is Separating
If you see water separating from the butter, you might have over-whipped it. This can also happen if you added too much liquid initially. Try chilling the butter again, as mentioned above. Then, whip it on low speed for a short time to try and re-emulsify it. If it’s too far gone, you might need to start over with fresh, properly softened butter.
Tips for Flavoring Your Whipped Butter
Once you have the basic whipped butter, you can get creative with flavors. This is where you can really make it your own. Think about what you’ll use it for.
Sweet Variations
For a sweet spread, consider adding a touch of honey, maple syrup, or a sprinkle of cinnamon. A little vanilla extract can also be lovely. These additions are wonderful on pancakes or muffins. A tablespoon of powdered sugar can add sweetness without liquid.
Savory Options
For savory uses, try adding fresh herbs like chives or parsley. Garlic powder or a hint of lemon zest are also popular. A dash of smoked paprika can give it a nice kick. These are perfect for bread or grilled corn.
Storing Your Homemade Whipped Butter
Proper storage will keep your whipped butter fresh and delicious. Because it has more air and sometimes more liquid, it might not keep as long as regular butter.
Store your whipped butter in an airtight container. Keep it in the refrigerator. It should stay fresh for about 1 to 2 weeks. For longer storage, you can freeze it. Freeze it in individual portions for convenience. Thaw overnight in the refrigerator before using.
Your Whipped Butter Checklist
Here’s a quick rundown to ensure your whipped butter success:
- Butter Softness: Ensure butter is softened, not melted or hard.
- Attachment: Use the whisk attachment on your stand mixer.
- Low Start: Begin mixing on low speed.
- Gradual Additions: Add liquid and salt slowly.
- Watch Texture: Whip until light and airy, not greasy.
- Scrape Down: Periodically scrape the bowl for even whipping.
Conclusion
You’ve now learned how to whip butter into a wonderfully light and airy spread using your stand mixer. Remember, the key to success is properly softened butter and not over-whipping. You can easily customize the flavor with sweet or savory additions, making it perfect for any occasion. Grab your softened butter, get your stand mixer ready, and transform your ordinary butter into something extraordinary. You’ll wonder how you ever lived without this easy upgrade!
Frequently Asked Questions
How long does whipped butter last in the refrigerator?
Your homemade whipped butter should stay fresh in an airtight container in the refrigerator for about 1 to 2 weeks. Because it has more air incorporated, it might not last quite as long as standard butter. Always check for any signs of spoilage before using.
Can I make whipped butter without a stand mixer?
While a stand mixer makes it incredibly easy, you can whip butter by hand with a whisk or even with an electric hand mixer. It will take more time and physical effort to incorporate enough air to achieve a light and fluffy texture. Be prepared for a good arm workout!
What’s the difference between softened butter and melted butter for whipping?
Softened butter is pliable and can be easily indented with a finger, but it holds its shape and isn’t greasy. Melted butter has completely lost its form and is liquid. You need softened butter to whip air into it; melted butter will just become oily and won’t achieve the desired fluffy consistency.
My whipped butter looks a little greasy. What did I do wrong?
Greasy whipped butter usually means the butter was too warm or it was over-whipped. The best fix is to pop the entire bowl into the refrigerator for 15-30 minutes to firm it up. Give it a quick whip on a low speed afterward to re-aerate.
Can I add sugar or sweeteners to my whipped butter?
Absolutely! You can add sweeteners like honey, maple syrup, or powdered sugar to create a sweet whipped butter. We found that powdered sugar incorporates well without adding extra liquid, which helps maintain the right consistency for sweet variations.
