
How to Knead Stiff Cookie Dough in a Stand Mixer?

The easiest way to knead stiff cookie dough in a stand mixer is by using the dough hook attachment on a low speed setting. This helps to soften and combine the dough without overworking it. You can achieve perfectly smooth dough this way.
Working with stiff cookie dough can be a bit challenging, right? We’ve all been there, wondering if our mixer can handle the job. The good news is that your stand mixer is a powerful kitchen tool that can easily manage this task. It’s all about using the right technique and attachment.
- Use a dough hook.
- Start on a low speed.
- Scrape down the bowl often.
- Don’t overmix.
- Add a tiny bit of liquid if needed.
Let’s walk through exactly how to prepare your stand mixer and get that dough ready for baking the best cookies ever. We’ll cover everything you need to know, step by step.
Getting Your Stand Mixer Ready for Stiff Dough
Preparing your stand mixer properly is key to successfully kneading stiff cookie dough. It’s not just about turning it on; a little setup goes a long way. This ensures the best results and protects your machine.
Choosing the Right Attachment for Your Stiff Dough
For stiff cookie dough, you’ll want to reach for the dough hook attachment. Why the dough hook? We found it’s designed to mimic hand-kneading, pulling and stretching the dough. The paddle attachment, while great for creaming butter, tends to just push stiff dough around without properly developing it. It can also strain your mixer.
- Dough Hook: Best for kneading, pulls and stretches dough.
- Paddle Attachment: Best for creaming, mixes but doesn’t knead stiff dough well.
- Whisk Attachment: Best for aerating, completely unsuitable for dough.
Understanding Your Mixer’s Speed Settings
When working with stiff dough, low speed settings are your friend. High speeds can overheat your mixer and overwork the dough. Starting on speed 1 or 2 is usually ideal. You’re aiming for a gentle, consistent motion, not a furious churn. Think of it like a slow, steady workout for your dough.
The Step-by-Step Kneading Process
Now that your mixer is ready, let’s get into the actual kneading. It’s a simple process, but paying attention to each step will make a big difference in your cookie texture. We want that perfect chewiness, right?
Adding Your Stiff Dough to the Mixer
First, carefully add all your stiff cookie dough to the mixer bowl. Make sure it’s not overflowing. If you have a particularly large batch, you might consider dividing it in half and kneading in two batches. This prevents overwhelming your mixer. A general rule of thumb is to fill the bowl no more than two-thirds full with dough ingredients (KitchenAid). Understanding what is the right size stand mixer for your needs can help prevent overwhelming your appliance with large batches.
Starting the Mixer and Monitoring Progress
Attach the dough hook, lower the mixer head, and turn your mixer on to the lowest speed setting (usually speed 1). Let it run for about 30 seconds to a minute. Don’t walk away just yet! You want to observe how the dough behaves. Is it clumping? Is it sticking to the sides? This initial period tells you a lot.
The Importance of Scraping Down the Bowl
You’ll notice bits of dough sticking to the sides of the bowl, or even to the dough hook itself. This is normal. Periodically, you’ll need to stop the mixer and use a rubber spatula to scrape down the sides. Gently push the stray bits of dough back towards the main mass. This ensures even kneading and prevents dry pockets of unmixed dough. We recommend doing this every 1-2 minutes during the initial phase.
When to Increase Speed (Slightly)
Once the dough starts to come together a bit more and is less crumbly, you can cautiously increase the speed to speed 2. No higher! We found that anything above speed 2 for stiff dough can stress your mixer and create too much friction, which can lead to tough cookies. You’re looking for the dough to start cleaning the sides of the bowl as it kneads.
Troubleshooting Common Stiff Dough Issues
Even with the best intentions, stiff dough can sometimes be finicky. Don’t worry, we’ve got solutions for the common snags you might hit. It’s all part of the baking adventure!
When Your Dough Is Too Dry
If your dough is still too crumbly and not coming together after several minutes of kneading, it might be too dry. This is where you can add a tiny bit of liquid. We emphasize “tiny.” Start with 1/2 teaspoon of milk or water. Add it directly into the bowl while the mixer is running on low. Let it mix for 30 seconds, then assess. You can repeat this process, adding 1/2 teaspoon at a time, until the dough comes together. Be patient, as adding too much liquid can quickly make the dough too sticky.
What if the Dough is Sticking Too Much?
Conversely, if your dough is sticking excessively to the dough hook and the sides of the bowl, it might be a bit too wet. This is less common with “stiff” dough but can happen if you accidentally added too much liquid earlier. The easiest fix is to add a tablespoon of flour. Let it mix on low, then assess. Repeat if necessary, one tablespoon at a time, until the stickiness reduces. The dough should still be slightly tacky, not dry.
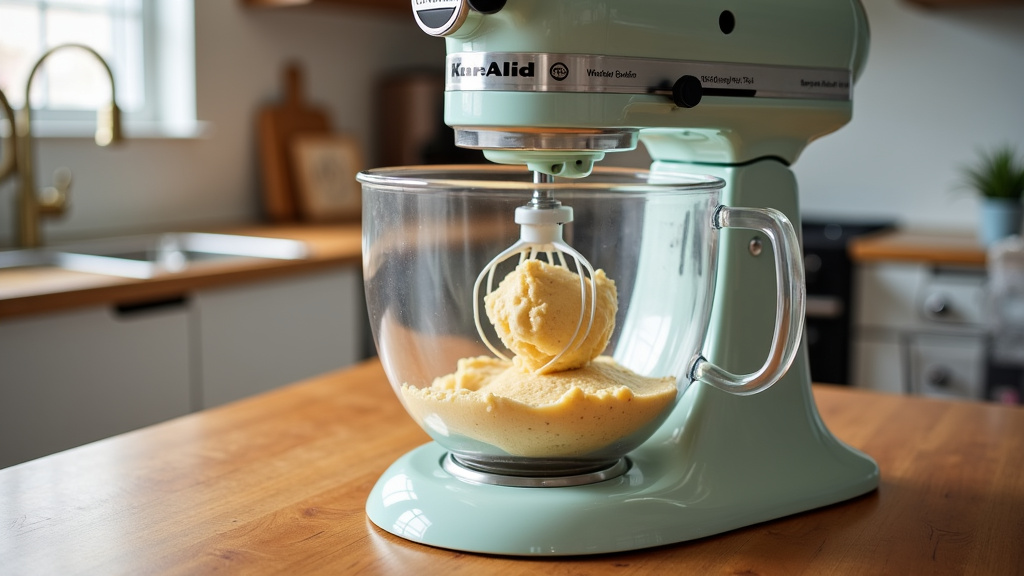
Signs of Properly Kneaded Dough
How do you know when you’ve achieved that perfect consistency? There are a few key indicators. Recognizing these signs will help you avoid over or under-kneading, leading to better cookie texture. We want that soft, yet chewy result!
The “Clean Bowl” Test
A good sign that your dough is properly kneaded is when it starts to “clean” the sides of the mixer bowl. This means the dough ball is mostly staying together and pulling away from the bowl’s edges as it rotates. You might still have a few small bits on the very bottom or sides, but the majority should be forming a cohesive mass. This indicates good gluten development.
The “Windowpane Test” (Simplified for Cookies)
For cookie dough, you don’t need a super strong gluten structure like bread dough, but a simplified version of the windowpane test can be helpful. Take a small piece of dough (about the size of a golf ball) and gently stretch it between your fingers. If you can stretch it a little without it tearing immediately, and it feels somewhat elastic, you’re in a good place. It won’t be as thin or translucent as bread dough, but it shouldn’t just crumble apart. This shows enough gluten has formed for structure (NIH).
Ideal Texture and Appearance
Properly kneaded stiff cookie dough will be smooth, uniform, and slightly elastic. It shouldn’t be overly sticky, nor should it be crumbly. It will have a consistent color and texture throughout. If you press a finger into it, it should spring back slowly. This indicates it’s ready for its next step, whether that’s chilling or shaping.
Important Considerations for Success
Beyond the kneading technique itself, a few other factors can influence your success. Keeping these in mind will help you achieve consistent, delicious results every time you bake. It’s about setting yourself up for victory!
Don’t Overmix Your Dough!
This is perhaps the most crucial warning: do not overmix your cookie dough. Unlike bread dough, which benefits from extensive kneading to develop strong gluten, cookie dough can become tough and less tender if over-kneaded. We recommend kneading for no more than 5-7 minutes total once the ingredients are mostly combined. Overmixing develops too much gluten, leading to a less desirable, chewier, and sometimes dry cookie texture. Think of it like exercising a muscle – too much can lead to soreness and inflexibility.
Allowing Your Mixer to Rest if Needed
Kneading stiff dough puts a significant strain on your stand mixer’s motor. If you notice your mixer sounds strained, feels hot to the touch, or smells like it’s overheating, stop it immediately. Give it a break for 10-15 minutes. This is especially important for smaller or older mixers. Your appliance needs a breather sometimes, just like you do after a tough workout!
Checklist for Kneading Stiff Cookie Dough
Here’s a quick checklist to ensure you’ve covered all the bases for perfectly kneaded stiff cookie dough:
- Did you use the dough hook attachment?
- Did you start on the lowest speed?
- Did you scrape down the bowl frequently?
- Did you only increase speed to level 2 (max)?
- Did you avoid overmixing (5-7 minutes max)?
- Is the dough smooth, uniform, and slightly elastic?
| Step | Why It’s Important | Troubleshooting Tip |
|---|---|---|
| Use Dough Hook | Mimics hand kneading, develops gluten properly. | Paddle makes dough tough; whisk does nothing. |
| Low Speed | Prevents overheating mixer and overworking dough. | Too high speed can burn out motor or make tough cookies. |
| Scrape Bowl | Ensures all ingredients are evenly incorporated. | Unscraped dough leads to dry, unmixed pockets. |
| Monitor Dough | Identifies dryness or excessive stickiness early. | Catch issues before dough is ruined; adjust as needed. |
| Don’t Overmix | Prevents tough, dry cookies by avoiding too much gluten. | Stop when dough is smooth and slightly elastic. |
Conclusion
You now have all the tools to confidently tackle even the stiffest cookie dough in your stand mixer. By using the dough hook, maintaining low speeds, and consistently scraping down the bowl, you’ll achieve that perfect consistency. Remember to listen to your mixer and avoid overmixing to keep your cookies tender.
Mastering this technique means more delicious, perfectly textured cookies every time. Go forth and bake with confidence, knowing your stand mixer is up to the task!
Frequently Asked Questions
How long should I chill stiff cookie dough after kneading?
After kneading, most stiff cookie doughs benefit from chilling for at least 30 minutes, or up to 2-3 days. Chilling helps the flavors meld, prevents spreading, and makes the dough easier to handle and shape.
Can I use a hand mixer for stiff cookie dough?
While you can try, a hand mixer is generally not recommended for stiff cookie dough. The motor isn’t powerful enough, and the beaters aren’t designed for kneading. This can strain your mixer or result in under-kneaded dough.
What if my dough is still crumbly even after adding liquid?
If your dough remains crumbly after adding small amounts of liquid, ensure you’re letting the mixer run long enough between additions. Sometimes it just needs more time to fully incorporate. Also, check your recipe for precise liquid measurements; large deviations can be hard to correct.
Will kneading stiff cookie dough damage my stand mixer?
Kneading stiff dough can put a strain on your mixer, but using the dough hook and low speeds minimizes the risk. Monitor your mixer for signs of overheating like a strained sound or warm motor. If you notice these, give your mixer a break to protect its motor.
Does the type of flour affect how stiff the cookie dough is?
Yes, the type of flour significantly impacts dough stiffness. Flours with higher protein content, like bread flour, absorb more liquid and can result in stiffer dough. All-purpose flour is typically balanced, but whole wheat flour also makes dough stiffer due to its bran content.
