
What Can You Make with a Pasta Roller Attachment?

You can make a surprisingly wide variety of delicious things with a pasta roller attachment! Beyond just classic fettuccine and spaghetti, you can create fresh lasagna sheets, delicate ravioli, and even fun shapes like bow ties. It’s a fantastic way to impress your friends and family with homemade pasta.
We found that a good pasta roller attachment can truly transform your kitchen experience. It allows you to control the thickness and width of your pasta precisely. Plus, it opens up possibilities for creative fillings and dough recipes you might not have considered before.
- Make fresh fettuccine, spaghetti, lasagna, and ravioli.
- Create fun, custom pasta shapes easily.
- Control pasta thickness for perfect results.
- Elevate your home cooking with restaurant-quality pasta.
Let’s dive into all the yummy possibilities your pasta roller attachment offers. We’ll cover everything from basic noodles to more adventurous creations.
Discover What You Can Create with a Pasta Roller Attachment
Your pasta roller attachment is more than just a noodle maker. It’s a gateway to a world of homemade pasta possibilities. You can create delicious, fresh pasta that tastes far superior to anything from a box. We found that it really ups your game in the kitchen. Let’s see what amazing dishes you can whip up.
Crafting Classic Pasta Shapes with Ease
The most common use for a pasta roller is creating basic noodles. You can make everything from thin spaghetti to thick linguine. It’s surprisingly simple to achieve consistent results. This is where many home cooks start their pasta-making journey. And for good reason – it’s incredibly satisfying!
Spaghetti and Fettuccine: The Staples
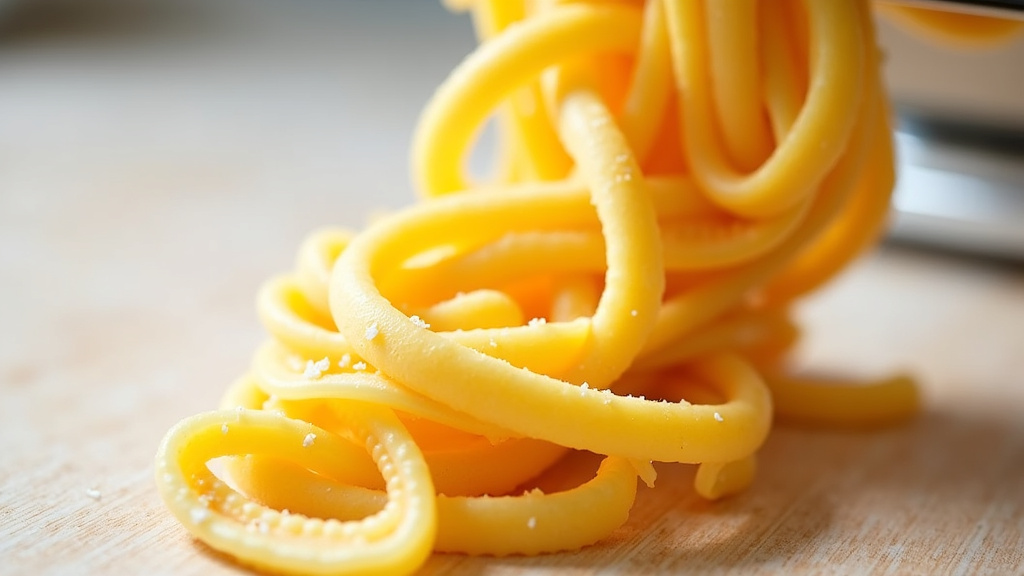
Your pasta roller attachment typically comes with settings for common noodle widths. You can roll out sheets of dough and then pass them through the cutting mechanism. For spaghetti, you’ll want a thinner cut. Fettuccine requires a slightly wider cut. We found that getting the dough to the right consistency is key here. It should be firm but pliable. Think of it like playdough, but tastier!
Many chefs suggest adding a bit of semolina flour to your dough. This gives the pasta a nice texture and helps it hold its shape. You can experiment with different flour blends too. For instance, a mix of all-purpose and semolina flour often works well. This simple step can make a big difference in your final pasta.
Lasagna Sheets: Building a Better Bake
Forget the dry, brittle lasagna noodles from the store. Your pasta roller can create perfectly thin and pliable lasagna sheets. You simply adjust the roller to your desired thickness. Many pasta makers have a setting that’s just right for this. Roll out a wide sheet of dough. You can then cut it to fit your baking dish.
We found that rolling the sheets slightly thicker for lasagna can be a good idea. This gives them more structure to hold up to the rich sauces and cheese. Some recipes even suggest boiling the fresh lasagna sheets for a minute or two before layering. However, many modern recipes call for using them uncooked. They absorb moisture from the sauce during baking. This results in a wonderfully tender lasagna (Cleveland Clinic).
Beyond the Basics: Creative Pasta Creations
Once you’ve mastered the basic noodles, your pasta roller opens up even more creative avenues. Think about stuffed pastas and unique shapes. It’s time to really have some fun in the kitchen!
Ravioli and Stuffed Pastas: A Delightful Discovery
Making ravioli at home might seem daunting, but your pasta roller attachment makes it achievable. You’ll roll out two thin sheets of pasta dough. One sheet will be the base, and the other will be the top. You’ll spoon your filling onto the base sheet. Then, you place the second sheet over the top.
Your pasta roller attachment often has a specific ravioli attachment. This attachment helps seal the edges of the pasta. It also cuts the ravioli into individual portions. If you don’t have a dedicated ravioli attachment, you can use a fluted pastry wheel. Just be sure to press down firmly to seal the filling inside. We found that practicing the sealing technique is important. This prevents your delicious fillings from escaping during cooking.
What kind of fillings can you make? The possibilities are endless! Consider classic ricotta and spinach. Or try a savory mushroom and herb blend. Even a sweet ricotta filling for a dessert ravioli can be a fun twist. Experts suggest keeping fillings relatively dry. Too much moisture can make the pasta difficult to seal and prone to opening (National Pasta Association).
Other Stuffed Pasta Shapes
Beyond ravioli, you can make other types of stuffed pasta. Think about tortellini, which are small, ring-shaped pasta. Or consider agnolotti, which are typically smaller and folded differently than ravioli. Your pasta roller can help you create the uniform dough sheets needed for these. You’ll then fold and seal them by hand. Beyond ravioli, you can make other types of stuffed pasta; our guide covers the best stand mixer attachments for making pasta dough.
The key is to have a consistent dough thickness. Your pasta roller ensures this. This uniformity helps all your stuffed pasta pieces cook evenly. We found that a slightly thicker dough works best for more robust fillings. It gives the pasta more strength to hold heavier ingredients.
Fun and Fancy Shapes
Do you want to make pasta that looks as good as it tastes? Your pasta roller can help! Many attachments come with different cutters. Some can create shapes like farfalle (bow ties) or mafaldine (wide noodles with ruffled edges). Even without special cutters, you can get creative.
Try cutting your pasta sheets into strips. You can then twist them or fold them into unique designs. A simple technique is to cut strips of varying widths. Then, layer them and twist them for a rustic look. We found that adding a little color to your dough can also make a big impact. Think about using spinach for green dough or beet juice for red. This adds visual appeal without altering the flavor much.
Customizing Thickness and Texture
One of the biggest advantages of using a pasta roller attachment is control. You get to decide exactly how thick or thin your pasta will be. This level of customization is hard to achieve with store-bought pasta. It affects not only the look but also the texture and cooking time of your pasta.
Achieving the Perfect Bite
Thinner pasta, like angel hair, cooks very quickly. It’s perfect for light sauces. Thicker pasta, like pappardelle, has a more substantial bite. It stands up well to rich, hearty sauces. Your pasta roller has numbered settings. These settings allow you to gradually thin your dough. Start with a thicker setting and pass the dough through successively thinner settings.
We found that many home cooks prefer a medium thickness for most applications. This offers a good balance. It’s versatile enough for various sauces. It also cooks in a reasonable amount of time. Many guidelines on pasta making suggest passing the dough through the same setting multiple times. This can help achieve a smoother texture (The American Culinary Federation).
Experimenting with Dough Types
Your pasta roller isn’t just for standard egg pasta. You can use it with other doughs too. Try making pasta with just flour and water. This is common in many Southern Italian traditions. It results in a different texture and flavor. Many Italian cooks swear by this simpler approach for certain dishes.
We found that semolina flour is excellent for water-based doughs. It gives them a firm texture and a slightly nutty flavor. You can also experiment with adding herbs or spices directly into the dough. Dried oregano, chili flakes, or even a pinch of turmeric can add a unique touch. Just be sure your dough is firm enough to handle the roller.
Practical Uses and Time-Saving Tips
Using your pasta roller attachment can save you time in the long run. While there’s an initial setup and cleanup, the actual pasta making is fast. You can make large batches and freeze them for later. This means you always have fresh pasta on hand.
Batch Making and Freezing
When you’re ready to make pasta, consider doubling or tripling your recipe. Roll out the dough and cut your desired shapes. Before they dry out too much, you can freeze them. Lay the pasta pieces flat on a baking sheet lined with parchment paper. Ensure they aren’t touching. Freeze until solid.
Once frozen, transfer the pasta to airtight freezer bags or containers. This prevents freezer burn. When you’re ready to cook, you can usually cook the frozen pasta directly. You might need to add an extra minute or two to the cooking time. We found that freezing works best for basic noodles. Stuffed pastas can sometimes stick together more.
A Checklist for Pasta Roller Success
Here’s a quick rundown to help you get the most out of your pasta roller attachment:
- Ensure your dough is not too sticky.
- Start with thicker roller settings and gradually decrease.
- Pass dough through each setting at least once.
- Dust cut pasta lightly with flour to prevent sticking.
- Freeze portions for future meals.
- Clean your attachment promptly after use.
The Kitchen Tool That Keeps on Giving
Your pasta roller attachment is a versatile tool. It allows you to create a wide array of delicious pasta dishes. From simple weeknight dinners to impressive holiday meals, it’s a real asset. We found that the joy of serving homemade pasta is truly special. It’s a taste of tradition right in your own kitchen.
Conclusion
You’ve seen that your pasta roller attachment is far more than a one-trick pony. It empowers you to create everything from classic spaghetti to delicate ravioli and even fun, custom shapes. Mastering its settings allows you precise control over thickness and texture. This means consistently delicious pasta every time. Don’t let your attachment gather dust! Your next step? Pick a recipe you love and start rolling. You’ll be amazed at the fresh pasta you can serve.
Frequently Asked Questions
Can I make gluten-free pasta with a pasta roller attachment?
Making gluten-free pasta with a roller can be challenging. Gluten-free flours don’t have the same elasticity as wheat flours. You’ll likely need a specialized gluten-free pasta dough recipe. We found that these doughs often require more hydration. They might also be more difficult to handle through the roller.
How do I clean my pasta roller attachment?
Cleaning is usually simple. Never submerge the roller in water. Instead, use a dry brush or a soft cloth to remove dough remnants. For stubborn bits, try running a small piece of dough through the rollers. This often picks up dried dough. Then, brush it clean again.
What’s the best way to store fresh pasta made with a roller?
For short-term storage, lightly dust fresh pasta with flour. You can then refrigerate it in an airtight container for 1-2 days. For longer storage, freezing is best. Lay the pasta flat on a baking sheet until firm, then transfer to freezer bags. This prevents it from sticking together.
Is it worth buying a pasta roller attachment if I only make pasta occasionally?
If you enjoy fresh pasta and want better quality than store-bought, it can be worth it. We found the results are far superior. Even occasional use can be very rewarding. Consider how often you’d realistically make pasta. The joy of homemade might outweigh the initial cost.
Can I use my pasta roller attachment for doughs other than pasta?
Yes, you can use your roller for other thin doughs! Many people use them for rolling out pie crusts or puff pastry. Just ensure your dough is firm enough. Very soft or sticky doughs may not work well. Always check your attachment’s manual for recommended uses.
