
Can You Make Sausage in a Stand Mixer?

Yes, you can absolutely make sausage in a stand mixer, and it’s a surprisingly efficient way to tackle the task. You might think a stand mixer is just for baking, but its powerful motor and mixing attachments make it a great tool for grinding and mixing sausage ingredients. It’s a game-changer for homemade sausage.
Many home cooks wonder if their kitchen appliance can do more than its usual job. We’ve found that with the right attachments, your stand mixer can significantly speed up the sausage-making process. It helps ensure your ingredients are evenly mixed and properly ground for the best texture and flavor. It’s about maximizing your kitchen tools.
- Stand mixers can indeed make sausage.
- Use the meat grinder attachment for best results.
- Ensure meat is very cold for efficient grinding.
- Mix until ingredients are just combined, don’t overmix.
- Clean attachments thoroughly after use.
Ready to see how your stand mixer can transform your sausage-making game? Let’s walk through exactly how it works step by step.
Making Sausage With Your Stand Mixer: Is It Possible?
You might be surprised, but yes, your stand mixer is a fantastic tool for making sausage. It’s more than just for cakes and cookies. We found that with the right attachments, it can grind meat and mix your sausage ingredients efficiently. This makes homemade sausage much more accessible for home cooks.
The Stand Mixer Meat Grinder Attachment Explained
The secret weapon for making sausage in your stand mixer is the meat grinder attachment. Most major stand mixer brands offer one. These attachments typically include a grinding plate with holes and a blade to push the meat through. You can also often find sausage stuffer tubes that work with these grinder attachments.
Choosing the Right Meat Grinder Attachment
When you look for a meat grinder attachment, check for compatibility with your specific stand mixer model. They usually come with different-sized plates. A finer plate gives you a smoother texture, while a coarser plate results in a chunkier sausage. For most classic sausage recipes, a medium plate works wonderfully.
Essential Steps Before You Start Grinding
Preparation is key for sausage making. Your meat needs to be very cold. Some experts even suggest freezing the meat for about 30 minutes before grinding. This helps the meat cut cleanly instead of smearing. Cold meat prevents the fat from becoming mushy, which is important for texture.
Preparing Your Meat and Ingredients
Cut your meat into strips or cubes that will easily fit into the grinder’s feed tube. Remove any large pieces of fat or connective tissue if your recipe calls for it. Also, make sure any spices or other flavorings you plan to add are measured out and ready to go. This makes the mixing process smooth.
Chilling Your Grinder Parts
Don’t forget to chill your meat grinder attachment parts. The grinding plate, blade, and even the feed tube should be cold. You can put these parts in the freezer for about an hour before you plan to grind. This is another step that helps keep the meat cold as it goes through the grinder, ensuring a better final texture.
Grinding the Meat: Step-by-Step
Once everything is prepped and chilled, you’re ready to grind. This is where your stand mixer truly shines. It takes the hard work out of grinding meat, which used to be a very labor-intensive process. Your mixer’s motor handles the heavy lifting.
Assembling the Grinder Attachment
Follow the manufacturer’s instructions for assembling your meat grinder attachment. Typically, you’ll insert the blade onto the auger, then the grinding plate, and secure it with the locking ring. Make sure everything is snug but not overtightened. Then, attach the grinder housing to your stand mixer’s power hub.
The Grinding Process
Turn your stand mixer on a low speed setting. Gradually feed the chilled meat strips into the feed tube, using the food pusher to guide them. Never force the meat. Let the auger do the work. If you’re grinding a large batch, you might need to grind the meat twice for a finer texture.
| Sausage Type | Grinding Plate Size | Recommended Mixer Speed | Texture Goal |
|---|---|---|---|
| Breakfast Sausage | Medium (approx. 4.5mm) | Low (Speed 2-3) | Slightly coarse, holds together well |
| Italian Sausage | Medium to Coarse (approx. 6mm) | Low (Speed 2-3) | Visible chunks of meat and fat |
| Bratwurst | Medium (approx. 4.5mm) | Low (Speed 2-3) | Fine but still has some bite |
Using the correct speed and plate size is important. We found that keeping the speed low prevents the meat from overheating. Overheating can lead to a greasy, mushy sausage. It’s better to take your time and get it right. Think of it as a gentle, consistent process. Using the correct speed and plate size is important with your meat grinder attachment.
Mixing Your Sausage Ingredients
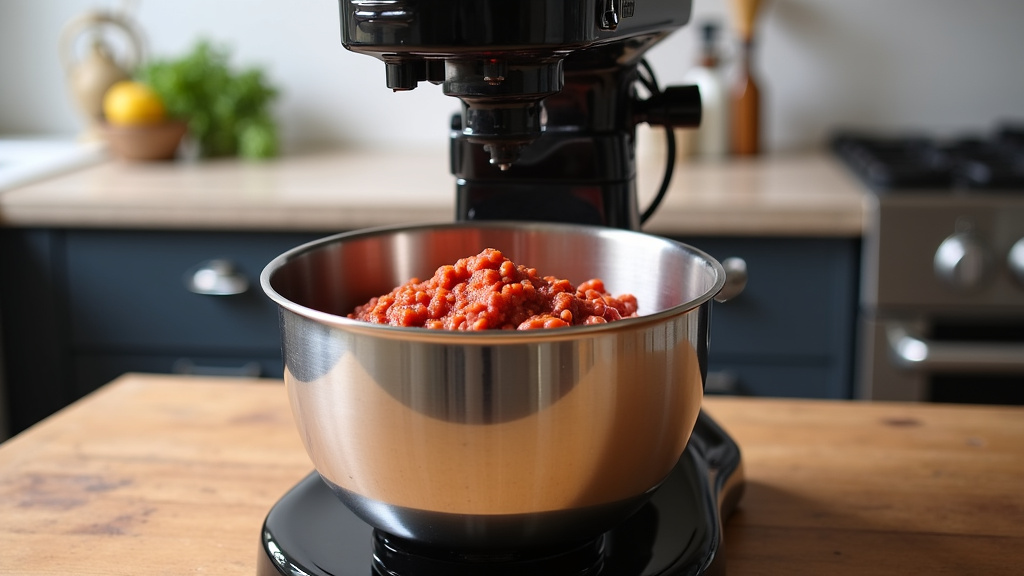
After grinding, it’s time to mix your seasonings into the meat. This is another area where the stand mixer excels. You’ll use the flat beater attachment or the dough hook for this step. Proper mixing ensures your spices are evenly distributed throughout the meat.
Choosing the Right Mixer Attachment
For mixing sausage, the flat beater attachment is generally preferred. It covers a wide area and effectively combines the meat with the spices without overworking it. The dough hook can also work, but it might be a bit too aggressive and could lead to a tougher sausage if you’re not careful. You want to combine, not pulverize.
The Mixing Technique
Add your ground meat to the mixer bowl. Sprinkle your measured spices and any other ingredients evenly over the meat. Start mixing on a low speed. Mix just until everything is combined. You’ll see the spices disappear into the meat. Be careful not to overmix!
Why Overmixing is Bad for Sausage
Overmixing can break down the meat proteins too much. This develops gluten-like strands, which can make your sausage tough and rubbery. Many sausage makers suggest mixing only until the spices are distributed. A good rule of thumb is about 30-60 seconds on low speed. Your goal is even seasoning, not a paste.
Testing for Seasoning
Before you stuff your sausage, it’s wise to test the seasoning. Take a small portion of the meat mixture. Form it into a small patty and cook it in a skillet. Taste it and adjust the seasonings as needed. This is your chance to get the flavor just right.
Cleaning Your Stand Mixer Attachments
Cleanliness is paramount in food preparation. This is especially true when dealing with raw meat. You’ll want to clean your stand mixer and its attachments thoroughly immediately after you finish making sausage.
Disassembling and Washing
Take apart the meat grinder attachment completely. Wash all parts, including the blade, plates, auger, and housing, with warm, soapy water. Use a brush to get into any tight spots. Rinse everything thoroughly. For the mixer bowl and beater attachment, a good wash with soap and water works well.
Drying and Storing
Ensure all parts are completely dry before reassembling or storing. Moisture can lead to rust, especially on metal grinder parts. Some manufacturers recommend lightly oiling metal parts with food-grade mineral oil after drying to prevent rust. Store attachments in a dry place.
A good clean-up routine ensures your equipment lasts longer and is safe for future use. You wouldn’t want any lingering meat bits to spoil your next baking project, right? Taking a few extra minutes to clean properly makes a big difference.
A Quick Sausage-Making Checklist
- Ensure your stand mixer has a meat grinder attachment.
- Cut meat into cubes and make sure it’s very cold.
- Chill your grinder parts in the freezer.
- Use a low mixer speed for grinding.
- Mix seasoning until just combined, avoid overmixing.
- Clean all parts thoroughly after use.
Conclusion
You’ve learned that your stand mixer is a powerful tool for making homemade sausage. With the right meat grinder attachment and a few key preparation steps, you can efficiently grind meat and mix your ingredients. Remember to keep everything cold for the best texture and avoid overmixing to prevent tough sausage. Cleaning your equipment thoroughly afterward ensures it’s ready for your next culinary adventure.
Your next step? Gather your ingredients, grab that meat grinder attachment, and get ready to create delicious, custom sausage right in your own kitchen. You’ve got this!
Frequently Asked Questions
What is the best type of meat to use for stand mixer sausage?
Pork is a classic choice for sausage due to its fat content, which adds flavor and moisture. You can also use a blend of pork and beef, or even poultry for lighter options. Aim for a meat-to-fat ratio of around 80/20 for the best results.
Can I use a regular food processor to make sausage instead of a stand mixer?
A food processor can grind meat, but it tends to pulverize it, leading to a mushy texture. A stand mixer with a meat grinder attachment provides better control over the grind size and texture, which is essential for good sausage.
How do I prevent my sausage from being too greasy?
Using meat with a good fat content is important, but too much can make it greasy. The 80/20 ratio is a good starting point. Also, ensure your grinder and meat are kept very cold throughout the process; this helps the fat stay solid and grind cleanly.
My stand mixer attachment feels like it’s struggling; what should I do?
If your mixer is struggling, your meat might be too warm or too large. Ensure the meat is well-chilled and cut into manageable pieces for the grinder. Grinding the meat twice might also be necessary for a finer texture, but take breaks if the motor feels overworked.
How long can I store homemade sausage before cooking?
Freshly made sausage can typically be stored in the refrigerator for 1-2 days. For longer storage, it’s best to freeze it. Properly wrapped sausage can last in the freezer for 2-3 months. Always cook sausage thoroughly to an internal temperature of 160°F (71°C).
