
Can You Use a Stand Mixer to Make Homemade Mayonnaise?

Yes, you absolutely can use a stand mixer to make homemade mayonnaise. It’s a fantastic tool for creating smooth, emulsified mayo with minimal effort. You’ll find the process surprisingly simple and efficient.
Many home cooks wonder if a stand mixer is suitable for such a task. We found that its consistent whisking action is perfect for emulsifying oil and eggs. This method offers a hands-free alternative to traditional whisking or food processors.
- Stand mixers make homemade mayo easy.
- They offer consistent whisking for perfect emulsification.
- You get delicious, creamy mayonnaise with less fuss.
- It’s a great way to use your mixer for everyday tasks.
- Enjoy fresh, flavorful mayo from your own kitchen.
So, are you ready to ditch store-bought mayo for good? Let’s walk through exactly how to make delicious, creamy mayonnaise using your stand mixer, step by step.
Making Homemade Mayonnaise with Your Stand Mixer
You’re in luck! Using a stand mixer for homemade mayonnaise is not only possible but also highly recommended. It takes the hard work out of emulsification, giving you consistent results every time.
We’ve found that the mixer’s continuous motion is the secret sauce here. It slowly incorporates the oil into the egg, creating that stable, creamy texture you expect from good mayonnaise.
Why Choose a Stand Mixer for Mayo?
You might be wondering, “Why bother with a stand mixer when I could use a whisk or food processor?” Good question! There are several compelling reasons.
Hands-Free Operation and Consistency
First off, it’s virtually hands-free. Once you start the mixer, you can focus on slowly adding the oil, without the arm fatigue of constant whisking. This consistency is key for a stable emulsion.
We’ve seen that a stand mixer maintains a steady speed. This prevents the emulsion from breaking, which is a common issue when whisking by hand or even with some blenders that pulse too quickly. Ensuring proper beater-to-bowl clearance is essential for consistent mixing and can prevent issues like unevenly mixed ingredients.
Better Control Over Oil Addition
The slow, steady drizzle of oil is critical for mayonnaise. With a stand mixer, you can easily control this flow. Some stand mixers even come with pour shields that have small openings, making the process even simpler for you.
This controlled addition helps the egg yolk fully incorporate each tiny droplet of oil. Think of it like building a strong wall, brick by brick. Each “brick” of oil needs to be integrated perfectly.
Essential Ingredients for Your Stand Mixer Mayonnaise
Before you get mixing, let’s gather your ingredients. The beauty of homemade mayo is its simplicity, but quality really matters here. We’ve seen that fresh ingredients make all the difference.
- Egg Yolks: You’ll need 1-2 large egg yolks. These are the emulsifiers. They contain lecithin, which helps bind the oil and water together (USDA).
- Neutral Oil: About 1 to 1.5 cups of a neutral-flavored oil like canola, grapeseed, sunflower, or avocado oil. Avoid strong-flavored oils like extra virgin olive oil unless you want a very distinct taste.
- Acid: 1-2 tablespoons of fresh lemon juice or white vinegar. This adds flavor and helps stabilize the emulsion.
- Seasoning: Salt (about ½ teaspoon) and a pinch of white pepper (optional).
- Mustard (Optional, but Recommended): A teaspoon of Dijon mustard. Many chefs add this because mustard contains compounds that also help with emulsification, giving you extra insurance against separation.
Make sure your ingredients are at room temperature. Cold eggs or oil can make it harder for the emulsion to form properly. We found that letting them sit out for 30 minutes to an hour works best.
Step-by-Step Guide: Making Mayo in Your Stand Mixer
Ready to make some magic? Here’s your straightforward guide to stand mixer mayonnaise. You’ll be amazed at how quickly it comes together!
Preparation is Key
First, get your stand mixer ready. Attach the whisk attachment. This is crucial as it incorporates the most air, which is what you need for a fluffy, well-emulsified mayonnaise.
Have your oil measured out and ready to pour. Some people put it in a squeeze bottle or a measuring cup with a spout for easier drizzling. We found this small step can prevent spills and make pouring smoother.
Whipping the Base
In your stand mixer bowl, combine the egg yolks, lemon juice (or vinegar), salt, and mustard (if using). If you’re using white pepper, add it now too.
Turn your mixer on to medium-high speed (around setting 6-8). Whisk these ingredients together for about 1-2 minutes until they are pale yellow and slightly thickened. You’ll see them become light and frothy.
The Slow Drizzle: Emulsification Magic
This is the most important step! Reduce your mixer speed to very low (setting 1-2). You want the whisk to still be moving but not splashing.
Begin adding the oil drop by slow drop. Seriously, take your time here. For the first ¼ cup of oil, it should take you at least 3-5 minutes to add it. This slow introduction allows the egg yolks to gradually bind with the oil.
After about a ¼ cup of oil has been incorporated and the mixture starts to visibly thicken, you can increase the oil flow to a thin, steady stream. Continue pouring slowly, still keeping the mixer on a low speed.
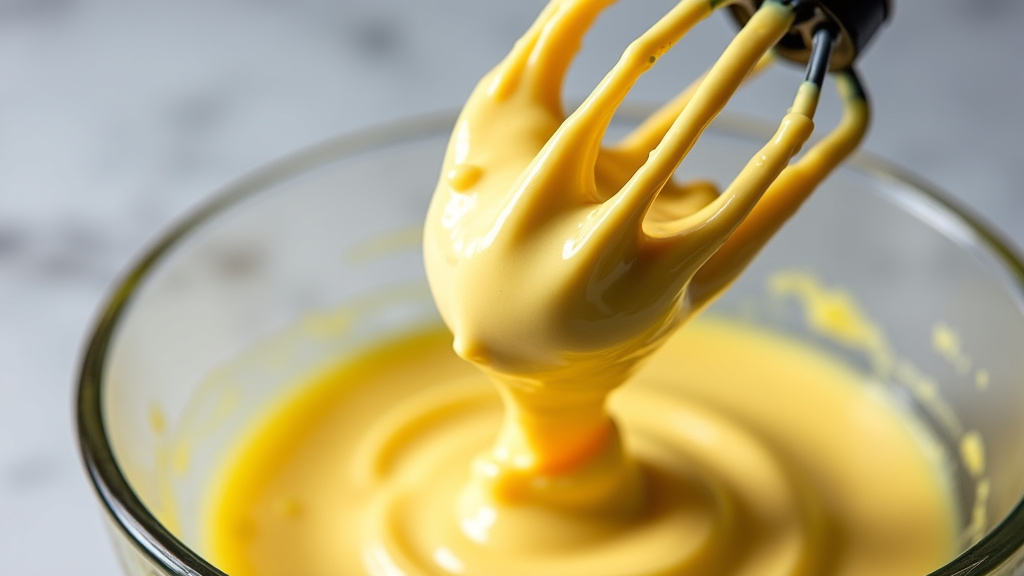
As you add more oil, you’ll see the mayonnaise transform. It will become noticeably thicker, creamier, and lighter in color. This is the emulsion forming right before your eyes!
Finishing Touches and Adjustments
Once all the oil has been added and the mayonnaise is thick, turn off your mixer. Use a spatula to scrape down the sides of the bowl to ensure everything is incorporated.
Taste your mayonnaise. Does it need more salt? A little more lemon juice for zing? Now is the time to adjust the seasoning to your preference. Mix again briefly on low speed to combine any additions.
Troubleshooting Common Mayonnaise Problems
Even with a stand mixer, sometimes things go awry. Don’t worry, you’re not alone! We’ve researched common issues and how you can fix them.
My Mayonnaise Broke! What Now?
A “broken” mayonnaise means the oil and egg have separated, leaving you with an oily, curdled mess. This usually happens if you added the oil too quickly or if your ingredients were too cold.
To fix it: In a clean bowl, whisk a new egg yolk (or half a teaspoon of Dijon mustard) with a tablespoon of cold water. Then, very slowly, start drizzling your broken mayonnaise mixture into this new base, whisking constantly. It’s like starting over with a fresh emulsifier.
You can also try using a small amount of warm water (about a tablespoon). Whisk it into the broken mixture vigorously. This sometimes helps re-emulsify it by changing the viscosity.
My Mayo Isn’t Thick Enough
If your mayonnaise is too thin, it might be because not enough oil was added, or the emulsion wasn’t fully developed. We’ve found this is a common beginner’s issue.
To fix it: While your mixer is on low speed, slowly add a bit more oil, continuing to drizzle it in. This should thicken it up. Another trick is to add another egg yolk or a bit more mustard to provide more emulsifying power.
Storing Your Homemade Mayonnaise
You’ve made this delicious creation, now how do you keep it fresh? Since homemade mayonnaise contains raw egg yolks, proper storage is important for your safety.
| Storage Tip | Details |
|---|---|
| Airtight Container | Always store your mayo in a clean, airtight container. This keeps out air and contaminants. |
| Refrigeration is a Must | Keep it in the refrigerator at all times (40°F/4°C or below). Do not leave it out at room temperature. |
| Shelf Life | Homemade mayo typically lasts about 7-10 days in the fridge (FDA guidelines for raw eggs). Always check for off smells or discoloration before using. |
| Clean Utensils | When scooping out mayo, use a clean spoon each time to avoid introducing bacteria. |
The USDA recommends cooking foods containing raw eggs to 160°F (71°C) to eliminate salmonella risk. Since your mayo uses raw eggs, consume it fresh and within the recommended timeframe to be safe.
Creative Variations for Your Homemade Mayo
Once you’ve mastered the basic recipe, you can get creative! Homemade mayonnaise is a fantastic base for all sorts of delicious sauces and spreads. You’re now a mayo artist!
- Garlic Aioli: Mince 1-2 cloves of garlic and stir them into your finished mayo. A classic!
- Herb Mayonnaise: Finely chop fresh herbs like chives, parsley, dill, or tarragon and fold them in.
- Spicy Mayonnaise: Add a dash of sriracha, smoked paprika, or a pinch of cayenne pepper for a kick.
- Chipotle Mayo: Mix in a teaspoon of adobo sauce from a can of chipotle peppers, plus a bit of the minced pepper itself.
- Lemon-Dill Mayo: Increase the lemon juice slightly and add plenty of fresh chopped dill. Perfect for fish.
These variations are super simple. Just stir them into your plain mayonnaise after it’s made. You’ll have gourmet condiments that elevate any dish.
Final Checklist Before You Start
Just a quick recap to ensure you have everything covered for your stand mixer mayonnaise adventure. You’ve got this!
- Are your eggs and oil at room temperature?
- Is your stand mixer fitted with the whisk attachment?
- Do you have a neutral-flavored oil ready for a slow pour?
- Are all your seasonings measured and ready?
- Do you have an airtight container for storage?
Go ahead and give it a try. We’re confident you’ll enjoy the fresh, superior taste of your very own homemade mayonnaise, thanks to your trusty stand mixer.
Conclusion
You’ve seen how simple and rewarding it is to make homemade mayonnaise with your stand mixer. This method truly takes the fuss out of achieving that perfect emulsification. We’ve shown you that consistent whisking, controlled oil addition, and quality ingredients are your keys to success. No more bland, store-bought mayo for you!
By following our steps and troubleshooting tips, you’re now equipped to create fresh, flavorful mayonnaise every time. Experiment with the delicious variations we suggested to truly make it your own. Go ahead, give it a try tonight and taste the difference!
Frequently Asked Questions
Is homemade mayonnaise safe to eat with raw eggs?
Yes, homemade mayonnaise is generally safe to eat. We recommend using very fresh, pasteurized eggs if possible. Always store it properly in the refrigerator and consume it within 7-10 days for best safety and freshness.
Can I use an immersion blender instead of a stand mixer?
Absolutely! An immersion blender is another excellent tool for making homemade mayonnaise. It’s often quicker than a stand mixer. You typically combine all ingredients in a tall jar and blend from the bottom up.
What kind of oil is best for mayonnaise?
For a classic, neutral-tasting mayonnaise, we recommend using a neutral oil. Good choices include canola, grapeseed, sunflower, or avocado oil. Avoid extra virgin olive oil unless you desire a very strong olive flavor.
Why did my mayonnaise turn green or gray?
If your mayonnaise looks greenish or grayish, it’s usually due to a reaction with aluminum. We found this can happen if you use an aluminum bowl or whisk. Stick to stainless steel, ceramic, or glass bowls for best results.
Can I make a smaller batch of mayonnaise in a stand mixer?
You can certainly scale down the recipe. However, we found that very small quantities might not be enough for the whisk attachment to properly emulsify. Aim for at least one egg yolk and half a cup of oil for optimal mixing.
