
How to Make Homemade Mayonnaise in a Stand Mixer?
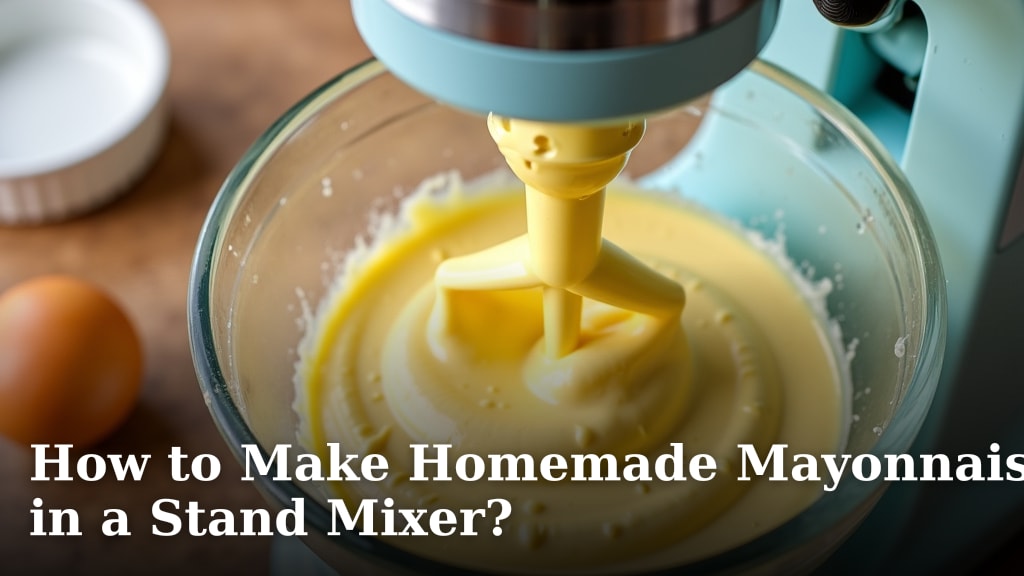
You can make homemade mayonnaise in a stand mixer quite easily, creating a rich, creamy condiment with minimal effort. This method lets your mixer do the hard work, freeing you up for other kitchen tasks.
Ditch store-bought jars for a fresh, vibrant alternative that tastes far better. This simple technique uses a few common ingredients and delivers delicious results every time, perfect for sandwiches, dips, or dressings. You’ll wonder why you ever bought mayo again.
- Whip up fresh mayo in minutes.
- Use simple ingredients from your pantry.
- Achieve perfect consistency with a stand mixer.
- Enjoy a superior taste to store-bought options.
Ready to make your own delicious, homemade mayonnaise? Let’s walk through exactly how to make homemade mayonnaise in a stand mixer, step by step.
Crafting Homemade Mayonnaise with Your Stand Mixer
Making your own mayonnaise at home is simpler than you might think. With a stand mixer, most of the hard work is done for you. This guide walks you through each step, ensuring a perfect batch every time.
You’ll need just a few basic ingredients. The key is to add the oil slowly. This creates a stable emulsion, giving you that rich, creamy texture you love.
Gathering Your Ingredients and Equipment
Before you begin, make sure you have everything ready. This makes the process smooth and enjoyable. What exactly do you need?
You probably have most of these items in your kitchen already. Fresh ingredients always yield the best flavor, so try to use high-quality options.
Essential Ingredients List
Good mayonnaise starts with good ingredients. Freshness is key, especially for the eggs.
- 1 large egg yolk: This is your emulsifier. It binds the oil and acid together.
- 1 teaspoon Dijon mustard: Adds flavor and helps with emulsification.
- 1 tablespoon fresh lemon juice or white vinegar: Provides tang and balances the richness.
- 1/2 teaspoon salt: Enhances the overall flavor.
- 1 cup neutral-flavored oil: Such as canola, grapeseed, or sunflower oil. Avoid strong-tasting oils like extra virgin olive oil, which can make your mayo bitter.
Why a neutral oil? Because you want the mayonnaise flavor to shine, not be overshadowed by a strong oil taste.
Necessary Equipment Checklist
Your stand mixer is the star of this show. Make sure it’s clean and ready.
- Stand mixer with whisk attachment: This is crucial for consistent mixing. You might also want to learn how to adjust the beater to bowl height for optimal mixing performance.
- Measuring cups and spoons: For precise ingredient amounts.
- Small bowl: For separating the egg yolk.
- Squeeze bottle or measuring cup with a spout: This makes adding the oil slowly much easier.
- Airtight container: To store your finished mayonnaise.
Having a squeeze bottle for the oil is a game-changer. It helps you control the flow, which is vital for preventing separation.
The Step-by-Step Mixing Process
Now, let’s get to the fun part: making the mayo! This process relies on creating an emulsion. What does that mean? It means blending two liquids that usually don’t mix (like oil and water) into a stable, creamy mixture.
Your stand mixer makes this task incredibly easy. Just follow these steps carefully, and you’ll have homemade mayo in no time.
Initial Setup and Base Mixture
First, prepare your stand mixer and gather your initial ingredients. This sets the stage for success.
- Attach the whisk attachment to your stand mixer.
- In the mixer bowl, combine the egg yolk, Dijon mustard, lemon juice (or vinegar), and salt.
- Turn the mixer on to medium-high speed (around 6-8 on most mixers).
- Whip these ingredients together for about 30 seconds. You want them well combined and slightly foamy.
This initial whisking helps to dissolve the salt and integrate the acid and mustard. It also introduces some air, which aids in emulsification.
Slow Oil Incorporation for Emulsion
This is the most critical step. Go too fast, and your mayonnaise will “break” or separate. Patience is your friend here.
- With the mixer still running on medium-high, begin to add the oil in a very slow, steady stream. Think of it as a thin drizzle, almost a drip.
- For the first 1/4 cup of oil, add it drop by drop. This is where the emulsion truly begins to form.
- Once about 1/4 cup of oil has been incorporated and the mixture starts to thicken, you can slightly increase the oil flow to a thin, steady stream.
- Continue adding the rest of the oil this way, ensuring each bit is fully incorporated before adding more.
The mixture will visibly thicken and lighten in color as you add the oil. If it looks like it’s separating, stop adding oil and whip vigorously for a moment. Sometimes, adding a tiny splash of hot water (1/2 teaspoon) can help bring it back together, we found through research.
Achieving the Right Consistency
How do you know when it’s done? The consistency will tell you.
- After all the oil is added, continue to whip for another 30-60 seconds.
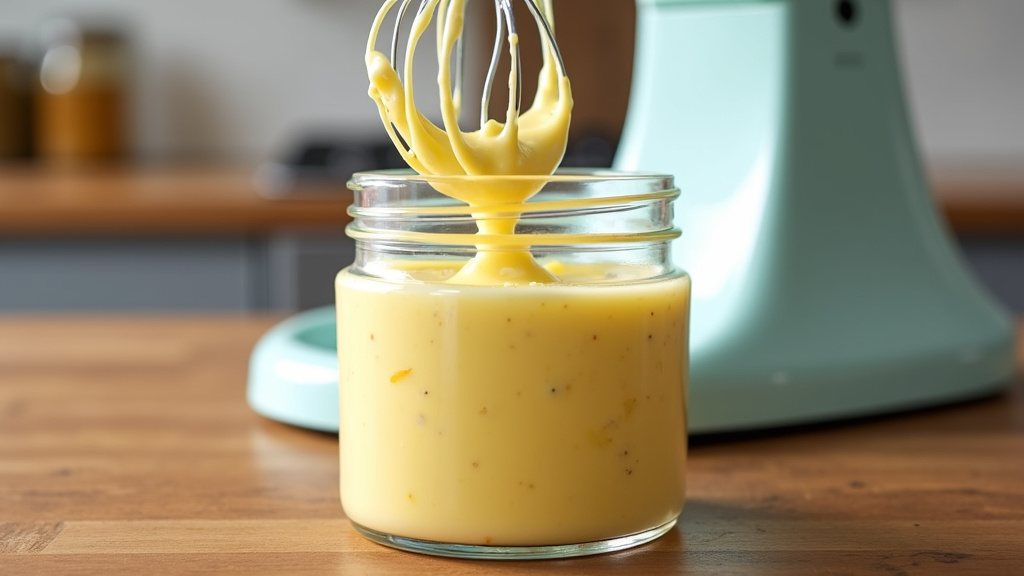
- The mayonnaise should be thick, pale yellow, and hold its shape. It should look like the store-bought mayo you’re used to, but perhaps even creamier.
- Scrape down the sides of the bowl with a spatula to ensure everything is mixed in.
If you prefer a thicker mayo, you can add a little more oil (1-2 tablespoons) very slowly, whipping constantly. For a thinner consistency, you can whisk in a teaspoon of water or lemon juice at the end.
Flavoring and Storing Your Homemade Mayonnaise
Once you’ve made your basic mayonnaise, the fun isn’t over. You can customize it! This is where homemade mayo truly shines – you control the flavor profile.
Proper storage is also important to keep your delicious creation fresh and safe to eat. How long does it last, anyway?
Customizing Your Mayonnaise
Plain mayonnaise is wonderful, but why stop there? Think of it as a blank canvas.
- Garlic Aioli: Add 1-2 cloves of minced fresh garlic to the base mixture.
- Herb Mayonnaise: Stir in 1-2 tablespoons of finely chopped fresh herbs like chives, dill, or parsley at the end.
- Spicy Mayonnaise: Add a dash of hot sauce, a pinch of cayenne pepper, or a teaspoon of sriracha.
- Smoky Mayonnaise: Mix in 1/2 teaspoon of smoked paprika or a drop of liquid smoke.
- Lemon-Herb Mayo: Increase the lemon juice slightly and add your favorite herbs.
Always taste and adjust. Start with a small amount of flavoring and add more until it’s just right for your palate.
Storage Guidelines and Safety Tips
Homemade mayonnaise, because it contains raw egg, needs to be handled with care. Many health organizations, such as the USDA, recommend caution with raw eggs.
- Refrigerate immediately: Transfer your mayonnaise to an airtight container as soon as it’s made.
- Shelf life: It will keep for up to 5-7 days in the refrigerator. Unlike store-bought mayo, it doesn’t have the same preservatives.
- Use fresh eggs: Always use the freshest eggs you can find, preferably pasteurized if you’re concerned about salmonella (though the acid in the recipe helps).
- Smell and appearance: If it smells off, looks discolored, or has any signs of mold, discard it immediately. When in doubt, throw it out.
We found through research that the acidity from the lemon juice or vinegar helps make the mayonnaise safer by inhibiting bacterial growth. Still, fresh is best for consumption.
Troubleshooting Common Mayonnaise Problems
Even with the best intentions, things can sometimes go awry. Don’t worry! Most mayonnaise mishaps can be fixed.
What if your mayo doesn’t thicken? Or what if it looks like cottage cheese?
My Mayonnaise Didn’t Thicken!
This is the most common issue. It usually happens because the oil was added too quickly at the beginning.
- Don’t panic! It can often be saved.
- In a separate, clean bowl, place one fresh egg yolk.
- Start whisking the fresh egg yolk on medium-high speed.
- Very slowly, a teaspoon at a time, begin to drizzle your broken mayonnaise into the new egg yolk while the mixer is running.
- Continue until all the broken mayo is incorporated and the mixture has thickened. It’s like restarting the emulsification process, but with a thicker base.
This method usually works because the fresh egg yolk provides new emulsifiers to bind the separated oil and egg mixture. It’s like giving your mayo a second chance at life.
My Mayonnaise Looks Curdled or Separated!
If your mayo looks like a broken sauce or has a grainy texture, it has “broken.” This is similar to not thickening, but often more visibly separated.
- Try the “fresh egg yolk” trick mentioned above.
- Alternatively, some experts suggest adding a teaspoon of hot water to the separated mixture and whisking vigorously. The heat can sometimes help reform the emulsion.
- Make sure your ingredients were not too cold. Room temperature ingredients emulsify more easily than cold ones. If your egg is straight from the fridge, let it sit out for 20-30 minutes.
Often, a broken mayo is a sign that the oil and egg never properly bonded. Going slowly with the oil is truly the secret weapon against this problem.
Enjoying Your Homemade Mayonnaise
You’ve done it! You’ve created a delicious, creamy condiment from scratch. Now, the best part: enjoying your culinary creation.
Homemade mayonnaise is so versatile. How will you use yours?
| Best Uses for Homemade Mayonnaise | Why Homemade is Better |
|---|---|
| Sandwiches and Wraps | Fresher taste, no preservatives, superior texture. |
| Potato Salad or Coleslaw | Elevates the entire dish with vibrant flavor. |
| Dips (e.g., aioli, ranch base) | Customizable flavors, richer base for mix-ins. |
| Dressings (e.g., Caesar, green goddess) | Adds a luxurious, homemade touch to salads. |
| Serving with Fries or Roasted Veggies | A simple, gourmet upgrade to everyday sides. |
The difference in taste between homemade and store-bought is truly remarkable. You’ll notice a brighter flavor and a much smoother, richer texture.
So go ahead, slather it on, mix it in, or dip something delicious into it. You made it yourself, and that’s something to be proud of!
Conclusion
You’ve seen how simple and rewarding making homemade mayonnaise in your stand mixer can be. By following these steps, you gain control over ingredients and flavor. No more preservatives or artificial additives in your mayo. Just fresh, delicious goodness made right in your kitchen.
Embrace the superior taste and texture that only homemade can offer. You can customize it endlessly to suit your culinary adventures. So, grab your stand mixer and whip up your first batch today. Your sandwiches, salads, and dips will thank you for it!
Frequently Asked Questions
Can I use an immersion blender instead of a stand mixer?
Yes, an immersion blender is a fantastic alternative for making homemade mayonnaise. The process is very similar; you just blend in a tall, narrow container. It often emulsifies even faster than a stand mixer.
What if my mayonnaise is too thin after following the recipe?
If your mayo is too thin, you likely added the oil too quickly or your ingredients were too cold. To fix it, try adding a fresh egg yolk to a clean bowl. Slowly drizzle your thin mayonnaise into the new egg yolk while continuously whisking until it thickens.
Can I use olive oil for homemade mayonnaise?
While technically possible, we don’t recommend using regular extra virgin olive oil. It has a strong, sometimes bitter flavor that can overpower your mayonnaise. Opt for a light or “virgin” olive oil, or stick to neutral oils like canola or grapeseed for the best results.
How long does homemade mayonnaise last in the refrigerator?
Homemade mayonnaise, due to its raw egg content and lack of preservatives, should be stored in an airtight container in the refrigerator for no more than 5-7 days. Always use fresh eggs and discard it if it smells or looks off.
Do I need to use pasteurized eggs for homemade mayonnaise?
Using pasteurized eggs is a good precaution if you are concerned about salmonella, especially for those with compromised immune systems, we found. While the acidity helps, pasteurized eggs offer an extra layer of safety. Otherwise, very fresh, high-quality eggs are usually sufficient.
