
How to Make Whole Wheat Bread in a Stand Mixer?

Yes, you absolutely can make delicious whole wheat bread in a stand mixer! Using your stand mixer for whole wheat bread means less kneading for you and a wonderfully soft, evenly mixed dough. It’s a fantastic way to get fresh, healthy bread without all the arm workout.
Many home bakers find that stand mixers make working with whole wheat flour much easier. This flour can sometimes be a bit trickier to handle than white flour. Your mixer’s dough hook will do the hard work, ensuring your dough develops properly. We found that this method consistently yields great results.
- Stand mixers simplify kneading whole wheat dough.
- They help achieve a consistently soft texture.
- It’s a low-effort way to bake fresh bread.
- This method is great for busy bakers.
Ready to bake your best loaf yet? Below, we’ll walk you through exactly how to make wonderful whole wheat bread using your stand mixer, step by step.
Baking Whole Wheat Bread with Your Stand Mixer
Making delicious whole wheat bread at home is totally achievable, especially with your trusty stand mixer. This appliance takes the grunt work out of kneading. You’ll end up with a beautifully developed dough. This method is a real game-changer for busy bakers. It ensures you get fresh, wholesome bread without a fuss.
Many bakers prefer using a stand mixer for whole wheat. The flour can be a bit tougher than all-purpose flour. Your mixer’s dough hook is designed to handle this. It develops the gluten structure needed for a great loaf. We’ve found this approach consistently produces a wonderful result. You’ll be amazed at how easy it is.
Gathering Your Whole Wheat Baking Essentials
Before you start, let’s make sure you have everything ready. Having your ingredients and tools prepared makes the whole process smoother. It’s like getting your ingredients prepped for a great recipe. Think of it as setting the stage for baking success.
Essential Ingredients for Your Loaf
You’ll need a few key ingredients to get started. The quality of your ingredients really impacts the final bread. We’ll focus on the basics for a simple, delicious loaf.
- Whole wheat flour: This is your star ingredient. Use 100% whole wheat flour for the most nutrients. You can also use a mix of whole wheat and all-purpose flour.
- Water: Lukewarm water is best for activating the yeast. Aim for a temperature between 105-115°F (40-46°C).
- Yeast: Active dry yeast or instant yeast will work. Check the expiration date to ensure it’s fresh.
- Salt: Salt adds flavor and controls yeast activity. Use fine sea salt or kosher salt.
- Sweetener: A touch of honey, maple syrup, or sugar feeds the yeast and adds a subtle sweetness.
- Fat: A little oil or melted butter makes the bread tender and moist. Olive oil or vegetable oil are good choices.
Tools You’ll Need
Beyond your stand mixer, a few other tools are helpful. These make the process easier and ensure better results.
- Stand mixer with dough hook: This is your main tool. Make sure the dough hook is clean and attached.
- Measuring cups and spoons: Accurate measuring is key in baking.
- Large bowl: For proofing the dough if it needs more space.
- Clean kitchen towel or plastic wrap: To cover the dough while it rises.
- Loaf pan: A standard 9×5 inch loaf pan is perfect.
- Wire rack: For cooling the bread after baking.
Setting Up Your Stand Mixer for Dough
Getting your stand mixer ready is simple. It’s mostly about attaching the right piece. Your mixer is designed for this task. It’s built to handle dough.
Attaching the Dough Hook
First, make sure your stand mixer is unplugged. This is for your safety. Locate the dough hook attachment. It usually looks like a J or a C shape. Slide it onto the mixer’s beater shaft. Give it a gentle twist to lock it into place. Your mixer manual can show you the exact method for your model. It’s usually quite straightforward.
Adding Ingredients to the Mixer Bowl
Now, let’s get the ingredients into the mixer bowl. It’s usually best to add the wet ingredients first. This helps them mix more evenly. Then, add your dry ingredients on top. This prevents the yeast from clumping together right away. Think of it as creating a layered effect for optimal mixing.
The Stand Mixer Dough-Making Process
This is where your stand mixer really shines. It does the hard work for you. You’ll be amazed at how quickly the dough comes together. The key is to let the mixer do its job.
Step 1: Mixing the Dough
Start by mixing on a low speed. This is usually speed 2 on most mixers. Let it mix for about 5-7 minutes. You’ll see the ingredients start to come together. The dough will begin to form a shaggy ball. It might still stick to the sides of the bowl a bit. That’s perfectly normal at this stage. Don’t be tempted to add more flour just yet. The dough will firm up as it kneads.
Step 2: Kneading the Dough
Once the dough has formed a shaggy mass, it’s time to knead. Increase the mixer speed slightly. A speed of 4 is often ideal. Let the mixer knead the dough for about 8-10 minutes. You’ll notice the dough becoming smoother. It will start pulling away from the sides of the bowl. It should look elastic and feel slightly tacky. This controlled kneading develops the gluten. That’s what gives bread its structure. Many experts say proper gluten development is key for a good rise and texture (NCBI).
Checking Dough Consistency
How do you know when it’s ready? The dough should be smooth and elastic. It shouldn’t feel overly sticky. If it’s too sticky, you can add flour, one tablespoon at a time. Let the mixer incorporate each addition before adding more. If the dough feels too dry, add water, one teaspoon at a time. You’re aiming for a dough that’s soft but manageable. It should bounce back slowly when you poke it.
Step 3: The First Rise (Bulk Fermentation)
Once your dough is perfectly kneaded, it’s time for its first rest. Lightly grease a clean bowl. You can use a little oil or cooking spray. Transfer the dough to this bowl. Turn it to coat all sides with the grease. This prevents a dry crust from forming. Cover the bowl tightly with plastic wrap or a damp kitchen towel. Place the bowl in a warm, draft-free spot. Let the dough rise until it has doubled in size. This usually takes about 1 to 1.5 hours. The exact time can vary with room temperature.
Why a Warm Spot Matters
Yeast thrives in warmth. A cozy environment helps it work efficiently. Think of it like a little bread spa! Without warmth, the yeast can be sluggish. Your dough won’t rise as much. A good spot could be near a preheating oven (not inside!) or on a sunny windowsill.
Shaping and Second Rise for Your Loaf
After the first rise, your dough has done most of its growing. Now it’s time to shape it. This step gives your bread its final form before baking.
Punching Down and Shaping the Dough
Gently punch down the risen dough. This releases some of the built-up gas. Turn the dough out onto a lightly floured surface. Shape it into your desired loaf form. For a standard loaf pan, flatten the dough into a rough rectangle. Fold the sides in towards the center. Then, roll it up tightly from one end. Pinch the seam closed. Place the shaped dough seam-side down into your greased loaf pan. Make sure it fits snugly.
Step 4: The Second Rise (Proofing)
Now, the loaf needs to rise again. This is called proofing. Cover the loaf pan loosely with plastic wrap or a clean kitchen towel. Place it back in that warm, draft-free spot. Let it rise until it has nearly doubled in size. This usually takes about 30-60 minutes. The dough should look puffy and rounded. When you gently poke the side, the indentation should spring back slowly. This shows the gluten is well-developed.
Are We Ready for the Oven?
How do you know it’s perfectly proofed? A good test is the poke test. If the indentation springs back immediately, it needs more time. If it stays indented or collapses, it’s likely over-proofed. Don’t worry too much if this happens; it will still bake, but might not rise as much in the oven. Many bakers aim for that gentle spring back. This indicates optimal readiness for baking (King Arthur Baking).
Baking Your Delicious Whole Wheat Bread
The moment of truth! It’s time to bake your homemade loaf. Your stand mixer has done its part, and now the oven takes over.
Preheating Your Oven
This is a critical step. Preheat your oven to 375°F (190°C) while the dough is on its second rise. A properly preheated oven ensures the bread bakes evenly from the start. Many recipes recommend this temperature. It allows the bread to rise beautifully before the crust sets (CDC).
Step 5: Baking the Loaf
Once the oven is preheated and the dough is proofed, carefully place the loaf pan in the center of the oven. Bake for 30-40 minutes. The crust should be a deep golden brown. The internal temperature of the bread should reach 190-200°F (88-93°C). You can check this with an instant-read thermometer.
Troubleshooting Oven Issues
Is your crust browning too quickly? You can loosely tent the loaf with aluminum foil during the last 10-15 minutes of baking. This protects the crust. If the bread sounds hollow when tapped on the bottom, it’s likely done. This is another classic sign of a perfectly baked loaf.
Cooling and Enjoying Your Bread
Almost there! Proper cooling is as important as baking. It allows the bread to set. It also develops the best texture and flavor.
Step 6: Cooling the Bread
As soon as the bread comes out of the oven, remove it from the loaf pan. Place it on a wire rack immediately. This allows air to circulate around the entire loaf. It prevents the bottom crust from becoming soggy. Let the bread cool completely. This can take at least 1-2 hours. Resist the urge to slice into it while it’s still warm. The inside structure is still setting. Cutting too early can result in a gummy texture.
Why Cooling is Essential
The baking process doesn’t fully stop when the loaf leaves the oven. The internal structure continues to set as it cools. This is a natural process that allows the starches to gelatinize properly. Waiting ensures you get those beautiful, airy slices everyone loves. It’s worth the patience!
Your Delicious Whole Wheat Loaf Awaits!
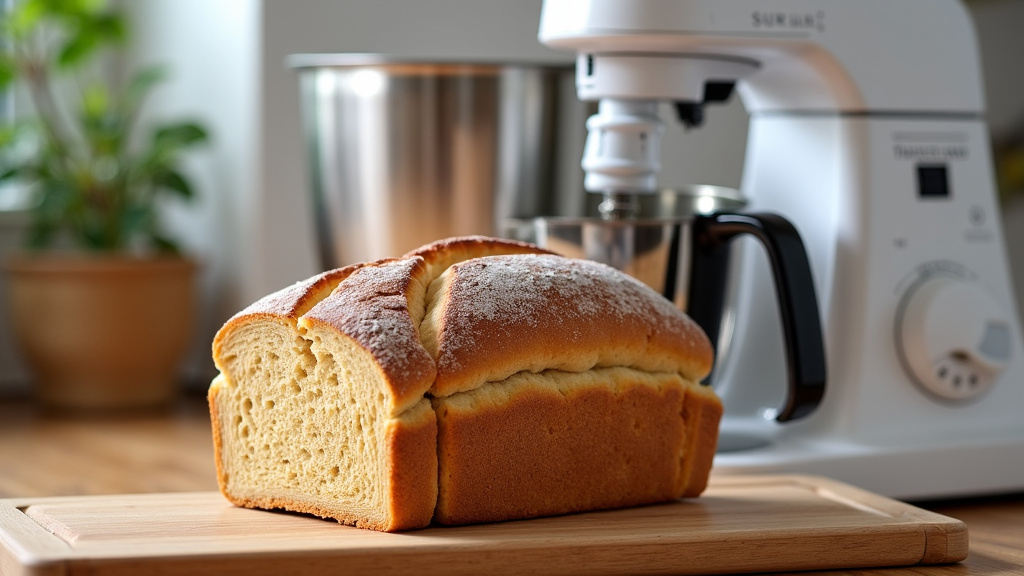
Now you have a beautiful, homemade whole wheat loaf. You made it using your stand mixer! Slice it up and enjoy the fresh taste and aroma. It’s perfect for sandwiches, toast, or just with a smear of butter. You’ve earned this delicious treat. Baking with your stand mixer makes it so rewarding.
Quick Checklist for Your Next Bake
Here’s a quick rundown to keep in mind for your next whole wheat baking adventure:
- Measure ingredients accurately, especially flour.
- Use lukewarm water for yeast activation.
- Let your stand mixer knead for the full time.
- Allow dough to double in size during both rises.
- Preheat your oven thoroughly.
- Cool the bread completely before slicing.
Conclusion
You’ve successfully navigated the steps to bake delicious whole wheat bread using your stand mixer! We found that this method consistently delivers a soft, well-risen loaf with minimal effort on your part. Your stand mixer truly handles the heavy lifting, developing the gluten perfectly for that ideal texture. Remember to trust the process, especially the proofing stages, and allow your bread to cool completely before slicing. Now, go ahead and enjoy the fruits of your labor – a beautiful, homemade loaf made possible by your own hands and your trusty stand mixer. Slice it up and savor that fresh-baked goodness!
Frequently Asked Questions
Why is my whole wheat dough so sticky in the stand mixer?
Whole wheat flour absorbs liquid differently than all-purpose flour, often making the dough seem stickier. Continue kneading for the full time; your mixer will develop the gluten and the dough should become smoother and less tacky. If it remains excessively sticky after 10 minutes, add flour just one tablespoon at a time.
Can I use a mix of whole wheat and white flour in my stand mixer?
Absolutely! Using a blend of whole wheat and all-purpose flour can make the dough easier to handle and result in a lighter texture while still providing whole grain benefits. You’ll likely find the mixing and kneading process in your stand mixer to be quite similar.
How do I know if my whole wheat dough is properly kneaded by the stand mixer?
Your dough is properly kneaded when it becomes smooth, elastic, and pulls away cleanly from the sides of the mixer bowl. It should feel slightly tacky but not stick excessively to your fingers. The “windowpane test” is a good indicator: a small piece of dough should stretch thin enough to see light through without tearing.
My bread didn’t rise much, what could have gone wrong with my stand mixer dough?
Several factors can affect the rise. Ensure your yeast was fresh and activated by lukewarm water, not too hot or cold. Also, make sure your dough had a warm, draft-free spot for both rises. Over-kneading or under-kneading in the stand mixer can also impact the final volume.
How long should I let my stand mixer knead whole wheat bread dough?
For whole wheat bread in a stand mixer, aim to knead for approximately 8-10 minutes on a medium speed (often speed 4). This duration is usually sufficient for the dough to develop the necessary gluten structure, becoming smooth and elastic. Keep an eye on the dough’s consistency rather than just the clock.
