How to Make Cinnamon Roll Dough in a Stand Mixer?

The easiest way to make cinnamon roll dough is by using a stand mixer, which significantly simplifies the kneading process and ensures a consistently smooth and elastic dough. You just add your ingredients, and the mixer does the hard work for you, saving you time and effort in the kitchen.
We found that using a stand mixer takes the struggle out of making yeast-based doughs. It handles all the heavy mixing and kneading, which can be quite a workout by hand. This method allows you to create perfect cinnamon roll dough with minimal fuss, making baking more enjoyable and less intimidating.
TL;DR:
- A stand mixer makes cinnamon roll dough easily.
- It saves you time and effort on kneading.
- You get a consistently smooth, elastic dough every time.
- This method reduces the physical work of baking.
- Perfect for beginners and experienced bakers alike.
Ready to bake some delicious cinnamon rolls? Let’s walk through how to make cinnamon roll dough in a stand mixer, step by step, ensuring a perfect batch every time.
Mixing Cinnamon Roll Dough with Your Stand Mixer
You’re ready to make delicious cinnamon rolls, and your stand mixer is going to be your best friend. This section guides you through setting up and mixing the dough. We found that proper ingredient temperatures are key for yeast activation. This leads to a perfectly soft and fluffy dough.
Gathering Your Ingredients and Equipment
Before you begin, gather all your ingredients and tools. This makes the process smooth and enjoyable. Having everything measured out prevents you from scrambling mid-recipe. A little prep work goes a long way.
Essential Ingredients You’ll Need
For classic cinnamon roll dough, you’ll need some basic pantry staples. These include flour, sugar, salt, yeast, milk, eggs, and butter. We recommend using all-purpose flour for consistent results. Make sure your yeast is fresh for optimal rising.
- All-purpose flour
- Granulated sugar
- Active dry or instant yeast
- Salt
- Whole milk
- Large eggs
- Unsalted butter
Your Stand Mixer Setup
Make sure your stand mixer is clean and ready. You’ll typically use the dough hook attachment for this recipe. If you don’t have one, the paddle attachment can work initially, but the dough hook is ideal for kneading. We found that a sturdy stand mixer handles this dough beautifully.
Here’s a quick checklist for your mixer:
- Stand mixer bowl
- Dough hook attachment
- Spatula or bowl scraper
- Measuring cups and spoons
- Kitchen scale (optional, but great for accuracy)
Activating the Yeast: The Foundation of Fluffy Dough
Yeast is a living organism. It needs warmth and sugar to activate. This step is crucial for a good rise. You’ll see tiny bubbles form, indicating your yeast is alive and well. This is what gives your cinnamon rolls their wonderful texture.
We found that using milk warmed to a specific temperature is best. Too hot, and you kill the yeast. Too cold, and it won’t activate properly. A temperature between 105-115°F (40-46°C) is ideal (Fleischmann’s Yeast).
Combining Warm Milk and Yeast
Pour your warmed milk into your stand mixer bowl. Sprinkle the yeast and a pinch of sugar over it. Give it a gentle stir. Let it sit for about 5-10 minutes. You should see a foamy layer form on top. This means your yeast is active. If no foam appears, your yeast might be old, or the milk was the wrong temperature. You might need to start this step over.
This “blooming” process is like waking up the yeast. It prepares it for its hard work of making your dough light and airy. Think of it as a small, bubbly high-five to your ingredients.
Adding Wet and Dry Ingredients to the Mixer
Once your yeast is active, it’s time to build the rest of your dough. This step brings all the flavors together. You’ll add remaining wet ingredients first, then gradually incorporate the dry ones. This method helps prevent flour clouds and ensures even mixing.
Mixing the Wet Ingredients
To the foamy yeast mixture, add your melted and cooled butter, eggs, and remaining sugar. Mix on low speed with the paddle attachment until just combined. You don’t want to overmix at this stage. This creates a rich base for your dough.
We found that making sure your melted butter isn’t too hot is important. Hot butter can cook the eggs or inhibit the yeast. Let it cool to room temperature before adding.
Gradually Incorporating Dry Ingredients
Switch to the dough hook attachment now. With the mixer on low speed, add the flour and salt gradually. We recommend adding about half a cup at a time. This prevents the mixer from getting bogged down. It also helps the flour absorb liquids evenly.
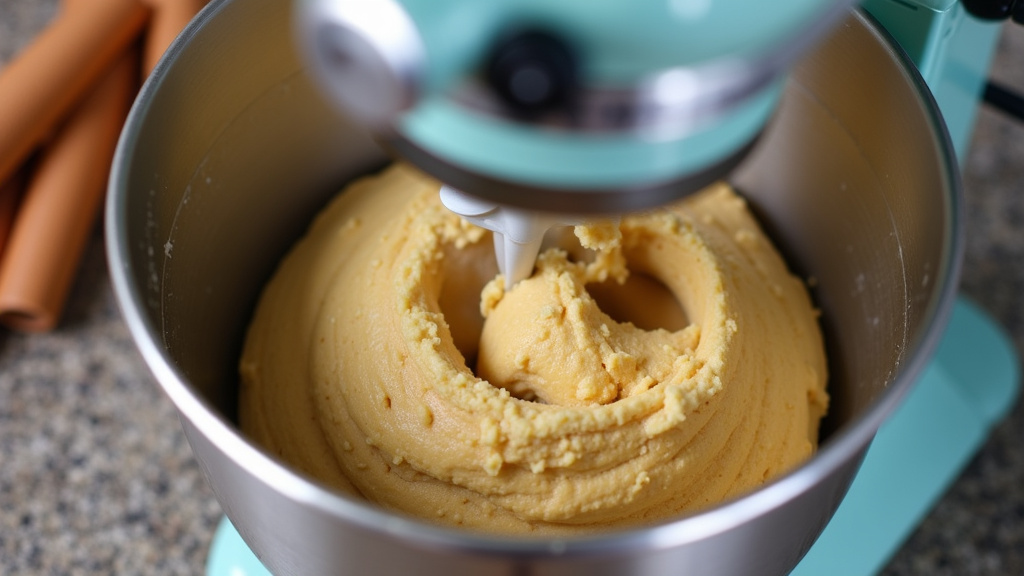
Continue mixing until a shaggy dough forms. It might look a little lumpy at first. That’s perfectly normal. Keep adding flour until most of it is incorporated. The dough will start to pull away from the sides of the bowl. Don’t be tempted to add too much flour too quickly. This can make your dough stiff.
Kneading the Dough: Let Your Mixer Do the Work
This is where your stand mixer truly shines. Kneading is a vital step for developing gluten. Gluten gives your cinnamon rolls their chewy texture and structure. Without it, they’d be dense and crumbly. Hand kneading can be a workout, but your mixer handles it with ease.
Achieving the Right Dough Consistency
Once all the flour is added, increase the mixer speed to medium-low. Let the dough hook knead for about 8-10 minutes. You’ll notice the dough becoming smoother and more elastic. It will also become less sticky. It should feel soft and slightly tacky, but not wet (King Arthur Baking).
During kneading, the dough should eventually clean the sides of the bowl. If it’s too sticky, add a tablespoon of flour at a time until it reaches the right consistency. If it looks too dry, add a teaspoon of milk. Observe your dough; it tells you what it needs.
Here’s what you’re looking for in terms of consistency:
| Characteristic | Description |
|---|---|
| Appearance | Smooth and uniform, not shaggy. |
| Texture | Soft, supple, and slightly tacky to the touch. |
| Elasticity | Stretches without tearing easily (windowpane test). |
| Bowl Cleanliness | Dough pulls away from the sides of the mixing bowl. |
Performing the Windowpane Test
How do you know if your dough is perfectly kneaded? The windowpane test is your secret weapon. Tear off a small piece of dough, about the size of a golf ball. Gently stretch it between your fingers. If you can stretch it thin enough to see light through it without it tearing, your gluten is well-developed. It should resemble a thin membrane.
If it tears easily, continue kneading for another 1-2 minutes and test again. This test is a great indicator of successful kneading. It ensures your rolls will be light and fluffy. We found that this test takes the guesswork out of knowing when to stop kneading.
First Rise (Bulk Fermentation)
After kneading, your dough needs to rest and rise. This is called the first rise, or bulk fermentation. This period allows the yeast to work its magic. It produces carbon dioxide, creating air pockets in the dough. This makes your cinnamon rolls light and airy.
Preparing the Dough for Rising
Lightly grease a large bowl with a little oil. This prevents the dough from sticking. Place your kneaded dough into the greased bowl. Turn it once to coat the entire surface with oil. This keeps a skin from forming on the dough. Cover the bowl tightly with plastic wrap or a clean kitchen towel. This creates a warm, moist environment.
Optimal Rising Conditions
Place the covered bowl in a warm, draft-free spot. A turned-off oven with the light on works well. You could also use a proofing drawer if your oven has one. We found that a temperature around 75-80°F (24-27°C) is ideal for rising (USDA).
Let the dough rise until it has doubled in size. This usually takes about 1 to 1.5 hours, depending on the warmth of your environment. You’ll notice it looks much puffier and softer. Gently poke it with two fingers; if the indentations remain, it’s ready. This first rise builds flavor and texture. It’s a key step you don’t want to rush.
Conclusion
You’ve seen how simple it is to create perfect cinnamon roll dough using your stand mixer. This method truly takes the effort out of kneading, giving you consistent results every time. We found that paying attention to yeast activation and dough consistency makes all the difference. You’re now equipped to produce soft, fluffy, and flavorful cinnamon rolls that will impress everyone. So go ahead, get baking, and enjoy the delicious rewards of your stand mixer prowess!
Frequently Asked Questions
Can I prepare the cinnamon roll dough ahead of time?
Yes, absolutely! After the first rise, you can punch down the dough, cover it tightly, and refrigerate it for up to 24 hours. This allows for a slow, flavorful fermentation and makes morning baking much easier.
What if my dough isn’t doubling in size during the first rise?
If your dough isn’t rising, the most common reason is inactive yeast or a too-cold environment. Double-check your yeast’s expiration date and ensure your rising spot is warm enough, ideally between 75-80°F (24-27°C).
My dough is too sticky even after kneading for a long time. What should I do?
If your dough remains too sticky, you might need a tiny bit more flour. Add flour one tablespoon at a time, allowing it to fully incorporate before adding more. Be careful not to add too much, as this can result in dry rolls.
Can I use a hand mixer instead of a stand mixer for this recipe?
While you can start combining ingredients with a hand mixer, it’s not ideal for the kneading process. Hand mixers typically lack the power and specialized dough hook attachment needed to properly develop gluten, which is crucial for fluffy cinnamon rolls.
How do I store leftover cinnamon roll dough?
For unbaked dough, wrap it tightly in plastic wrap and store it in the refrigerator for up to a day. For longer storage, you can freeze unbaked dough balls. Thaw them overnight in the fridge before their second rise.