How to Knead Pizza Dough by Hand vs a Stand Mixer?

You can knead pizza dough effectively using either your hands or a stand mixer; the best method depends on your preference and available equipment. Both techniques create delicious, airy crusts.
Whether you’re a seasoned baker or a kitchen newbie, mastering dough kneading is a key step to perfect pizza. We found that each method has its advantages, from the tactile satisfaction of hand-kneading to the efficiency of a machine.
- Hand kneading is a great workout.
- Stand mixers save time and effort.
- Both methods develop gluten for elasticity.
- Choose based on your comfort level.
Ready to get your hands (or mixer) dirty? Let’s walk through exactly how to knead pizza dough, comparing hand kneading versus a stand mixer step by step.
Comparing Hand Kneading and Stand Mixer Kneading for Pizza Dough
You’re ready to make pizza, but which kneading method is right for you? We found that both hand kneading and using a stand mixer effectively develop the gluten needed for a chewy, elastic pizza crust.
Each method offers unique benefits and drawbacks. Your choice often comes down to personal preference and kitchen setup.
The Art of Hand Kneading: A Full-Body Workout
Hand kneading is a traditional method that connects you directly to your dough. It’s often described as a stress-relieving activity. This technique builds arm and core strength, too!
It can feel intimidating at first, but with a little practice, you’ll be a pro. The key is understanding how the dough feels as it develops.
Setting Up for Hand Kneading Success
Before you begin, gather your ingredients and clear your workspace. A clean, spacious countertop is ideal for unrestricted movement.
- Choose a sturdy, clean surface.
- Lightly flour your work area.
- Have a bench scraper handy for sticky situations.
- Keep a small bowl of flour nearby for dusting.
We found that having everything prepped makes the process much smoother. It helps you focus on the dough, not the scramble.
Step-by-Step Hand Kneading Technique
Ready to get your hands messy? This method takes about 10-15 minutes of active kneading. It’s a great way to feel the dough’s transformation.
- Combine Ingredients: In a large bowl, mix your flour, water, yeast, salt, and olive oil until a shaggy dough forms.
- Turn Out the Dough: Transfer the dough to your lightly floured surface. Don’t worry if it’s sticky initially.
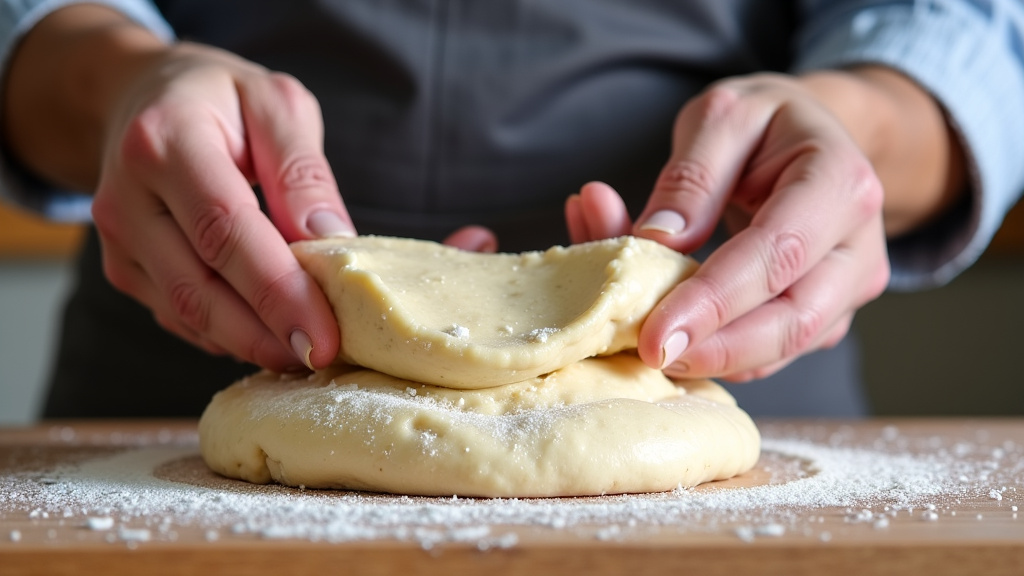
- Push and Fold: Flatten the dough slightly with your palms. Then, push it away from you with the heels of your hands. Fold the top part of the dough back over itself.
- Rotate and Repeat: Give the dough a quarter turn and repeat the push-and-fold motion. Keep a rhythm going.
- Observe the Change: As you knead, the dough will become less sticky and more elastic. It will transform from a shaggy mess into a smooth, pliable ball.
- The Windowpane Test: To check for proper gluten development, tear off a small piece of dough. Gently stretch it between your fingers. If you can stretch it thin enough to see light through it without tearing, your dough is ready. This is called the “windowpane test” (Cook’s Illustrated).
Don’t be afraid to add a tiny bit more flour if the dough is too sticky. Just a sprinkle! Too much flour can make your pizza crust tough.
Using a Stand Mixer: The Effortless Approach
If you prefer a hands-off method, your stand mixer is a true hero. It does all the hard work for you, saving time and energy. This is especially helpful if you’re making larger batches of dough.
Many busy home cooks find the stand mixer to be an indispensable tool. It lets you focus on other meal prep while the dough is working.
Essential Stand Mixer Setup
To use your stand mixer, you’ll need the right attachment. The dough hook is designed specifically for kneading. It mimics the folding and stretching action of human hands.
- Attach the dough hook to your stand mixer.
- Ensure your mixing bowl is securely in place.
- Have all your ingredients measured and ready.
We recommend starting with clean hands anyway, even if you’re using a mixer. You’ll still need to handle the dough at some point!
Step-by-Step Stand Mixer Kneading
Using a stand mixer is much simpler than hand kneading. The machine takes care of the muscle. This method usually takes about 8-10 minutes.
- Combine Ingredients: Place all your pizza dough ingredients directly into the stand mixer bowl.
- Mix on Low: Start the mixer on a low speed (usually speed 1 or 2). Let it mix until a shaggy dough forms and all the flour is incorporated. This takes about 1-2 minutes.
- Increase Speed and Knead: Increase the speed to medium-low (speed 2 or 3). Let the mixer run for 7-9 minutes.
- Observe the Dough: The dough will start to pull away from the sides of the bowl. It will look smoother and more elastic. It should cling to the dough hook.
- Check for Doneness: Perform the same windowpane test as with hand-kneaded dough. If it stretches thin without tearing, it’s ready. If not, knead for another minute and test again.
Be careful not to over-knead your dough with a stand mixer. Over-kneading can result in a tough, dense crust. The dough will look very smooth and shiny, but lose its elasticity. We found that stopping once the windowpane test is passed is a reliable indicator.
Which Method is Right for You? A Quick Comparison
Both methods yield excellent results, but they cater to different needs and preferences. Are you a hands-on type, or do you prefer efficiency?
Consider your available time, your comfort level, and the equipment you own. There’s no wrong answer here; only the best fit for your kitchen.
| Feature | Hand Kneading | Stand Mixer Kneading |
|---|---|---|
| Time Commitment | 10-15 minutes active time | 8-10 minutes active time (less effort) |
| Effort Level | High (physical workout) | Low (machine does the work) |
| Tactile Experience | High (feel the dough’s development) | Low (observational) |
| Clean-up | Minimal (countertop, hands) | Mixer bowl, dough hook, splash guard |
| Equipment Needed | None beyond a bowl and surface | Stand mixer with dough hook |
| Batch Size | Best for small to medium batches | Excellent for large batches |
| Beginner Friendliness | Can be intimidating at first | Easier to learn and master |
Tips for Perfect Pizza Dough, Regardless of Method
No matter how you knead, a few universal principles apply to making great pizza dough. These tips help ensure a delicious outcome every time.
- Use Good Quality Flour: We found that bread flour or “00” flour gives the best texture.
- Warm Water is Key: Use water between 105-115°F (40-46°C) to activate the yeast.
- Don’t Skimp on Resting Time: Proper proofing allows the gluten to relax and the flavors to develop.
- Measure Accurately: Especially with flour, precise measurements make a big difference.
- Don’t Rush It: Pizza dough benefits from patience.
Troubleshooting Common Kneading Issues
Even seasoned bakers encounter issues. Don’t worry if your dough isn’t perfect on the first try. Baking is a learning process.
Dough is Too Sticky
If your dough is sticking everywhere, resisting your attempts to form a ball, you likely need a little more flour. Add it sparingly, a tablespoon at a time, until the dough is manageable (King Arthur Baking).
For hand kneading, a light dusting on your hands and surface helps. For a stand mixer, let it mix for another minute or two before adding more flour.
Dough is Too Stiff or Dry
This usually means you’ve added too much flour, or your kitchen is very dry. You can try adding a tiny bit more water, about a teaspoon at a time. Work it in gently.
A dry dough will be tough to knead and difficult to stretch later. It might result in a dense crust. We found that a slightly sticky dough is better than a dry one.
Dough Not Developing Gluten
If your dough isn’t becoming elastic or passing the windowpane test, it might need more kneading. Sometimes, especially with whole wheat flours, it just takes longer. Continue kneading for a few more minutes.
Ensure your yeast is active. If your yeast is old, it might not be working, which can affect dough structure. Active yeast produces visible bubbles and a yeasty smell (USDA).
The Post-Kneading Process: What Comes Next?
Once your dough is perfectly kneaded, its journey isn’t over. It needs to rest and rise. This is called proofing.
Lightly oil a large bowl. Place your kneaded dough inside, turning it once to coat. Cover the bowl with plastic wrap or a clean kitchen towel.
Let it rise in a warm, draft-free place until it has doubled in size. This usually takes 1-2 hours, depending on your room temperature and yeast activity.
This resting period allows the gluten to relax and flavors to deepen. It’s a crucial step for a light, airy pizza crust.
Conclusion
Whether you choose to knead pizza dough by hand or with a stand mixer, the goal is always a delicious, airy crust. We’ve shown you that both methods effectively develop gluten for elasticity and texture. Your best choice ultimately depends on your available time, equipment, and how hands-on you want to be.
Embrace the method that fits your kitchen and comfort level. You’ll soon be enjoying perfectly kneaded pizza dough and making fantastic homemade pies. So, grab your flour and get ready to create!
Frequently Asked Questions
Can I use a food processor to knead pizza dough?
While some food processors come with a dough blade, we found they can easily overwork and overheat pizza dough, leading to a tough crust. It’s generally better to stick to hand kneading or a stand mixer for optimal results.
How do I know if my dough is over-kneaded with a stand mixer?
Over-kneaded dough will feel very stiff and resistant to stretching. It might even start to tear easily, rather than stretching thinly. Stop kneading as soon as the windowpane test is passed to avoid this issue.
What if my hand-kneaded dough never passes the windowpane test?
Don’t worry too much! Some doughs, especially those with whole grains or lower protein flour, might not pass the test perfectly. If your dough feels smooth and elastic and is no longer sticky, it’s likely ready, even without a perfect windowpane.
Can I knead pizza dough ahead of time and store it?
Yes, absolutely! After kneading and an initial short rise (about 30-60 minutes), you can place your dough in an oiled, airtight container in the refrigerator for 1-3 days. This slow fermentation often develops even more flavor.
Does kneading duration change for different types of pizza dough?
Yes, it can. Doughs with higher hydration (more water) or those made with weaker flours might require slightly less kneading. Conversely, whole wheat doughs often need a bit more kneading time to develop sufficient gluten.