How to Make Cookie Dough in a Stand Mixer?

The easiest way to make cookie dough using a stand mixer is to gather your ingredients first, then cream the butter and sugar, add eggs and vanilla, and finally mix in your dry ingredients until just combined. This method makes light and fluffy dough with minimal effort. You’ll love the convenience!
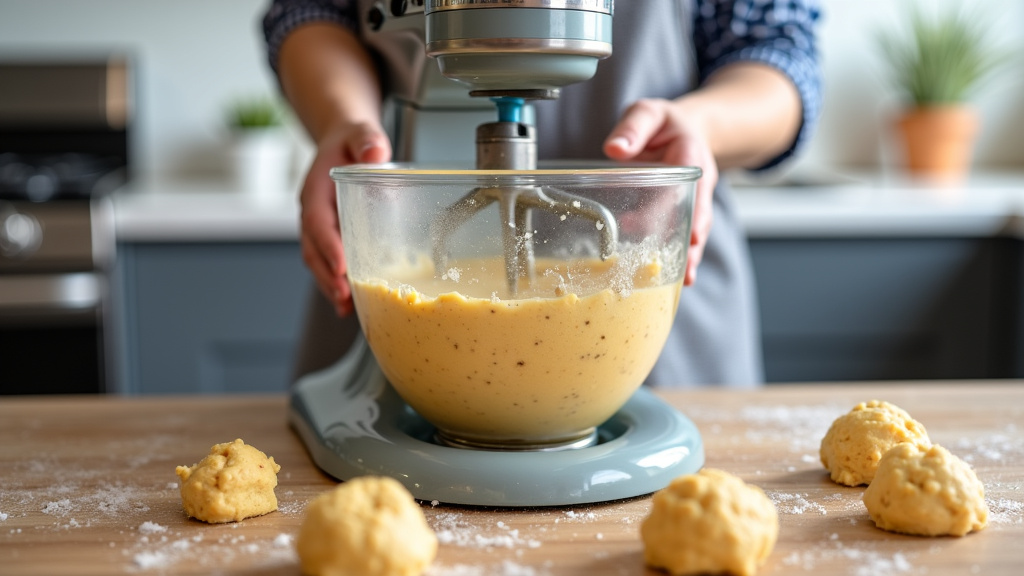
Using a stand mixer saves your arms from all that mixing. We found that it also helps to incorporate air into your dough, leading to better texture in your baked cookies. This approach works for nearly any cookie recipe, from classic chocolate chip to chewy oatmeal raisin. Just make sure to scrape down the sides of the bowl often.
- Effortless mixing with less arm strain.
- Achieve lighter, airier dough.
- Consistent results every time.
- Versatile for many cookie types.
Ready to bake up some deliciousness? Let’s walk through exactly how to make cookie dough in a stand mixer, step by step.
Preparing Your Cookie Dough with a Stand Mixer
Making cookie dough with a stand mixer simplifies the process. You’re giving your arms a break and ensuring a consistently mixed dough. This typically leads to better-baked cookies!
We’ve found that proper preparation is key. Think of it as setting the stage for a great performance. What do you need before you even turn on the mixer?
Gathering Your Ingredients and Tools
Before you start, lay out everything you need. This might sound obvious, but it helps prevent frantic searching mid-recipe. A little organization goes a long way toward stress-free baking.
Imagine being halfway through creaming butter and realizing you don’t have enough eggs! Pre-measuring ingredients also means you won’t forget anything important. It’s a small step that makes a big difference.
Essential Equipment for Success
You’ll need your stand mixer, of course. Make sure it’s on a stable, flat surface. We also recommend having both the paddle attachment and the whisk attachment ready. Both have their uses in cookie dough.
- Your stand mixer (with paddle and whisk attachments)
- Large mixing bowls (for dry ingredients)
- Measuring cups and spoons
- A rubber spatula (for scraping the bowl)
- A kitchen scale (for accuracy, especially with flour)
Having these tools within reach helps you move seamlessly through the recipe. You’ll feel like a professional baker in your own kitchen.
Temperature Matters: Room Temperature Ingredients
This is a big one. Many recipes call for room temperature butter and eggs. Why is this so important? We found that room temperature ingredients combine much more smoothly.
Cold butter won’t cream properly with sugar; it will just clump. Cold eggs can cause the mixture to curdle. For the best texture, let your butter and eggs sit out for 30-60 minutes before you begin (Cornell University Extension).
The Creaming Process: Butter and Sugar
This is where your stand mixer shines. Creaming butter and sugar together creates tiny air pockets. These air pockets are what give cookies their light and airy texture. It’s truly a magical step!
Don’t rush this part. It takes a few minutes, but it’s worth it. You’re building the foundation for delicious cookies from the ground up.
Using the Right Attachment and Speed
For creaming, always use the paddle attachment. The whisk attachment incorporates too much air too quickly, which you don’t want at this stage. Start on a low speed to prevent sugar from flying everywhere.
Once the initial combining happens, increase the speed to medium. You’ll hear the mixer working, and you’ll see the mixture transform. Aim for a light, fluffy, and pale yellow color (King Arthur Baking Company).
Scraping Down the Bowl: A Critical Step
You’ll notice that butter and sugar sometimes stick to the sides and bottom of the bowl. Stop your mixer a few times during creaming to scrape down the bowl with your spatula. This ensures everything is evenly incorporated.
If you don’t scrape, you’ll end up with unmixed streaks in your dough. This can lead to an inconsistent cookie texture. We found this step to be vital for uniformity.
Incorporating Wet Ingredients
Once your butter and sugar are perfectly creamed, it’s time for the eggs and vanilla. These liquid ingredients add moisture and flavor to your cookie dough. They also help bind everything together.
Remember that room temperature tip? It applies here too. Room temperature eggs mix in smoothly without causing the mixture to separate. This keeps your dough looking smooth and creamy.
Adding Eggs One at a Time
Crack your eggs into a separate small bowl first. This lets you check for shell pieces. Then, add one egg at a time to your stand mixer. Mix on low speed until each egg is fully incorporated before adding the next.
This method helps create an emulsion, like a mayonnaise. It keeps your dough stable and smooth. Adding all eggs at once can sometimes overwhelm the mixture and make it look greasy.
The Role of Vanilla and Other Flavorings
After the eggs, it’s time for the vanilla extract. We think a good quality vanilla makes a noticeable difference. You can also add other liquid flavorings here, like almond extract or a dash of coffee extract, depending on your recipe.
Again, mix on low speed until just combined. You don’t want to overmix at this stage; just ensure the flavors are well distributed.
Mixing in Dry Ingredients
This is the final main step before adding your fun mix-ins. The goal here is to combine everything without developing too much gluten. Overmixing flour can lead to tough, chewy cookies instead of tender ones.
Always pre-measure your dry ingredients. Some recipes even suggest whisking them together in a separate bowl first. This ensures even distribution of baking soda, salt, and spices.
Gradually Adding Flour and Leavening Agents
With your mixer on the lowest speed, gradually add your dry ingredients to the wet mixture. We found it’s best to add them in two or three additions. This helps prevent a flour cloud from enveloping your kitchen!
Mix only until the flour streaks have just disappeared. As a general rule, stop mixing as soon as you can’t see dry flour anymore. At this point, the dough might still look a little shaggy.
When to Add Mix-ins (Chocolate Chips, Nuts, etc.)
Once your basic dough is formed, it’s time for the star attractions: chocolate chips, nuts, dried fruit, or whatever your recipe calls for. Add these after the dry ingredients to avoid overmixing the dough.
You can briefly use the stand mixer on very low speed to incorporate them. Alternatively, for a gentle touch, use your rubber spatula and fold them in by hand. This ensures they are evenly distributed without compacting your dough.
Putting it All Together: A Quick Checklist
Here’s a final checklist to help you make perfect cookie dough with your stand mixer every time:
- Gather all ingredients and equipment before starting.
- Ensure butter and eggs are at room temperature.
- Cream butter and sugar until light and fluffy with the paddle attachment.
- Scrape the bowl frequently during mixing.
- Add eggs one at a time, mixing until just combined.
- Gradually add dry ingredients on low speed, mixing just until no flour streaks remain.
- Fold in mix-ins gently, by hand or on very low speed.
Following these steps will set you up for cookie success. You’ll have a beautifully mixed dough ready for baking. Enjoy the satisfying process!
Conclusion
You now have all the tools and knowledge to conquer cookie dough making with your stand mixer. By gathering ingredients, ensuring proper temperatures, and understanding each mixing stage, you’re setting yourself up for success. Remember to scrape the bowl and mix just until combined.
This method not only saves your arms but also helps create consistently delicious cookies with a wonderful texture. You’ll gain confidence with every batch. Get ready to enjoy the satisfaction of homemade cookies, made easier than ever.
Now, go forth and bake some amazing cookies!
Frequently Asked Questions
Can I use a hand mixer instead of a stand mixer?
Yes, you can use a hand mixer, but it will require more effort from you. The process steps remain the same. Just be prepared to hold the mixer for longer periods.
How long does it take for butter and sugar to cream properly?
Creaming typically takes 2-5 minutes on medium speed in a stand mixer. You’re looking for a mixture that is light in color, fluffy, and visibly increased in volume.
What does “mixing until just combined” mean for dry ingredients?
It means mixing on the lowest speed only until you no longer see streaks of dry flour. Any more mixing will develop gluten, leading to tougher cookies.
Do I need to chill cookie dough after making it in a stand mixer?
Many recipes benefit from chilling the dough, though not all require it. Chilling can deepen flavors and prevent cookies from spreading too much. Check your specific recipe for recommendations.
My dough looks crumbly after adding dry ingredients. What went wrong?
If your dough is too crumbly, you might have added too much flour or not enough liquid. Ensure your measurements are accurate. Sometimes, a tiny bit more liquid (like milk or water) can help bring it together, but add it sparingly.