
How to Make Swiss Meringue Buttercream in a Stand Mixer?
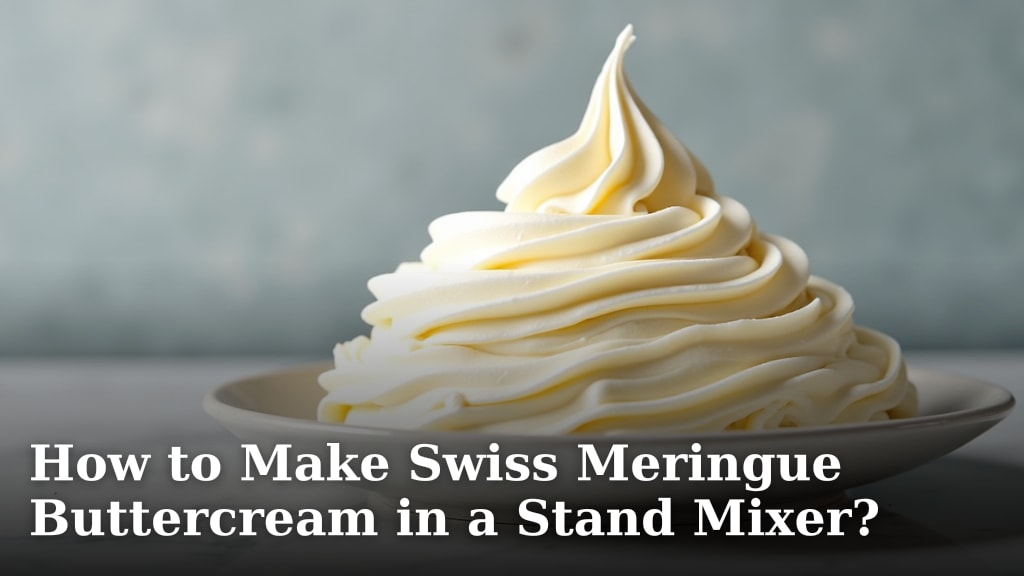
Making Swiss meringue buttercream in a stand mixer is totally doable and yields incredibly smooth, stable frosting. You can achieve this by gently heating egg whites and sugar over a double boiler until the sugar dissolves, then whipping them into stiff, glossy peaks before adding softened butter. This method ensures a silky texture perfect for decorating.
This technique is a favorite among bakers for good reason. It’s a more stable and versatile buttercream compared to American or Italian versions. Many bakers find it surprisingly easy to master, transforming simple ingredients into a dessert masterpiece that holds its shape beautifully, even in warmer conditions. You’ll love how it pipes!
- Heat egg whites and sugar gently.
- Whip until stiff, glossy peaks form.
- Gradually add softened butter.
- Whip until smooth and creamy.
- Chill if too soft; re-whip.
Let’s walk through exactly how to make this delicious frosting step by step in your stand mixer. It’s easier than you might think!
Whipping Up Silky Swiss Meringue Buttercream with Your Stand Mixer
So, you want to make that incredibly smooth, stable Swiss meringue buttercream? Great choice! This frosting is a baker’s dream. It’s less sweet than American buttercream and holds its shape like a champ. We’re going to walk you through making it perfectly using your trusty stand mixer. It really is easier than it sounds.
Gathering Your Ingredients and Tools
Before you start, let’s make sure you have everything ready. Having your ingredients prepped makes the whole process smoother. Think of it like setting up your kitchen for a smooth cooking show!
Essential Ingredients for Swiss Meringue Buttercream
You’ll need a few key players for this recipe. The quality of your ingredients really does shine through in the final product. Good eggs and good butter make a big difference!
- Egg Whites: Fresh, room temperature egg whites work best. You’ll need about 3-4 large egg whites.
- Granulated Sugar: This is what helps stabilize the meringue. About 1 cup is a good starting point.
- Unsalted Butter: Softened, but not melted! This is super important for texture. You’ll want about 1 to 1.5 cups.
- Flavorings: Vanilla extract is classic, but feel free to get creative.
- Pinch of Salt: This just helps balance the sweetness.
Your Stand Mixer and Essential Equipment
Your stand mixer is the star here, but you’ll need a few other things to help it shine. Preparation is key for success.
- Stand Mixer: With the whisk attachment.
- Heatproof Bowl: Glass or stainless steel works great.
- Saucepan: For the double boiler setup.
- Whisk: For stirring over the heat.
- Spatula: For scraping down the bowl.
- Thermometer (Optional but helpful): For checking the sugar temperature.
The Gentle Art of Heating Egg Whites and Sugar
This is where the magic begins! We’re going to gently heat the egg whites and sugar. This process cooks the egg whites, making them safe to eat, and dissolves the sugar completely. This step is often called a ‘Swiss bain-marie’ or double boiler method.
Setting Up Your Double Boiler
First, grab a saucepan and fill it with about an inch of water. You want it to simmer, not boil furiously. Place your heatproof bowl on top of the saucepan. Make sure the bottom of the bowl doesn’t touch the water. This gentle heat is your friend.
Combining and Heating the Mixture
Add your egg whites and granulated sugar to the heatproof bowl. Now, begin whisking them together. You’ll want to keep whisking constantly. This prevents the egg whites from scrambling and ensures the sugar dissolves fully. We’re aiming for a smooth, lump-free mixture.
Knowing When It’s Ready
How do you know when it’s ready? Rub a little bit of the mixture between your fingers. If you can still feel any sugar granules, keep whisking and heating. You’re looking for a completely smooth texture. Many sources suggest heating the mixture until it reaches about 160°F (71°C) on a thermometer (FDA). This ensures the egg whites are fully cooked and safe.
Once it feels smooth and reaches the target temperature (if using a thermometer), carefully remove the bowl from the heat. Be really careful here – steam is hot!
Whipping the Meringue to Glossy Peaks
Now, it’s time to put your stand mixer to work! This is where the airy, fluffy texture develops.
Attaching the Whisk and Starting the Mixer
Immediately transfer the warm egg white and sugar mixture to your stand mixer bowl. Attach the whisk. Start the mixer on a low speed. You don’t want to splash hot meringue everywhere!
Gradually Increasing Speed and Whipping Time
As the mixture starts to combine and cool down slightly, you can gradually increase the speed to medium-high. Let the mixer run. You’re looking for the meringue to become thick, glossy, and to form stiff peaks. This can take anywhere from 7 to 10 minutes, sometimes longer. Stiff peaks mean when you lift the whisk, the meringue stands straight up without drooping. It should also look very shiny.
Why Stiff Peaks Matter
These stiff, glossy peaks are the foundation of your buttercream. They create the stable structure that holds everything together. If your peaks are soft, your buttercream might be too loose. We’ve found patience here really pays off.
Incorporating the Butter: The Key to Creaminess
This is arguably the most delicate stage. You’re transforming a fluffy meringue into a rich, creamy buttercream. The temperature of your butter is absolutely critical here. We’ve all been there when it goes wrong!
Ensuring Your Butter is Perfectly Softened
Your unsalted butter needs to be soft, but not melted. It should yield easily when you press it with your finger. If it’s too cold, your buttercream will be lumpy. If it’s too warm or melted, it can break and become oily. Many bakers recommend cubing the butter for easier incorporation.
Adding Butter Piece by Piece
With the mixer running on medium-low speed, start adding the softened butter, one tablespoon at a time. Wait until each piece of butter is mostly incorporated before adding the next. This gradual addition is vital for creating a smooth emulsion. It helps prevent the mixture from breaking.
What to Do if It Looks Curdled or Oily
Don’t panic if your mixture looks like it’s breaking, separating, or curdled. This is quite common, especially when you’re starting out. It often means the butter was slightly too warm or too cold, or added too quickly. The good news is that it can usually be fixed!
Often, the mixture just needs to reach the right temperature to come together. You can try chilling the bowl for 10-15 minutes, then re-whipping it. Alternatively, if it’s too soft and oily, you can pop it in the fridge for a bit. If it’s too stiff and crumbly, sometimes a brief stint in a slightly warmer place (but not hot!) can help. Consistency is key. We found that patience and temperature control are your best friends here.
Whipping to Ultimate Smoothness
Once all the butter is added, continue to whip the buttercream. Increase the mixer speed to medium-high. Whip for several minutes until the buttercream is incredibly smooth, light, and fluffy. It should hold its shape beautifully. This final whipping stage helps create that signature silky texture.
Troubleshooting Common Swiss Meringue Buttercream Issues
Even with the best intentions, sometimes things don’t go perfectly. Don’t worry, we’ve all had batches that needed a little coaxing.
Dealing with a Runny or Oily Buttercream
This is the most frequent issue. It usually happens when the butter is too soft or the room is too warm. If your buttercream is too soft, cover the bowl and refrigerate it for 15-30 minutes. Then, re-whip it on medium speed until it regains its proper consistency. You might need to do this a couple of times.
Tackling a Curdled or Separated Buttercream
As mentioned, curdling often occurs if the butter temperature is off or it was added too quickly. The fix is usually temperature-related. Try chilling the bowl for 10-15 minutes, then whip on medium speed. If it’s still not coming together, you might try gently warming the bowl with a kitchen torch or blow dryer for a few seconds while whipping on low speed. Just a little warmth can help the fats re-emulsify. Be cautious not to melt it.
When Your Buttercream is Too Stiff
If your buttercream is too stiff, it might be because it got too cold. Try adding a tablespoon or two of room temperature liquid (like milk or cream) or a tiny bit more softened butter while whipping on low speed. You can also try gently warming the bowl as described for curdled buttercream.
Tips for Perfect Swiss Meringue Buttercream Every Time
Here are a few final pointers to help you achieve buttercream perfection. These little tips can make a big difference in your results.
- Room Temperature is King: Ensure your egg whites and butter are at room temperature for the best results.
- Don’t Rush the Butter: Add it gradually, one piece at a time. Patience here prevents a broken batch.
- Watch Your Temperatures: Pay attention to the temperature of your mixture and your butter.
- Clean Equipment: Make sure your bowl and whisk are completely clean and free of any grease. Even a tiny bit of fat can prevent the meringue from whipping properly.
Quick Checklist for Your Next Batch
Want to make sure you don’t miss a step? Keep this handy checklist nearby!
- Heat egg whites and sugar until smooth and dissolved.
- Whip meringue to stiff, glossy peaks in your stand mixer.
- Ensure butter is softened but not melted.
- Add butter one tablespoon at a time, slowly.
- Whip until smooth and creamy.
- Chill and re-whip if consistency is off.
Conclusion
You’ve now learned how to master Swiss meringue buttercream in your stand mixer! Remember, the key is the gentle heating of egg whites and sugar, whipping to stiff peaks, and carefully incorporating softened butter. Don’t be discouraged by initial curdling; a little patience and temperature adjustment usually fixes it. This smooth, stable frosting is perfect for all your decorating needs. Your next beautiful cake awaits!
Frequently Asked Questions
Why is my Swiss meringue buttercream so runny?
A runny buttercream often means the butter was too soft, or the room temperature is too warm. Try chilling the entire bowl for about 15-30 minutes. Then, re-whip it on a medium speed until it thickens up to your desired consistency. You might need to repeat the chilling and whipping process.
My buttercream looks curdled or separated. What happened?
Curdling usually happens when the butter’s temperature isn’t quite right or it was added too quickly. The good news is that it’s often fixable with temperature. Try chilling the bowl for 10-15 minutes, then whip on medium speed. If it’s still separated, gently warming the bowl slightly while whipping can help the fats re-emulsify.
Can I make Swiss meringue buttercream without a stand mixer?
While a stand mixer makes it much easier, you can technically make it by hand or with a hand mixer. You’ll need a lot of arm power to whip the meringue to stiff peaks and incorporate the butter. It will take considerably longer and be quite a workout!
How long does Swiss meringue buttercream last?
Properly stored Swiss meringue buttercream can last in the refrigerator for about a week. Because it contains cooked egg whites and butter, it should be kept in an airtight container. It’s best to let it come to room temperature and re-whip it briefly before using it again.
Can I use pasteurized egg whites from a carton?
Yes, you can use pasteurized egg whites from a carton for Swiss meringue buttercream. The heating step in the double boiler method will ensure they are fully cooked and safe, just like fresh egg whites. Ensure they are at room temperature before you start.
