Can You Make Meringue without a Whisk Attachment?
On this page (3 sections)
Yes, you absolutely can make meringue without a whisk attachment. While a stand mixer or hand mixer with a whisk attachment makes the job easier, you can achieve fluffy meringue using other common kitchen tools. It just takes a little more elbow grease and patience.
Many home bakers wonder if they need special equipment for recipes like meringue cookies or pavlova. Fortunately, the key ingredients – egg whites and sugar – can be whipped into peaks by hand. You might be surprised at how well your traditional whisk performs.
- Yes, you can make meringue without a whisk attachment.
- It requires more manual effort and time.
- A balloon whisk is your best friend here.
- Achieving stiff peaks is possible with persistent beating.
- It’s a great way to save energy and get a workout!
Let’s walk through exactly how you can whip up perfect meringue using just a bowl and a whisk.
Whipping Up Meringue Without a Mixer Attachment
So, you’re craving some light-as-air meringue, but your trusty stand mixer is off-limits, or maybe you just don’t have that specific whisk attachment. Don’t you worry! We’ve found that achieving fluffy, cloud-like meringue is absolutely possible with just a bit of old-fashioned muscle power and a few key kitchen tools.
It might sound daunting, like trying to sculpt a masterpiece with just your hands. But think of it as a rewarding challenge. You’re literally transforming simple egg whites into something magical. Many home bakers have discovered this technique and found great success.
Your Secret Weapon: The Humble Whisk
When you’re going the manual route, the type of whisk you use really matters. We’ve found that a large balloon whisk is your best friend in this situation. Its shape and numerous wires are designed to incorporate the most air into your egg whites.
Why is this so important? Meringue relies on air bubbles trapped within the egg white proteins. These bubbles expand when heated, giving meringue its characteristic lightness. A balloon whisk is the most efficient tool for creating those tiny, stable air pockets when you’re doing the work by hand. Smaller whisks will certainly work, but they’ll take considerably longer and require more effort.
Choosing the Right Bowl
The bowl you choose can also make a difference. We recommend a large, sturdy metal bowl. Metal is great because it doesn’t retain grease, which can prevent egg whites from whipping properly. Make sure the bowl is deep enough to contain any splashes.
Before you start, ensure your bowl and whisk are impeccably clean. Any trace of fat or yolk can sabotage your meringue. We’ve learned that even a tiny speck of grease can make your egg whites reluctant to whip up.
The Art of Manual Whipping: Technique Matters
This is where the elbow grease comes in. Start by separating your eggs carefully. It’s best to use room-temperature egg whites; they whip up to a greater volume. Some research suggests this is because the proteins in warmer egg whites are more relaxed and can be stretched more easily (NCBI).
Add your egg whites to the clean bowl. Begin whisking slowly at first, just to break them up a bit. You’ll start to see some foam forming. Keep going! The goal is to build volume and incorporate as much air as possible.
The Stages of Meringue: What to Expect
You’ll notice your egg whites going through several stages. First, they’ll become foamy. Then, they’ll start to look milky and opaque. This is often called “soft peaks” stage. If you lift your whisk, the peaks that form will curl over.
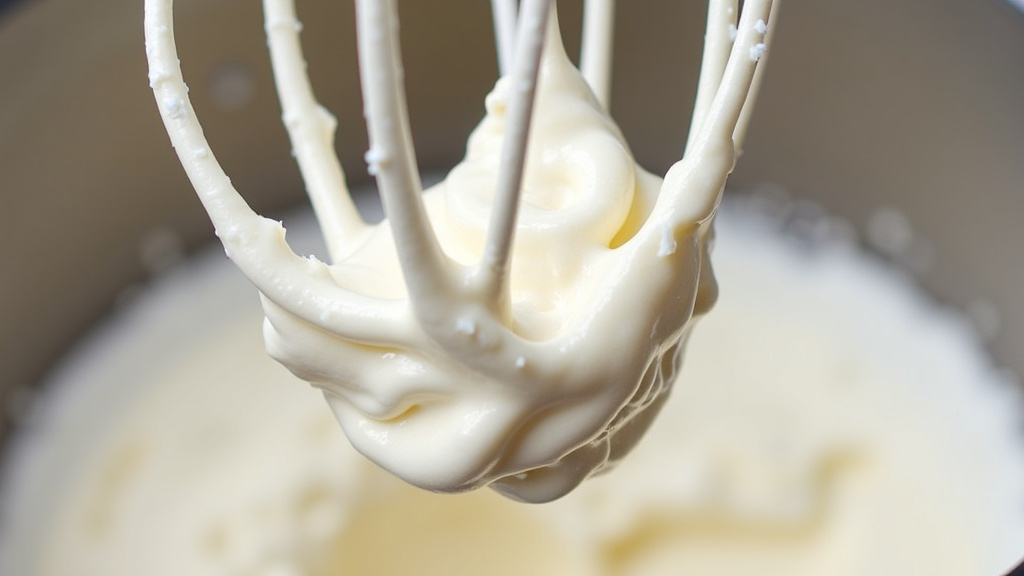
You’re aiming for “stiff peaks.” This is when you lift the whisk, and the peaks stand straight up, perhaps with a slight curl at the very tip. They should look glossy and firm. This stage takes patience and consistent whisking. We’ve found that it can take anywhere from 10 to 20 minutes, depending on your whisking speed and the size of your batch.
Adding Sugar: A Gradual Process
Once you’ve reached the soft peak stage, it’s time to add your sugar. It’s crucial to add it gradually, a tablespoon at a time, while you continue to whisk. This allows the sugar to dissolve properly. If you dump it all in at once, you’ll end up with a gritty, less stable meringue.
Why is gradual addition so important? As the sugar dissolves, it actually helps to stabilize the air bubbles you’ve created. Many culinary experts recommend this slow integration. It takes time, but it’s key to a successful meringue texture. We’ve learned that rushing this step often leads to weeping meringue.
Troubleshooting Your Hand-Whipped Meringue
Even with the best intentions, you might run into a few common issues. One of the most frequent is weeping meringue. This is when liquid pools at the bottom of your meringue. It often happens if the sugar hasn’t fully dissolved, or if the meringue is under-whipped (Cleveland Clinic).
Another problem can be a gritty texture. This also points to undissolved sugar. Make sure you’re whisking long enough, especially after adding the sugar. You can test for dissolved sugar by rubbing a small amount of meringue between your fingers; it should feel smooth, not grainy.
When to Stop Whisking
Knowing when to stop is as important as knowing when to start. Over-whipped meringue can look dry and lumpy. It loses its glossy sheen. If you go too far, the protein structure can break down, making it difficult to work with. Aim for those firm, glossy peaks.
The ideal consistency will hold its shape beautifully. It should feel smooth and pliable, not stiff and crumbly. Remember, consistency is key. Your arms might be tired, but the delicious result will be worth it!
Tips for Success with Manual Meringue
Let’s summarize some quick wins for making meringue by hand:
- Ensure all equipment is spotless and free of grease.
- Use room-temperature egg whites for maximum volume.
- A large balloon whisk is your best tool.
- Add sugar slowly, one tablespoon at a time.
- Whisk until you achieve stiff, glossy peaks.
- Test for dissolved sugar by rubbing between your fingers.
The Benefits of Going Manual
Beyond just getting the job done, there are some surprising benefits to whisking meringue by hand. For starters, it’s a fantastic arm workout! You’ll be engaging muscles you might not typically use.
It also connects you more directly to the process. You can feel the texture changing, the air incorporating. It’s a more mindful way to bake. Plus, you don’t need to worry about plugging anything in or cleaning bulky mixer parts. It’s pure, simple baking at its finest.
A Quick Comparison: Hand vs. Mixer
We can see how the methods stack up:
| Method | Time/Effort | Result Consistency | Equipment Needed |
|---|---|---|---|
| Hand Whisking | Higher Effort, Longer Time (10-20+ min) | Can be excellent, but requires practice | Bowl, Whisk |
| Stand/Hand Mixer | Lower Effort, Shorter Time (5-10 min) | Very consistent and reliable | Mixer, Whisk Attachment |
As you can see, the mixer offers convenience and speed. But the hand-whisked method offers a satisfying connection to your baking and proves that you don’t need fancy gadgets to create wonderful treats. It just requires a bit more patience and arm strength.
Conclusion
You’ve seen that making delicious meringue without a mixer attachment is entirely achievable. It boils down to patience, the right tools like a balloon whisk and a metal bowl, and a good old-fashioned bit of arm power. While a mixer offers speed, whisking by hand connects you more directly to the baking process and proves you don’t need fancy gadgets. Remember to focus on achieving those stiff, glossy peaks and ensuring your sugar dissolves completely. So, next time you crave meringue, don’t let a missing attachment stop you – get ready to whisk your way to a delightful treat!
Frequently Asked Questions
How long does it typically take to make meringue by hand?
We’ve found that whisking meringue by hand can take anywhere from 10 to 20 minutes, sometimes even longer. This depends on your whisking speed, the size of your batch, and the type of whisk you’re using. It definitely requires more time than using a stand mixer.
Can I use a fork to make meringue?
While you can technically try to whip egg whites with a fork, it’s not recommended for meringue. A fork simply doesn’t incorporate enough air to create the stable structure needed for meringue. You’ll likely end up with a very flat, unsweetened mixture.
What if my meringue is weeping or watery?
Weeping meringue usually means the sugar hasn’t fully dissolved, or the meringue wasn’t whipped long enough to form strong enough protein bonds. You can try whisking for a bit longer, ensuring gradual sugar addition, and checking for smooth texture between your fingers.
Can I use cold egg whites if I’m whisking by hand?
We strongly recommend using room-temperature egg whites. Research suggests that warmer egg whites whip up to a greater volume because their proteins are more relaxed. Cold egg whites can be more difficult to whip manually.
Is there a way to tell if the sugar is dissolved?
Yes, there’s a simple test! Take a small amount of the meringue mixture between your thumb and forefinger. If you feel any grittiness, the sugar hasn’t dissolved yet. Keep whisking until it feels completely smooth.