How to Whip Cream in a Stand Mixer?
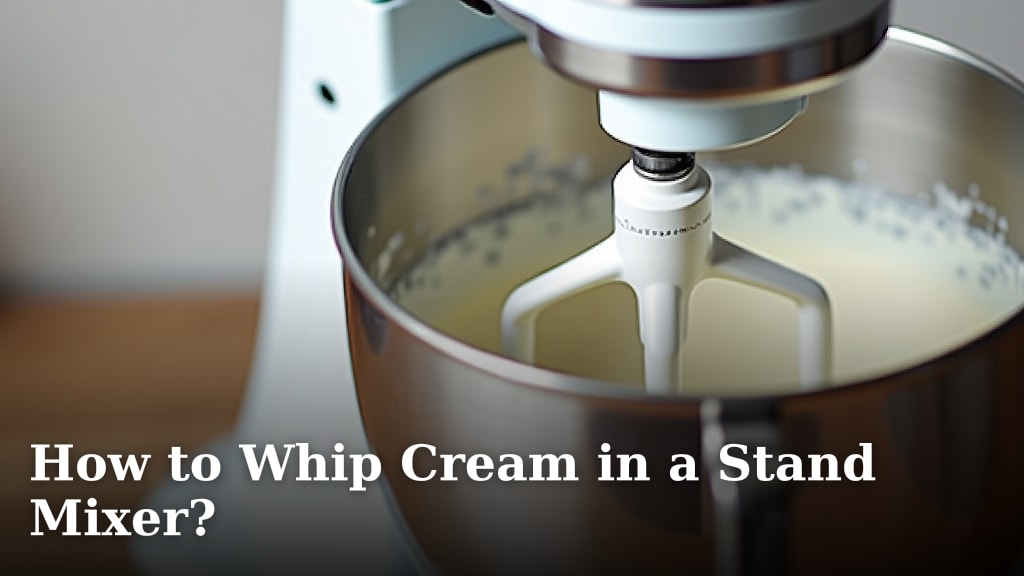
The easiest way to make perfect whipped cream at home is to use a stand mixer. This
Mastering Whipped Cream in Your Stand Mixer
Making whipped cream at home is surprisingly simple, especially with a stand mixer. You’ll get beautifully fluffy results every time. Let’s walk through the steps to create that perfect, airy topping you crave.
Gathering Your Essentials: Ingredients and Equipment
Before you begin, gathering everything you need makes the process smooth. Think of it as setting your culinary stage. Having cold ingredients and tools is key to success.
Ingredients You’ll Need
The beauty of whipped cream lies in its simplicity. You only need a few items, but their quality matters. We found that using good quality heavy cream makes a big difference in flavor and texture.
- Heavy Cream or Heavy Whipping Cream: This is your star ingredient. Look for cream with a milkfat content of 36% or higher. This higher fat content provides the stability needed for perfect peaks (USDA).
- Powdered Sugar (Confectioners’ Sugar): This sweetens your cream and helps stabilize it. Powdered sugar contains a small amount of cornstarch, which prevents weeping.
- Vanilla Extract: A touch of pure vanilla extract adds a lovely aroma and classic flavor. You can also experiment with other extracts.
Consider using organic ingredients if you prefer. Many home bakers find the subtle flavor better.
Essential Equipment
Your stand mixer does most of the heavy lifting. But a few other tools will ensure your whipped cream is a triumph, not a tragedy.
- Stand Mixer: Your primary tool! Make sure it’s clean and in good working order. A KitchenAid or similar model works perfectly.
- Whisk Attachment: This is the specific attachment you’ll use. Its wire design incorporates air efficiently.
- Chilled Mixing Bowl: This is a game-changer. A cold bowl helps the cream hold its structure.
- Rubber Spatula: For scraping down the sides of the bowl and folding in flavors.
- Measuring Cups and Spoons: For accurate ingredient amounts. Precision leads to consistent results.
Remember that cold components are your best friend here. Some experts even suggest chilling your whisk attachment for 15-20 minutes beforehand.
Chilling for Success: The Cold Truth
Why all this talk about cold? Heavy cream whips best when it’s very cold. This helps the fat globules stiffen and hold air more effectively. Warm cream will struggle to whip and may become grainy.
- Heavy Cream: Keep it in the coldest part of your refrigerator until you’re ready to use it. Don’t let it sit out at room temperature.
- Mixing Bowl and Whisk: Place your stand mixer’s metal bowl and whisk attachment in the freezer for 15-20 minutes before whipping. This pre-chilling step makes a noticeable difference, especially on warm days.
Think of it like setting up for a science experiment. The conditions you create directly impact the outcome. A cold environment prevents the cream from breaking down too quickly.
The Step-by-Step Whipping Process
Now for the fun part! This is where your cold ingredients transform into fluffy, cloud-like cream. Pay attention to the stages; it happens faster than you might think.
Step 1: Combine Ingredients in the Chilled Bowl
Take your very cold heavy cream from the fridge. Pour it into your pre-chilled stand mixer bowl. Add your powdered sugar and vanilla extract. Don’t worry about mixing them yet.
- Start with cold cream.
- Add all ingredients at once.
- Attach the whisk.
This quick combination ensures everything is ready for the whipping action. There’s no need for pre-mixing; the stand mixer will handle it.
Step 2: Start Whipping on Low Speed
Attach the cold whisk attachment to your stand mixer. Turn the mixer on to a low speed, around setting 2 on most KitchenAid models. This initial slow speed helps prevent splashing.
- Begin at a low speed.
- Watch for initial foam.
- Gradually increase speed.
You’ll see small bubbles forming. This is the air starting to incorporate into the cream. Let it go for about 30 seconds to a minute.
Step 3: Increase Speed to Medium-High
Once the cream is foamy and no longer splashing, increase the mixer speed to medium-high, typically setting 6-8. This faster speed is where the magic happens. The whisk efficiency increases dramatically.
- Medium-high speed for whipping.
- Observe the changing texture.
- Scrape down sides if needed.
You’ll notice the cream thickening quickly. Keep an eye on it; this stage moves fast. You might need to pause and scrape down the sides of the bowl with your rubber spatula to ensure even whipping.
Step 4: Watch for Soft Peaks, Then Stiff Peaks
This is the most crucial part: knowing when to stop. Whipped cream goes through several stages.
| Stage | Appearance | Usage |
|---|---|---|
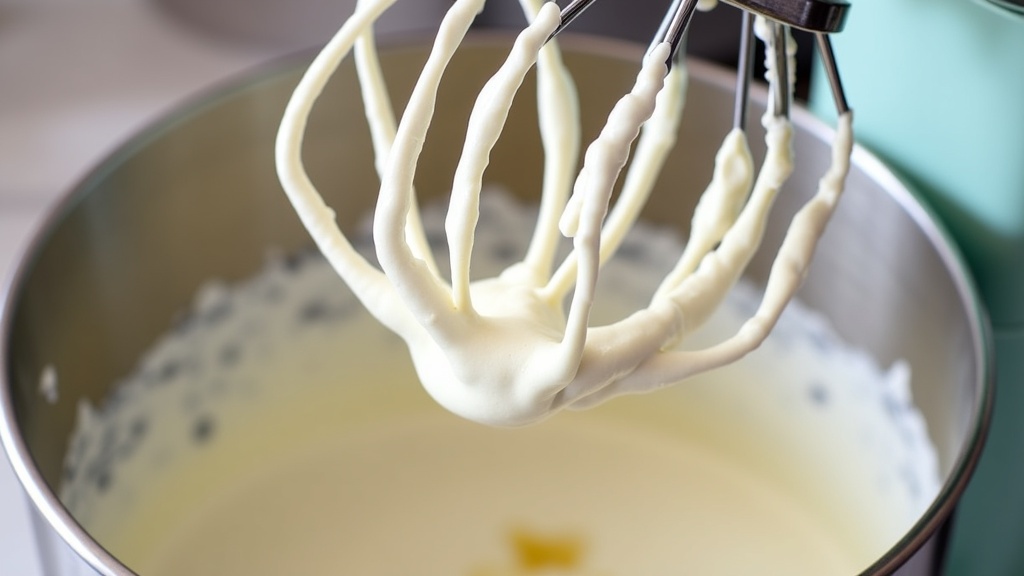
| Soft Peaks | Cream holds shape loosely; peak folds over when whisk is lifted. | Piping on desserts, light toppings, mixing into mousses. |
| Medium Peaks | Peak holds form but tips over slightly; still looks moist. | Most common for dessert topping, stable but still airy. |
| Stiff Peaks | Peak stands straight up when whisk is lifted; appears more dense. | Filling cakes, very stable toppings, long-lasting structure. |
For most uses, you want medium to stiff peaks. This means when you lift the whisk, the cream forms a peak that holds its shape. If it slouches over, it’s soft. If it stands tall, it’s stiff.
- Stop the mixer frequently to check.
- Look for the desired peak stage.
- Avoid over-whipping.
Over-whipping leads to grainy, butter-like cream. It’s better to stop a little early and then whip for a few more seconds if needed. This takes practice, but you’ll get a feel for it!
Troubleshooting Common Whipped Cream Issues
Even with the best intentions, sometimes things go awry. Don’t worry; many common problems have simple solutions. We’ve all been there.
Why Isn’t My Cream Whipping?
If your cream isn’t thickening, the most likely culprit is warmth. Is your cream very cold? Was your bowl chilled? Warm ingredients or tools make it difficult for the fat globules to emulsify and hold air (Journal of Dairy Science).
- Check temperature of cream.
- Ensure bowl and whisk are cold.
- Verify that you’re using heavy cream (not half-and-half).
Sometimes, simply putting everything back in the fridge or freezer for 15 minutes can revive the process. Patience is a virtue here.
My Whipped Cream Looks Grainy
Grainy whipped cream is almost always a sign of over-whipping. You’ve gone past the stiff peak stage, and the fat has started to separate, moving towards butter. Can you fix it?
- Add a splash of fresh, cold heavy cream.
- Gently whisk by hand for a few seconds.
- Use for a different purpose if it’s too far gone.
A small amount of fresh cream can sometimes “bring back” slightly over-whipped cream. Add a tablespoon or two and gently fold it in by hand until it looks smooth again. If it’s very grainy, it might be best used in coffee or another dish where texture is less critical.
How to Prevent Whipped Cream from Weeping
Weeping is when your whipped cream releases liquid, often after sitting for a while. This is a common issue, but there are ways to minimize it.
- Use powdered sugar instead of granulated sugar.
- Add a stabilizer (like cornstarch or cream of tartar).
- Don’t over-whip.
As mentioned, powdered sugar helps. For extra stability, some bakers add a teaspoon of cornstarch or cream of tartar per cup of heavy cream at the beginning of the whipping process. This helps it hold its shape longer (Cook’s Illustrated).
Using and Storing Your Fresh Whipped Cream
Congratulations, you’ve made beautiful whipped cream! Now, how should you use it and keep it fresh?
Freshly whipped cream is best enjoyed immediately. It’s a delicate creation. However, if you have leftovers or need to make it ahead, appropriate storage is key.
Fresh Whipped Cream Checklist
- ☐ Cold heavy cream
- ☐ Chilled bowl and whisk
- ☐ Powdered sugar for stability
- ☐ Vanilla extract for flavor
- ☐ Gradually increased mixer speed
These simple checks will guide you to wonderful results every time you whip cream.
Conclusion
You now have all the tips and tricks to make perfect whipped cream using your stand mixer. From understanding the importance of cold ingredients to mastering the different peak stages, you’re ready to create a truly delicious topping. We found that the biggest key is patience and observation; it whips up faster than you think!
So go ahead, grab your heavy cream, chill your bowl, and let your stand mixer do the hard work. You’ll be layering fluffy, homemade whipped cream on your favorite desserts in no time. Happy whipping!
Frequently Asked Questions
Can I use milk instead of heavy cream for whipping?
No, you cannot use regular milk for whipping. Milk doesn’t have enough fat content (it’s less than 3.5%) to incorporate and hold air, which is essential for creating stable whipped cream. You need heavy cream with at least 36% milkfat.
How long does homemade whipped cream last in the refrigerator?
Homemade whipped cream is best enjoyed fresh, but it can last for about 2-3 days in an airtight container in the refrigerator. We recommend giving it a gentle whisk by hand before serving if it’s been sitting for a while.
What can I do with leftover whipped cream that’s become a bit deflated?
If your whipped cream has deflated slightly, you can often revive it with a quick whisk! Gently whisk it by hand for 15-30 seconds until it regains some fluffiness. If it’s too far gone, use it in coffee, hot chocolate, or as a topping for fruit salad.
Is there a way to make whipped cream without sugar?
Yes, you can absolutely make unsweetened whipped cream! Simply whip the heavy cream by itself until it reaches your desired consistency. This is great for savory dishes or if you prefer to add sweetness from other sources.
Can I freeze homemade whipped cream?
Yes, you can freeze whipped cream, particularly if it’s been whipped to stiff peaks. Pipe dollops onto a parchment-lined baking sheet, freeze until solid, then transfer to an airtight container. It will hold for about a month, but the texture might be slightly softer when thawed.