How to Grind Meat with a Stand Mixer Attachment?

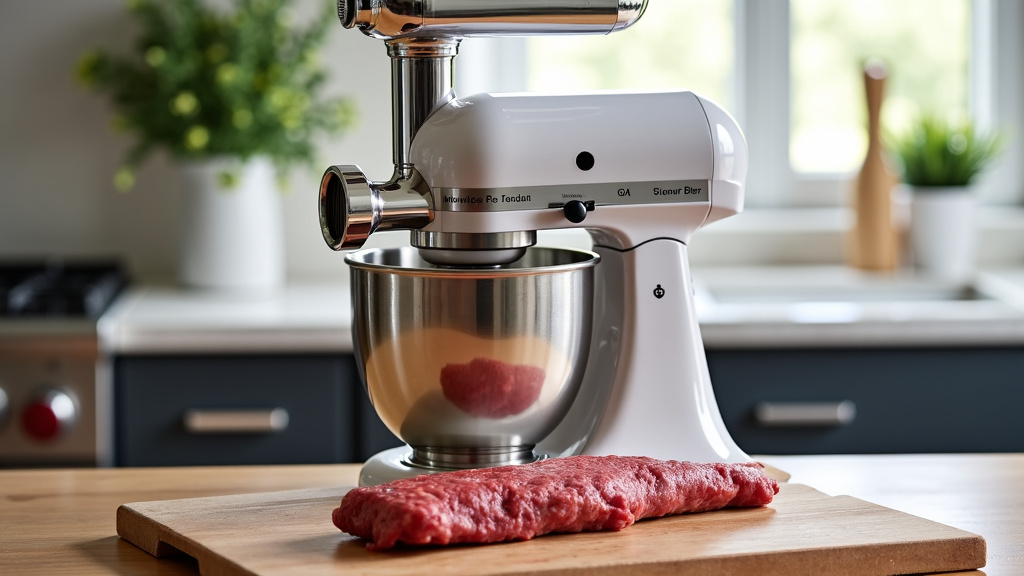
The easiest way to grind meat with a stand mixer attachment is to use a meat grinder attachment designed for your specific mixer model. You’ll need to chill your meat and grinder parts beforehand to ensure a safe and efficient process, resulting in perfectly ground meat for your recipes.
Using your stand mixer for grinding meat is a fantastic way to achieve fresher, better-tasting results at home. It’s also incredibly convenient, letting you control the fat content and grind size for everything from burgers to sausages. We found that this method offers great flexibility for home cooks.
- Chill meat and equipment first.
- Assemble the grinder attachment correctly.
- Feed meat into the grinder slowly.
- Choose your desired grind plate.
- Clean immediately after use.
Ready to make your own ground meat? Let’s walk through exactly how to set up your mixer and get grinding, step by step.
Setting Up Your Stand Mixer for Meat Grinding
Transforming your stand mixer into a meat grinder is simpler than you might think. We found that the key is proper preparation and assembly, which ensures both safety and a smooth grinding process.
Gathering Your Essential Tools and Ingredients
Before you begin, make sure you have everything you need. This helps prevent interruptions once you start grinding.
- Your stand mixer: The powerhouse of this operation.
- Meat grinder attachment: Ensure it’s compatible with your mixer model.
- Sharp knife and cutting board: For preparing your meat.
- Large mixing bowls: At least two, preferably chilled, for holding meat before and after grinding.
- Tray or plate: To catch the ground meat.
- Pusher/stomper: Usually comes with the attachment, helps feed meat safely.
- Ice or freezer: For chilling meat and parts.
Chilling for Optimal Results and Safety
This step is absolutely critical. We found that chilling your meat and equipment makes a huge difference in the final product and your safety (USDA).
Why Chill Your Meat?
Cold meat grinds much more cleanly. It prevents the meat from “smearing” or becoming a paste. This smear happens when the fat softens and separates from the muscle, leading to a greasy texture. Chilling also inhibits bacterial growth, making your process safer (FDA).
How to Chill Your Meat Properly
Cut your chosen meat into 1-inch cubes. Place these cubes on a baking sheet lined with parchment paper. Pop them into the freezer for 20-30 minutes, or until they are very firm but not frozen solid. They should be slightly icy to the touch.
Chilling Your Grinder Attachment Parts
Just like the meat, your grinder parts need to be cold. Place the grinder housing, auger, blade, and desired grinding plate in the freezer for at least 20 minutes before use. This prevents heat transfer to the meat during grinding.
Assembling Your Meat Grinder Attachment
Once everything is chilled, it’s time to put your grinder together. This process is usually straightforward but always refer to your specific attachment’s manual.
Step-by-Step Assembly Guide
Connecting the grinder attachment to your stand mixer is typically a quick process.
- Attach the auger: This spiral screw fits into the main housing.
- Insert the blade: The sharp blade goes onto the end of the auger. Make sure the sharp edges face outwards towards the grinding plate. This is important for a clean cut.
- Place the grinding plate: Select your desired plate (coarse or fine) and place it over the blade.
- Secure the ring: Screw on the retaining ring to hold everything in place. Don’t overtighten it, just snug enough.
- Attach to mixer: Connect the entire assembly to the power hub on the front of your stand mixer. Make sure it’s firmly secured.
Choosing the Right Grinding Plate
Your attachment likely comes with different-sized grinding plates. Which one should you use?
| Grinding Plate Size | Recommended Uses | Example Recipes |
|---|---|---|
| Coarse (6mm-8mm) | First grind, chili, sausage, texture for burgers. | Chili con carne, breakfast sausage, meatballs. |
| Medium (4.5mm-6mm) | General-purpose, meatloaf, pâté. | Meatloaf, burgers, most ground meat recipes. |
| Fine (3mm-4.5mm) | Second grind, smooth pâtés, baby food, emulsified sausage. | Fine-ground beef for sauces, frankfurters, bologna. |
We often recommend starting with a coarse plate for your first grind, especially if you plan to grind a second time. This makes the second, finer grind much easier on your mixer.
The Meat Grinding Process
With your equipment ready and meat chilled, you’re set to begin. Grinding meat at home is a rewarding experience.
Feeding the Meat Safely and Efficiently
Slow and steady wins the race when it comes to grinding meat.
- Turn on your mixer: Start at a low to medium speed, typically speed 4 or 6 on a KitchenAid. Too fast can generate heat.
- Feed meat into the hopper: Drop a few pieces of your chilled meat into the feeding tube.
- Use the pusher: Gently guide the meat down into the auger with the food pusher. Never use your fingers! This is a key safety tip.
- Collect ground meat: Position a chilled bowl or container directly under the grinding plate to catch the emerging ground meat.
- Monitor texture: Watch how the meat comes out. If it’s smearing, your meat might not be cold enough.
Double Grinding for Finer Results
Do you need very fine ground meat for something like a smooth pâté or delicate sausages? A double grind is your answer.
- First grind (coarse): Grind all your meat using a coarse plate as described above.
- Chill the ground meat: Place the coarsely ground meat back in the freezer for another 15-20 minutes, just until it’s very cold again.
- Change grinding plate: Switch to a finer grinding plate on your attachment.
- Second grind: Feed the chilled, coarsely ground meat back through the grinder. You’ll notice a much smoother, more uniform texture this time.
Post-Grinding Care and Cleaning
You’ve successfully ground your meat! Now, swift cleanup is essential to maintain your equipment and prevent bacterial growth.
Immediate Disassembly and Initial Rinse
Don’t let meat particles dry and harden in your grinder parts. This makes cleaning much harder.
- Unplug your mixer: Always unplug before disassembling.
- Remove attachment: Take the grinder attachment off the mixer.
- Disassemble completely: Take apart the retaining ring, plate, blade, auger, and housing.
- Scrape off excess meat: Use a spatula or knife to gently remove any large pieces of meat clinging to the parts.
- Rinse under cold water: Use cold water first. Hot water can cook and bind proteins to the metal, making them harder to remove.
Thorough Washing and Drying
After the initial rinse, it’s time for a proper clean.
- Use warm, soapy water: Wash all parts by hand with a good dish soap and a brush, especially for the small holes in the grinding plates.
- Consider a pipe cleaner: For stubborn bits in the auger or housing, a pipe cleaner can be surprisingly effective.
- Rinse thoroughly: Make sure all soap residue is gone.
- Dry immediately: This is crucial to prevent rust, especially on steel blades and plates. Use a clean towel.
- Air dry fully: Let parts air dry completely before storing to ensure no moisture remains.
Storing Your Grinder Attachment
Proper storage prolongs the life of your attachment.
Once dry, store the parts in a dry place. Some people like to lightly coat steel parts with a food-grade mineral oil to prevent rust, especially if they live in humid climates. Just be sure to wash it off before the next use.
Tips for Best Results and Troubleshooting Common Issues
Even with good preparation, sometimes things don’t go perfectly. We’ve gathered some common tips and solutions.
Achieving the Perfect Grind: A Checklist
Keep these points in mind for consistently great results.
- Start with quality meat: Fresh, well-marbled cuts make the best ground meat.
- Keep everything cold: This is the golden rule, as we found in our research.
- Cut meat into small, even pieces: This prevents jamming and ensures uniform grinding.
- Don’t overfill the hopper: Feed meat gradually to avoid stressing your mixer.
- Use the pusher, not your hand: Safety first, always.
- Clean immediately: Don’t procrastinate on cleanup; it saves you effort later.
Troubleshooting Grinding Problems
Experiencing some hiccups? Here are common issues and how to fix them.
Meat is Smearing or Getting Mushy
This is almost always a temperature issue. Is your meat cold enough? Are your grinder parts cold? Pop them back in the freezer for 15-20 minutes. A dull blade can also cause this, so check your blade’s sharpness.
Grinder is Jamming or Slowing Down
You might be feeding too much meat too quickly, or your meat pieces are too large. Cut them smaller and feed more slowly. Ensure no sinew or gristle is blocking the auger. Sometimes, if the retaining ring is too tight, it can cause friction and slow down the process.
Meat is Not Coming Out Evenly
Again, check the temperature of your meat and parts. Also, make sure your blade is correctly installed, with the sharp edge facing the grinding plate. A worn or dull blade can also lead to uneven grinding.
Conclusion
Grinding your own meat at home with a stand mixer attachment gives you unmatched control and freshness. You’ve learned how to prepare your meat and equipment, properly assemble your grinder, and effectively manage the grinding process. We found that keeping everything cold is the most important factor for success.
Proper cleaning and storage will also ensure your equipment lasts for years. By following these steps, you can confidently create delicious, custom-ground meats for all your culinary adventures. So go ahead, give it a try and taste the difference!
Frequently Asked Questions
Can I grind raw chicken or fish with a stand mixer attachment?
Yes, you absolutely can grind raw chicken or fish. Just like other meats, ensure they are very cold and cut into small pieces before grinding. This helps maintain texture and prevents smearing.
How often should I sharpen the blade of my meat grinder attachment?
The frequency depends on how often you use it and what types of meat you grind. If you notice the meat smearing or needing more force to go through, it’s a good sign the blade needs sharpening or replacing. We recommend checking it annually if you’re a regular user.
What’s the best way to clean the small holes in the grinding plates?
After rinsing off large pieces, use a small brush or even a pipe cleaner with warm, soapy water to thoroughly scrub out the holes. Make sure no meat residue remains, as it can harbor bacteria.
Can I use frozen meat directly in the grinder?
No, you shouldn’t use meat that’s frozen solid. It’s too hard and can damage your grinder attachment or mixer motor. The meat should be very firm and slightly icy, but still pliable enough to cut and feed.
Are stand mixer meat grinder attachments dishwasher safe?
Most stand mixer meat grinder attachments are NOT dishwasher safe. The harsh detergents and high heat can corrode or tarnish metal parts, especially steel blades and plates, leading to rust. Always hand wash and dry immediately.