Baking Tools: The Complete Buying Guide
Baking scales are the most useful first tool for accurate recipes. Add measuring tools, temperature tools, dough tools, and cooling equipment based on what you bake most often.
On this page (12 sections)
- Which baking scales are best for home baking?
- How should you use baking scales?
- Which measuring tools still matter if you own a scale?
- Which temperature tools improve baking results?
- Which baking tools help with cakes and batters?
- Which tools help with bread and dough?
- What tools help with flour and dry ingredients?
- Which rolling pin and pastry tools should you buy?
- Why do cooling racks matter?
- How should you build a baking tools collection?
- How do you care for baking tools?
- What is the best first purchase for baking?
Baking scales are the most useful first tool for accurate recipes because they measure ingredients by weight instead of relying on how tightly they sit in a cup.
Weight is steadier than volume for flour and other dry ingredients. A cup can hold less when the flour is loose and more when it is packed, while a scale reads the same weight each time.
That steadiness matters in bread, where flour and water set the dough structure. It also helps with cakes, where small changes in flour can affect crumb and rise.
Build the rest of your setup around the recipes you make most. Bread needs dough tools, cakes need measuring and temperature tools, and nearly every bake benefits from a cooling rack.
Start with the scale before you add shaping tools or specialty pans. It supports both bread and cake work, so it earns its place even if your habits change later.
The right tools make repeatable results easier, but a larger collection is not automatically better. A drawer full of tools you rarely use will not help your baking.
Buy the tools that solve a clear problem in your kitchen. If dough sticks to the counter, a scraper helps.
If cakes brown unevenly, a thermometer helps.
Look at your recent recipes before you shop. Notice which steps feel awkward, slow, or easy to get wrong.
Add specialty items as your baking habits grow. A proofing basket makes sense after you start shaping loaves often, not before.
This order keeps spending tied to real use. You learn the first tools well, then add the next one when your recipes ask for it.
Which baking scales are best for home baking?
The best baking scales for home baking have 1 g increments, a tare function, a clear display, and enough capacity for your usual bowl. Digital models are quick to read and often switch between grams, ounces, pounds, and volume modes.
We compared these four scales by capacity, measurement increments, power setup, cleaning features, and useful baking functions. Each one fits a different kitchen routine.
The Nicewell Food Scale 22lb Digital Kitchen Scale suits bakers who want a broad platform and high capacity for large bowls or dough ingredients. It measures from 0.1 oz to 22 lb and from 3 g to 10 kg, with grams, kilograms, pounds and ounces, fluid ounces, and milliliters available.
Its stainless steel top and tempered glass design give you a surface that is easy to wipe after weighing flour or sugar. The attached hook can help with storage when counter space is limited.
The Etekcity Food Kitchen Scale with Bowl suits bakers who want to weigh ingredients directly in a removable bowl. For more options, compare digital kitchen scales with bowls.
The bowl can also be turned upside down over the scale for storage, which helps in a small kitchen.
Its 11 lb capacity is enough for many everyday cake, cookie, and bread recipes. Choose it when the included bowl matters more to you than the 22 lb capacity of the larger scales.
The Etekcity 22lb Food Kitchen Scale suits bakers who want a rechargeable scale and an easier cleanup routine. Its stainless steel surface is designed for IPX6 water resistance, and the charging port cover needs to be in place before cleaning.
The scale measures up to 22 lb or 10 kg and switches among grams, ounces, pounds and ounces, milliliters for milk and water, and fluid ounces for milk and water. It includes a rechargeable battery and USB-C cable.
The Etekcity Food Kitchen Scale suits bakers who want a compact drawer-friendly scale. Its 5,000 g or 11 lb capacity covers most home recipes, while the 2 g minimum weight and 1 g increments support small ingredient amounts.
Its buttons are designed for quick response and easy cleaning. Choose it for everyday cakes, cookies, and meal prep when you don't need a removable bowl or rechargeable power.
For a closer comparison of digital options, see our guide to the best digital kitchen scale for baking. Bread bakers can compare capacity and weighing habits in the guide to the best scale for baking bread, while a battery-free setup may call for best baking scales mechanical.
How should you use baking scales?
Use baking scales by placing your empty bowl on the platform, pressing tare, and adding each ingredient until the display reaches the recipe's weight. Tare keeps the bowl weight out of the ingredient measurement, so you can build a recipe in one container.
Keep the scale on a firm, level surface. Read the unit before adding ingredients, since a recipe written in grams should not be weighed in ounces or a volume mode.
Add flour slowly near the target weight. If you go over, remove a small amount rather than guessing how to correct the recipe.
A scale can also reduce washing up. Place the bowl on the platform, tare it, weigh the flour, tare again, and add the next ingredient directly to the same bowl when the recipe allows.
Our guide on how to use a kitchen scale for baking explains tare, unit changes, ingredient order, and common weighing mistakes in more detail.
Which measuring tools still matter if you own a scale?
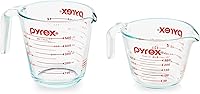
A scale does not replace every measuring tool. Measuring spoons remain useful for small amounts, and cups help when recipes specify volume or when you need to portion liquids during preparation.
Small ingredients are hard to judge by eye. A little salt, baking powder, or spice can change flavor or lift, and a spoon gives you a repeatable amount.
Choose measuring tools that are easy to level and easy to clean. Flat rims make it simpler to level dry ingredients without spilling.
Keep a dedicated set near the baking area. You should not need to search for a spoon while a batter is waiting.
Store spoons where flour dust will not settle on them. A quick rinse and dry after use keeps them ready for the next recipe.
Use the guide to measuring cups dry and liquid when you need to choose between dry cups, liquid measuring cups, and weight-based measurements.
Liquid cups suit milk, water, and other pours. Dry cups suit ingredients you spoon in and level off.
For small additions such as salt, baking powder, and spices, compare best measuring spoons set.
A scale is still useful when a recipe gives cup measurements. You can weigh the amount that works in your kitchen and record it for the next batch.
Write that weight in the margin of the recipe. Next time you can skip the conversion and weigh directly.
Keep both systems working together. Volume tools handle small and liquid amounts, while the scale handles the main ingredients by weight.
Which temperature tools improve baking results?
An oven thermometer helps you check whether the oven's actual heat matches its setting. An instant-read thermometer helps you check food or dough temperature at a specific moment, especially for bread, yeast mixtures, and cooked fillings.
For oven cooking, compare meat thermometers with probes when you need to monitor a roast.
Oven dials can be off, and preheating does not always mean the oven has reached the temperature you selected. Place an oven thermometer where it can show the heat around your baking position, then compare it with the dial.
Use the guide to the best oven thermometer for baking when oven temperature affects browning, rise, or baking time. For bread dough, custards, syrups, or other temperature-sensitive steps, see best instant read thermometer for baking.
Thermometers are measuring tools, not substitutes for recipe judgment. A cake may need a clean center test, while bread may need a temperature check plus a firm, baked crust.
Which baking tools help with cakes and batters?
Cakes benefit from a scale, flexible spatula, reliable measuring spoons, an oven thermometer, and a cooling rack. For recipes that put a rack in the oven, check whether cooling racks are oven safe first.
A silicone spatula is especially useful for scraping batter from the bowl and folding ingredients without leaving a thick layer behind.
Choose a spatula with a heat-safe head if you also use it for cooked fillings or melted ingredients. A flexible edge helps with bowl corners, while a firmer head can help spread frosting or batter.
See our guide to the best silicone spatula for cooking for options that cover baking and general kitchen work. For a broader setup, the best tools for baking cake guide groups the main tools by mixing, measuring, baking, cooling, and decorating.
If you use a stand mixer, leave enough room to lift the bowl and remove the beater. A stable work surface matters more than a decorative setup, so compare best stand mixer table before adding a dedicated table.
Which tools help with bread and dough?
Bread bakers need a scale, a bench scraper, a dough-handling surface, a proofing basket, and a bread lame for shaped loaves. The scale controls the flour-to-water ratio, while the other tools help you divide, shape, proof, and score dough.
A bench scraper helps divide dough and clear sticky pieces from a work surface. It can also help transfer shaped dough without pulling it apart.
See the guide to the best bench scraper for baking when you want a tool for portioning dough, scraping flour, or lifting cut pieces. Choose a design that matches the way you handle dough and the amount of counter space you have.
A banneton basket supports dough during its final proof. See our guide to using a banneton basket to learn how to prepare and use one.
It gives a shaped loaf a place to rest before baking, but it doesn't replace a baking surface or change the dough formula.
Compare best banneton proofing basket options before choosing a size or shape. Match the basket to the loaf shape you plan to make and leave enough room for the dough to expand.
A bread lame makes a controlled cut in the surface of proofed dough. Scoring gives the loaf a planned place to open as it expands in the oven.
Use the guide to the best bread lame for sourdough when you want to compare handles, blade styles, and storage considerations. Keep the blade covered or stored safely between uses.
Stand mixers can help with dough, but they don't remove the need to weigh ingredients or judge dough development. Compare the best stand mixer for bread baking and what is the best stand mixer for bread baking before choosing a machine for heavier dough work.
What tools help with flour and dry ingredients?
A flour sifter helps break up clumps and distribute dry ingredients more evenly. Electric models are covered in our guide to electric flour sifters.
A sifter is most useful when a recipe calls for sifted flour, powdered sugar, cocoa, or a light dry mixture. Those recipes rely on air and fine texture, not just honest weight.
Sifting can help powdered sugar lose lumps before it goes into frosting. It can also help cocoa blend without dark streaks.
Use a bowl that gives the sifter enough room to work without spilling. A wide, deep bowl catches dust and lets you shake or turn with control.
Shake gently and check the bowl often. A steady motion works better than hard shaking that sends flour over the side.
A hand-crank or squeeze sifter suits home baking where you sift a few cups at a time. It stores easily and does not need a power outlet.
An electric model can suit larger or more frequent batches. It adds speed, but it also needs counter space and a place to store the body.
If your recipe does not call for sifting, whisking dry ingredients together may be enough for that particular bake. Many muffins, cookies, and quick breads do not need sifted flour.
Do not sift out of habit when the recipe does not ask for it. Save the time and washing up for a recipe that will show the difference.
Weigh flour before or after sifting based on the method your recipe expects. Sifting changes how the flour sits, so the order can affect the amount.
Pour flour into the sifter, sift into the bowl, then weigh if your recipe uses grams. Keep the scale nearby so you can correct the amount before you add wet ingredients.
Compare best flour sifter for baking options by capacity, handle design, mesh, and how easy the tool is to clean.
A small sifter can suit occasional cake baking, while frequent bakers may prefer a design that holds more dry ingredients. A finer mesh suits powdered sugar and cocoa, while a coarser mesh suits flour.
Check that the sifter fits over your mixing bowl without wobbling. A stable fit makes sifting calmer and keeps flour in the bowl.
Clean the mesh right after use and let it dry fully. Flour left in the mesh can clump next time and make the next sift uneven.
Store the sifter dry and away from steam. That keeps the mesh clean and ready when a cake recipe calls for it.
Which rolling pin and pastry tools should you buy?
Choose a rolling pin based on how much control you want over dough thickness. A simple rolling pin suits general pastry work, while an adjustable pin can help you repeat a target thickness.
The material, shape, handles, and surface affect how the pin feels in use. A pin with handles gives you a familiar grip, while a handle-free style lets you place your hands directly on the barrel.
Read what is the best type of rolling pin before choosing between tapered, straight, handled, and adjustable designs. If even thickness matters for cookies or pastry, compare best adjustable rolling pins for baking.
Store the pin where it stays dry and does not collect flour or grease. If you want the tool visible, how to display rolling pins covers practical storage and display ideas.
A pastry mat gives you a defined work surface for rolling dough. It can make size guides easier to follow and help keep flour contained.
See best pastry mat for rolling dough when comparing markings, material, storage, and counter coverage. Check that the mat fits your work area and can be cleaned according to its care instructions.
Why do cooling racks matter?
A cooling rack lets air move around baked goods as they cool. Cooling on a rack helps the bottom of bread, cookies, and cakes avoid sitting against a hot pan or trapped moisture.
Trapped steam can soften a crisp crust. It can also make cookie bottoms tender and cake layers damp.
Moving baked goods to a rack lets air reach the underside. That helps the surface set instead of steaming in the pan.
Move items to the rack when the recipe directs you to do so. Some cakes need time in the pan before removal, while cookies may need a short rest before transfer.
A short rest lets cookies firm up so they slide off a sheet pan. Moving them too soon can break soft edges.
Cakes often need a brief rest so the crumb holds together. If you turn a cake out too soon, it may tear or stick.
Pans differ, so follow the recipe for that bake. A loaf pan, a sheet pan, and a cake pan each release food at a different pace.
Choose a rack that fits your sheet pans, counter, and storage space. A larger rack can hold more items, but it also needs a place to stand and a place to live when not in use.
Measure the rack against your largest sheet pan before you buy. It should support the pan without hanging over the edge.
Check counter space too. A rack that covers the whole counter leaves no room to set down a mixer bowl or a hot pan.
Height matters for air flow and for frosting. A taller rack lifts air under the bake, while a low rack may crowd frosting or toppings.
Wire spacing affects small items. Closer wires support small cookies, while wider spacing can catch crumbs and be harder to tap clean.
Compare best cooling rack for baking by surface area, spacing, height, foldability, and cleaning needs. Foldable legs can help in a small kitchen, but check that they lock or sit steady.
A nonfolding rack may feel more stable for heavy loaves. It also takes more shelf space, so plan where it will store.
Keep the rack stable before moving a hot pan or freshly baked loaf onto it. Set it on a firm, level surface and keep it away from the edge.
Do not stack racks or pans on a rack that is still warm. Let each item cool on its own so air can move around it.
Wash the rack after it cools and dry it fully. Dry racks store better and are less likely to spot or rust.
Store the rack flat or upright where you can reach it. A rack buried under pans may stay in the cupboard while cakes cool in the pan.
How should you build a baking tools collection?
Build your collection in stages: start with accurate measuring, then add tools for the recipes you make most often. A practical first group is a baking scale, measuring spoons, an oven thermometer, a silicone spatula, and a cooling rack.
Add a bench scraper and rolling pin if you make pastry or shaped dough. Add a banneton basket and bread lame if you regularly bake hearth loaves or sourdough.
For cake-heavy baking, prioritize a scale, spatulas, measuring tools, an oven thermometer, cooling racks, and the pans your recipes use. A flour sifter is useful when your recipes call for sifted dry ingredients.
For bread-heavy baking, prioritize a scale with enough capacity, a dough scraper, a proofing basket, a bread lame, and a thermometer. A stand mixer is optional and depends on your batch size, dough type, and preferred method.
Storage should be part of the decision. A tool that is hard to reach may not become part of your routine, even if it has useful features.
How do you care for baking tools?
Clean tools soon after use, following the care needs of their materials. Wipe scales rather than soaking them, keep flour out of buttons and seams, and dry metal tools before storage.
Flour dust settles fast around buttons and seams. A quick wipe after weighing keeps the next reading clean and the buttons responsive.
Use a soft, slightly damp cloth for most scale surfaces. Wipe, then dry right away so moisture does not sit on the display or seams.
Do not place a digital scale under running water unless its stated water resistance supports that use. For the IPX6 Etekcity scale, keep the charging port cover in place before washing and wipe the surface dry after spills.
That care keeps water away from the charging port and the sensor area. It also keeps the surface ready for the next weighing.
Keep rolling pins, pastry mats, bannetons, and wooden or porous tools fully dry before storing them. Moisture trapped in a drawer or cabinet can create odors and shorten the useful life of the tool.
Let wooden tools air dry on a rack, not in a closed drawer. Once dry, store them where air can move around them.
Wash pastry mats as their care notes direct and dry them flat. A damp mat folded away can hold odors and feel tacky next time.
Clean bench scrapers and spatulas soon after dough or batter work. Dried dough is harder to remove and can dull your next pass if a crust remains.
Store lames safely, keep thermometer probes clean, and check that cooling racks do not have loose or sharp parts before use. Replace a tool when damage affects safe handling or accurate measurement.
Keep lame blades covered or in a guard. A covered blade is safer to store and easier to reach for in a drawer.
Wipe thermometer probes after use and dry them before you put them away. A clean probe gives a steadier reading and keeps flavors from carrying over.
Check cooling racks for bent wires or loose feet. A rack that wobbles can tip a hot pan and spoil the bake.
Store metal tools dry, flat or upright, and away from steam. That simple habit protects edges, joints, and moving parts.
Inspect tools now and then instead of waiting for a failure. A cracked handle, loose joint, or bent rack is easier to fix or replace before it affects a recipe.
What is the best first purchase for baking?
The best first purchase is a digital baking scale with tare and 1 g increments because it improves ingredient consistency across bread, cakes, cookies, and pastry. Choose a larger 22 lb model for broad capacity, a bowl model for contained weighing, a rechargeable model for easy charging, or a compact 11 lb model for drawer storage.
Pick the Nicewell scale if you want a large platform, 22 lb capacity, 5 units, and AAA battery power. Pick the Etekcity bowl scale if its removable bowl and compact storage matter most.
Pick the rechargeable Etekcity scale if you want IPX6 water resistance, a 22 lb capacity, hold, and USB-C charging. Pick the smaller Etekcity scale if you want 1 g increments, a 5,000 g capacity, and a thin body for a drawer.
After the scale, buy the tool that matches your next recipe: a thermometer for temperature control, a scraper and banneton for bread, or a spatula and cooling rack for cakes. That approach keeps your baking tools useful, easy to store, and tied to the food you actually make.
Frequently asked questions
Are baking scales better than measuring cups?
Baking scales measure ingredients by weight, so flour, sugar, and other ingredients are less affected by how tightly they sit in a cup. Measuring cups still help with liquids and recipes written by volume, but a scale gives you a repeatable starting point for doughs, cakes, and other baked goods.
What should I look for in baking scales?
Look for 1 g increments, a tare function, a readable display, and enough capacity for your largest bowl. Digital baking scales are usually the easiest choice for recipes that use grams, while a mechanical scale may suit you if you prefer a battery-free design.
Do I need a kitchen scale for bread baking?
A kitchen scale is highly useful for bread baking because flour and water ratios affect dough texture. Choose a scale with at least 5 kg capacity if you mix large batches, then use tare to weigh ingredients in one bowl without doing separate calculations.
Which baking tools should I buy first?
Start with a baking scale, measuring spoons, a reliable oven thermometer, a cooling rack, and a heat-safe spatula. Add a bench scraper, bread lame, banneton basket, rolling pin, or pastry mat when your recipes call for dough handling or shaped bread.