Can You Knead Pasta Dough by Hand Instead of a Mixer?
On this page (5 sections)
- Kneading Pasta Dough: Your Hands Are the Best Tool
- The Essential Ingredients and Tools
- The Art of Hand-Kneading Pasta Dough
- Resting and Final Touches Once your dough is perfectly kneaded, it needs a little break. Resting is a critical step that allows the gluten to relax. This makes the dough easier to roll out later. Think of it as letting your muscles recover after a good workout! The Importance of Resting the Dough After kneading, the gluten strands are tight and have a lot of energy. If you try to roll it out immediately, it will fight back, shrinking and tearing. Resting allows these strands to loosen up. This makes the dough much more pliable and easier to handle. Many pasta makers stress this step. The National Center for Home Food Preservation suggests resting doughs for at least 30 minutes. Wrap the kneaded dough tightly in plastic wrap or cover it with an inverted bowl or a damp kitchen towel. This prevents it from drying out. Let it sit at room temperature for at least 30 minutes. For even better results, you can let it rest for an hour. Some people even refrigerate it for longer periods, but for fresh pasta, room temperature is usually best. Checking Dough Consistency After Resting When you unwrap your dough after resting, it should feel softer and more relaxed. It will be less resistant when you press into it. You should be able to form it easily. If it still feels a bit stiff, let it rest a little longer. If it feels slightly sticky, you can lightly dust your hands and the surface with a tiny bit of flour before you start rolling. Hand-Kneading vs. Mixer: A Quick Comparison While we’re focusing on hand-kneading, it’s useful to compare it to using a mixer. Both methods can yield delicious results, but they offer different experiences. Comparing Kneading Methods Feature Hand-Kneading Stand Mixer Effort Required Physical workout, takes time and stamina. Minimal physical effort, machine does the work. Dough Control High. You can feel and adjust consistency. Lower. Can sometimes overwork or underwork dough. Texture Development Often results in a slightly chewier, more rustic texture. Can produce a very smooth, consistent texture. Time Commitment About 10-15 minutes of active kneading. About 5-10 minutes of machine time. Learning Curve Requires practice to develop the “feel.” Easier to start, but requires understanding attachments and speeds. Your Pasta-Making Checklist Ready to put your hands to work? Here’s a quick checklist to keep you on track for perfect hand-kneaded pasta dough: Gather all your simple ingredients and tools. Create a sturdy flour well for your eggs. Gently incorporate flour into the eggs. Bring the shaggy dough together on your work surface. Knead for 8-10 minutes using the push, fold, and turn method. Check for smoothness, elasticity, and the “spring back” test. Wrap and rest the dough for at least 30 minutes. Conclusion
- Frequently Asked Questions
Yes, you can absolutely knead pasta dough by hand instead of using a mixer! It’s a time-honored technique that many home cooks prefer for its tactile connection to the process. While a stand mixer can speed things up, hand-kneading pasta dough is entirely achievable and often leads to a wonderfully textured result. You’ll find it’s a bit of a workout, but totally worth it for that homemade pasta taste.
Many chefs and home cooks alike believe that the physical act of kneading by hand allows you to better feel the dough’s consistency. You can adjust flour or liquid amounts more intuitively than a machine might. This hands-on approach is a key part of traditional pasta making and gives you better control over the final texture.
- Yes, you can knead pasta dough by hand.
- It requires a bit of effort but is very doable.
- Hand-kneading gives you great control over dough texture.
- Many find it a more rewarding way to make pasta.
- It’s a traditional and effective method.
Let’s get your hands into some dough! Below, we’ll walk you through exactly how to achieve perfect pasta by kneading it all by yourself.
Kneading Pasta Dough: Your Hands Are the Best Tool
So, you’re wondering if you can skip the fancy mixer and just use your own two hands to make pasta dough? The answer is a resounding yes! Many cooks believe that hand-kneading pasta dough offers a superior connection to the process. It allows you to truly feel the dough and understand its needs as you work it. Think of it as a conversation between you and your ingredients.
While a stand mixer might seem like a modern shortcut, the traditional method of hand-kneading has been used for centuries for a good reason. It works! You get a better sense of the dough’s hydration and gluten development. This hands-on approach is often considered essential for perfect pasta. You’re not just following a recipe; you’re becoming part of the pasta-making tradition.
The Essential Ingredients and Tools
Before you start kneading, let’s make sure you have everything you need. The good news is that the ingredient list for pasta dough is wonderfully simple. You really only need a few things to get started. This simplicity is part of what makes homemade pasta so approachable.
What You’ll Need
The foundation of most pasta dough is flour and eggs. The type of flour can make a difference, but all-purpose flour is a great starting point for beginners. For a more traditional Italian pasta, you might opt for ’00’ flour, which is finely milled.
- Flour: All-purpose flour or ’00’ flour works well.
- Eggs: Large eggs provide richness and binding.
- Salt: Just a pinch enhances the flavor.
- Water (optional): Sometimes a little is needed to adjust consistency.
- Large Bowl: For initial mixing.
- Clean Work Surface: A countertop or a large wooden board.
- Bench Scraper (optional but helpful): For cleaning up and gathering dough.
- Plastic Wrap or Damp Cloth: For resting the dough.
The Flour Well Method: A Classic Start
The most common and effective way to start hand-kneading is using the flour well method. It’s a bit like building a small edible volcano! It helps keep your workspace tidy initially.
First, measure your flour into your large bowl or directly onto your clean work surface. Make a deep well in the center of the flour. It needs to be wide enough to hold the eggs without them spilling out. Imagine you’re creating a little nest for the eggs. Make sure the walls of your flour well are sturdy!
Next, crack your eggs into the well. Add your pinch of salt. If your recipe calls for a little water, add that now too. You can use a fork to gently beat the eggs and salt within the well. Be careful not to break the flour walls just yet. You want everything to stay contained.
Gradually Incorporating the Flour
Once the eggs are lightly beaten, you can begin to gradually incorporate the flour. Use your fork or your fingers to gently pull bits of the flour wall into the egg mixture. Do this slowly. You don’t want to rush this step. As you mix, the ingredients will start to form a thick batter or paste. Keep working the fork around the edges.
As the mixture thickens, you’ll notice it becoming harder to stir. This is a good sign! The flour is starting to bind with the eggs. You might need to reinforce the flour walls if they start to crumble. Keep pulling in small amounts of flour. The goal is to incorporate most of the flour into the wet ingredients without the whole thing collapsing. You’ll see it transform from a liquidy mess into something more cohesive.
The Art of Hand-Kneading Pasta Dough
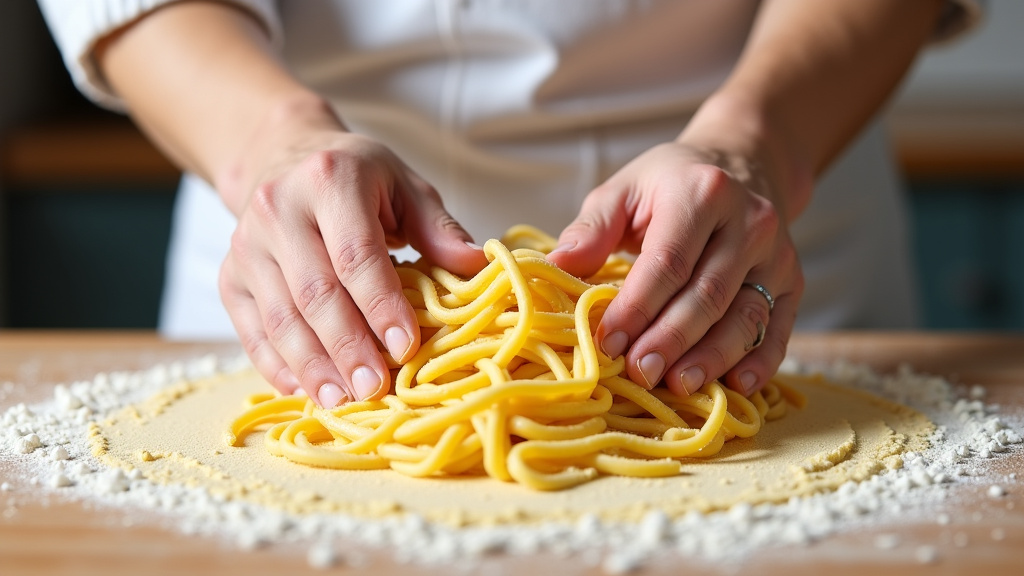
Once you have a shaggy, rough dough, it’s time to get your hands dirty – literally! This is where the real kneading begins. It’s a physical process, but with a little practice, you’ll find it quite satisfying. Think of it as giving your dough a good massage.
Bringing the Dough Together
At this point, your dough might still be a bit sticky and crumbly. You can use your hands, or a bench scraper, to gather all the loose bits of flour and dough on your work surface. Start pressing them together. Don’t worry if it doesn’t look pretty yet. It will come together with a bit of effort. You’re essentially coaxing all the loose pieces into one unified mass. You want to avoid having dry, powdery flour left on your board. If it seems too dry, you can lightly dampen your hands. A few drops of water can help bind stubborn bits.
The Kneading Technique: Step-by-Step
Now for the main event: the kneading! This is how you develop the gluten, which gives pasta its structure and chew. Many experts recommend kneading for about 8-10 minutes. It might seem like a long time, but it’s crucial for texture.
- Push and Fold: Place the heel of your hand on the dough. Push down and away from you, stretching the dough.
- Fold It Over: Fold the stretched dough back over on itself.
- Rotate and Repeat: Give the dough a quarter turn. Repeat the push, stretch, fold, and turn motion.
Keep this rhythm going. Push, fold, turn. Push, fold, turn. You’ll feel the dough change under your hands. Initially, it will be sticky and perhaps a bit lumpy. As you knead, it will become smoother and more elastic. It should start to feel supple and less resistant. You’re building strength in the dough.
Judging When Your Dough is Ready
How do you know when you’ve kneaded enough? There are a few tell-tale signs. The dough should become smooth and elastic. It should feel firm but pliable, like an earlobe. It shouldn’t be sticky to the touch anymore. If you poke it gently, the indentation should spring back slowly. This indicates the gluten has developed sufficiently.
We found that resistance is a key indicator. As you knead, the dough will offer more resistance. This means the gluten strands are forming a strong network. If the dough tears easily, it likely needs more kneading. We also discovered that checking the texture is vital. It should feel silky, not gummy or tough. A good rule of thumb is to aim for a dough that springs back when gently pressed. The Mayo Clinic notes that proper kneading is key for developing a dough that holds its shape well during cooking.
Troubleshooting Your Dough During Kneading
What if your dough is too sticky or too dry? Don’t panic! It’s a common occurrence, especially when you’re starting out. Hand-kneading allows you to adjust on the fly, which is its biggest advantage.
- Too Sticky? If the dough is sticking to your hands and your work surface even after a few minutes of kneading, it’s too wet. Add a tiny bit more flour, just a tablespoon at a time. Work it in thoroughly before adding more. Be conservative; too much flour will make the dough tough.
- Too Dry? If the dough feels stiff, crumbly, and won’t come together, it’s too dry. Lightly dampen your hands with water and continue kneading. You can also add water, a teaspoon at a time, until the dough starts to come together.
Sometimes, the flour just needs time to absorb the liquid. Keep kneading for a minute or two before making adjustments. Often, the dough will become less sticky as you work it. This is a key benefit of hand-kneading; you develop a feel for it.
Resting and Final Touches
Once your dough is perfectly kneaded, it needs a little break. Resting is a critical step that allows the gluten to relax. This makes the dough easier to roll out later. Think of it as letting your muscles recover after a good workout!
The Importance of Resting the Dough
After kneading, the gluten strands are tight and have a lot of energy. If you try to roll it out immediately, it will fight back, shrinking and tearing. Resting allows these strands to loosen up. This makes the dough much more pliable and easier to handle. Many pasta makers stress this step. The National Center for Home Food Preservation suggests resting doughs for at least 30 minutes.
Wrap the kneaded dough tightly in plastic wrap or cover it with an inverted bowl or a damp kitchen towel. This prevents it from drying out. Let it sit at room temperature for at least 30 minutes. For even better results, you can let it rest for an hour. Some people even refrigerate it for longer periods, but for fresh pasta, room temperature is usually best.
Checking Dough Consistency After Resting
When you unwrap your dough after resting, it should feel softer and more relaxed. It will be less resistant when you press into it. You should be able to form it easily. If it still feels a bit stiff, let it rest a little longer. If it feels slightly sticky, you can lightly dust your hands and the surface with a tiny bit of flour before you start rolling.
Hand-Kneading vs. Mixer: A Quick Comparison
While we’re focusing on hand-kneading, it’s useful to compare it to using a mixer. Both methods can yield delicious results, but they offer different experiences.
| Feature | Hand-Kneading | Stand Mixer |
|---|---|---|
| Effort Required | Physical workout, takes time and stamina. | Minimal physical effort, machine does the work. |
| Dough Control | High. You can feel and adjust consistency. | Lower. Can sometimes overwork or underwork dough. |
| Texture Development | Often results in a slightly chewier, more rustic texture. | Can produce a very smooth, consistent texture. |
| Time Commitment | About 10-15 minutes of active kneading. | About 5-10 minutes of machine time. |
| Learning Curve | Requires practice to develop the “feel.” | Easier to start, but requires understanding attachments and speeds. |
Your Pasta-Making Checklist
Ready to put your hands to work? Here’s a quick checklist to keep you on track for perfect hand-kneaded pasta dough:
- Gather all your simple ingredients and tools.
- Create a sturdy flour well for your eggs.
- Gently incorporate flour into the eggs.
- Bring the shaggy dough together on your work surface.
- Knead for 8-10 minutes using the push, fold, and turn method.
- Check for smoothness, elasticity, and the “spring back” test.
- Wrap and rest the dough for at least 30 minutes.
Conclusion
You’ve learned that kneading pasta dough by hand is not only possible but a rewarding experience. It allows for a more intuitive connection with your ingredients, giving you fine-tuned control over your pasta’s final texture. While it requires a bit of physical effort and time, the result is a delicious, homemade pasta that truly honors tradition. So, gather your flour and eggs, and get ready to feel the dough transform under your hands. Your kitchen is about to smell amazing!
Frequently Asked Questions
How long should I knead pasta dough by hand?
We found that aiming for about 8-10 minutes of consistent kneading is generally recommended. This timeframe allows the gluten to develop properly, creating that essential chewiness and structure in your pasta.
What are the signs my hand-kneaded pasta dough is ready?
Your dough is ready when it feels smooth, elastic, and no longer sticky. A good test is to gently poke it; the indentation should spring back slowly. The dough should also feel firm but pliable, similar to an earlobe.
My pasta dough is too sticky. What should I do?
If your dough feels overly sticky even after a few minutes of kneading, it’s likely too wet. Add flour very gradually, just a tablespoon at a time, incorporating it fully before adding more. Be cautious, as too much flour can make the dough tough.
Can I use all-purpose flour instead of ’00’ flour for hand-kneaded pasta?
Yes, you absolutely can! All-purpose flour is a perfectly good starting point for hand-kneaded pasta and still yields fantastic results. ’00’ flour offers a finer texture, but don’t let flour type stop you from enjoying homemade pasta.
How long does hand-kneaded pasta dough need to rest?
After kneading, your dough should rest for at least 30 minutes at room temperature, wrapped tightly. This rest period allows the gluten to relax, making the dough much easier to roll out without resistance or tearing.